


Hardware components | ||||||
_ztBMuBhMHo.jpg?auto=compress%2Cformat&w=48&h=48&fit=fill&bg=ffffff) |
| × | 1 | |||
| × | 1 | ||||
 |
| × | 1 | |||
 |
| × | 1 | |||
Software apps and online services | ||||||
 |
| |||||
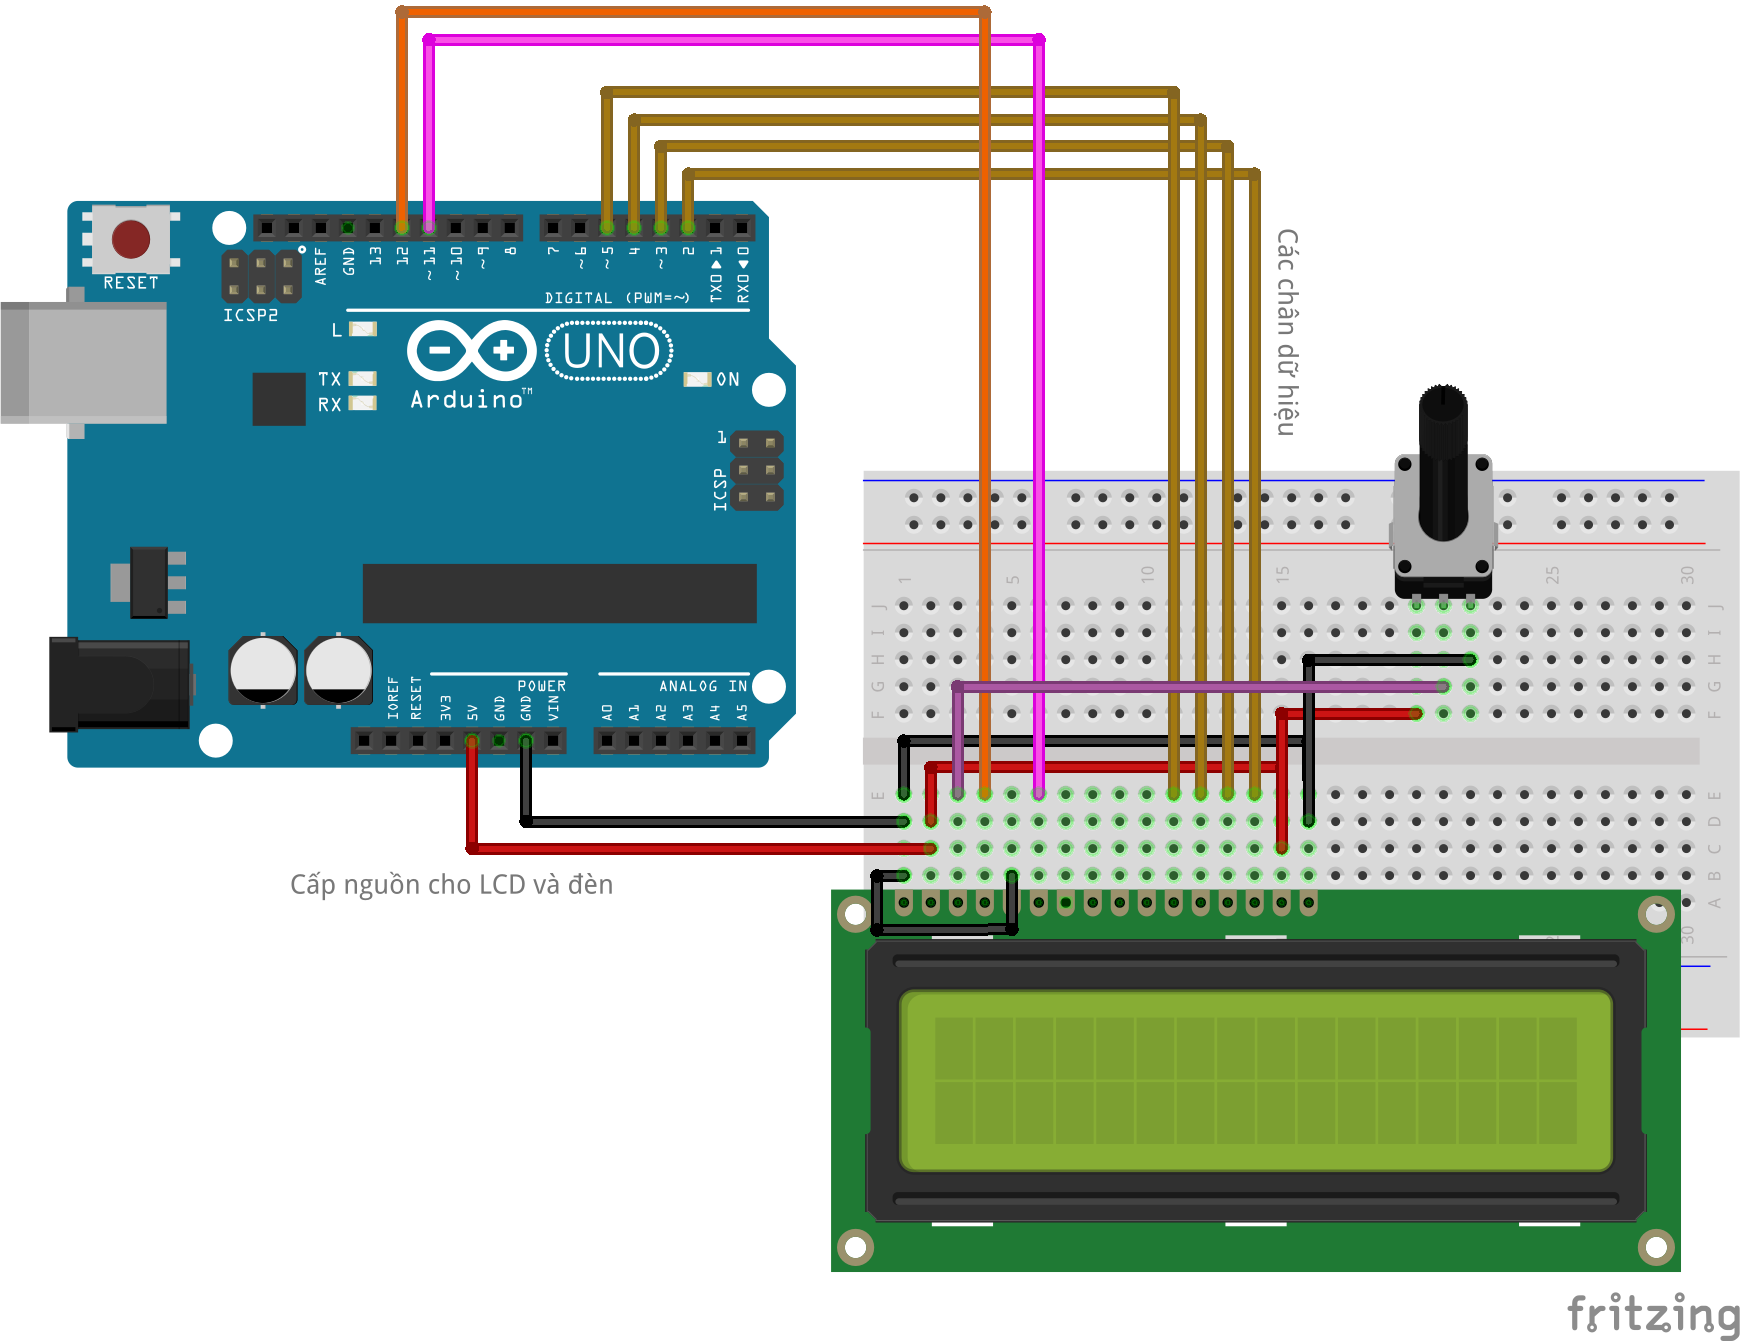
Control the LCD screen with the Arduino
Something you have to knowYou only have an Arduino and a LCD so that you needs lots of pins on the Arduino. This app can run 4-bit or 8-bit. But if you want to use all the features on the LCD, you need to use 7 + 4 = 11 pins (Mustn't do this!). The app running 4-bit is OK so I will go to instructions on 4-bit.
Wiring steps- Arduino = LCD (left to right)
- Pin 2 = Pin 14
- Pin 3 = Pin 13
- Pin 4 = Pin 12
- Pin 5 = Pin 11
- Pin 11 = Pin 7
- Pin 12 = Pin 5
- Ground = Pin 1 + Pin 16 + Pin 6
- 5V = Pin 3 + Pin 15

1 project • 27 followers
I am building the project with IoT with Windows (Windows On Devices). Also I have a tag: Break your heart for the beginner.
Comments