
Hardware components | ||||||
 |
| × | 1 | |||
 |
| × | 1 | |||
 |
| × | 1 | |||
 |
| × | 1 | |||
 |
| × | 1 | |||
_ztBMuBhMHo.jpg?auto=compress%2Cformat&w=48&h=48&fit=fill&bg=ffffff) |
| × | 1 | |||
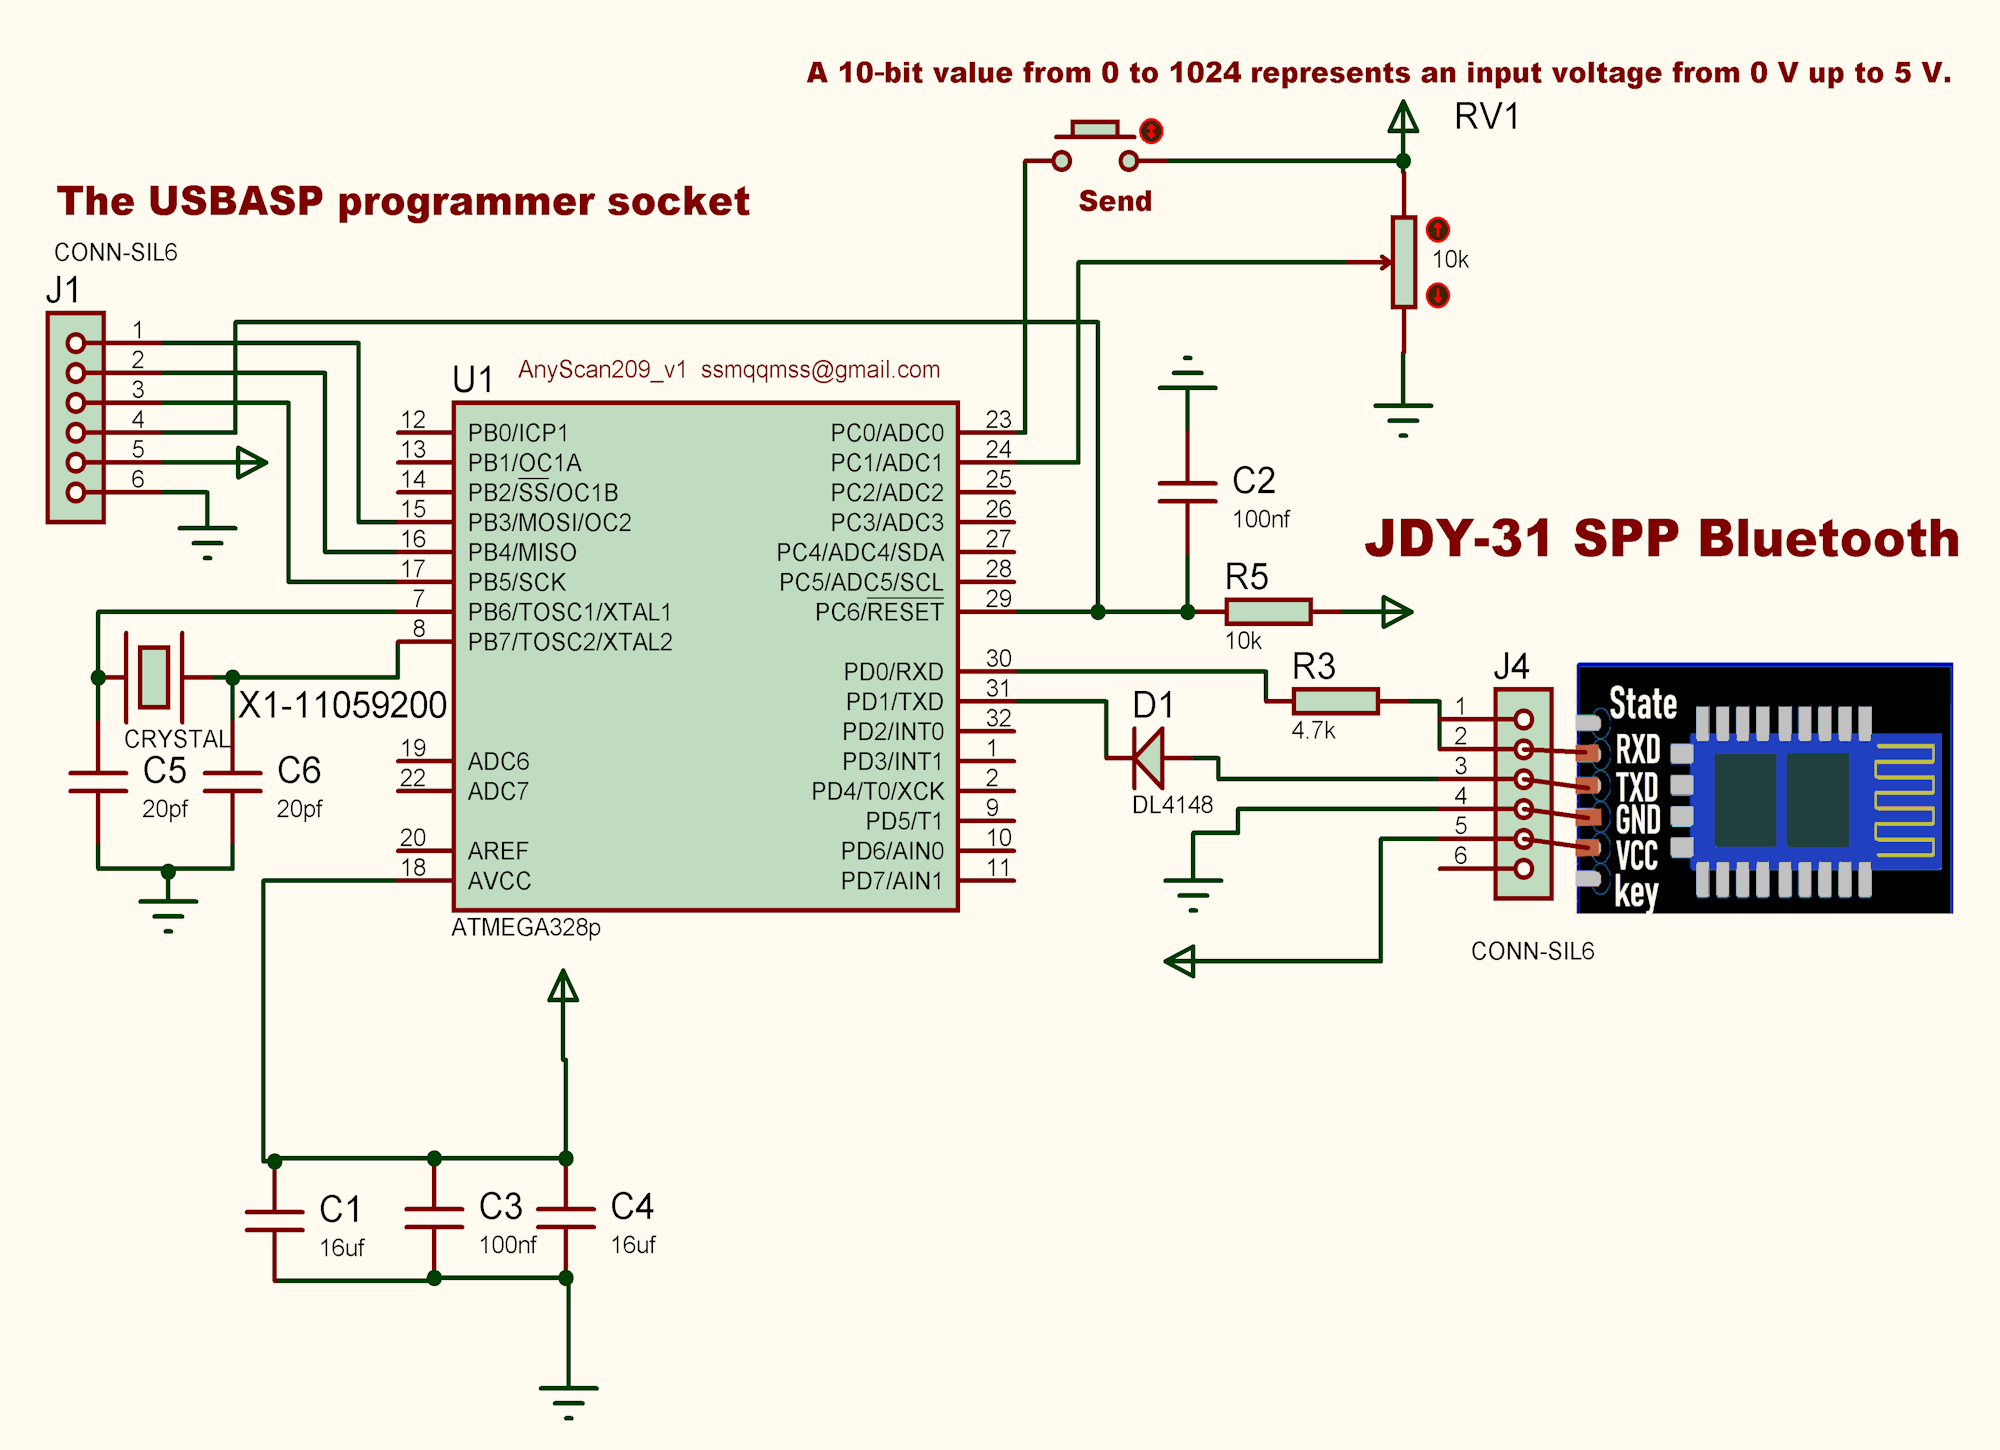
AnyScan209 is an Android application designed for mapping input variables such as altitude, pressure, temperature, and especially magnetic field measurements. The app supports 0–1024 (10‑bit) input values.
Download :AnyScan209 for Android - Download the APK from Uptodown
ANYSCAN APK for Android Download
AnyScan209 — Official Full Tutorial
Magnetic Mode:
- The neutral reference point must be 512
- Values 512–1024 represent the positive (maximum) range
- Values 512–0 represent the negative (minimum) range
Temperature / Altitude Mapping:
- 0 is the minimum value
- 1024 is the maximum value
With each received value, the software automatically moves forward by one cell.
At the end of the scan, you can choose whether to save the raw data or save the normalized (min/max enhanced) data.
Permissions:
AnyScan209 requires:
- Folder creation permission (to save scan files)
- Bluetooth access
Note: Android may request location permission for Bluetooth usage. This is an Android requirement, not related to the app itself.
How to Start:
Use the yellow back icon at the top of the screen (or your phone’s back button) to switch between the Files page and the Scan page.
Creating a New File:
1. Go to the Files page
2. Set the scan dimensions (from 8×8 up to 100×100)
3. Enter a file name
4. Tap New File, then Confirm
5. Switch to the Scan page and begin scanning
The app includes both 2D and 3D visualization modes.
Internal Sensor Mode:
If your phone supports it, the app currently uses the internal magnetic sensor.
Future updates may add support for internal pressure and altitude sensors.
Internal sensor mode includes:
- Detector (on/off, beep mode selection)
- Adjustable sensitivity threshold (via phone volume keys)
- Real‑time graph display
- Sensor amplification
- Sampling rate control (fast = low accuracy, slow = high accuracy)
- Auto‑scan mode (hold the Scan button to activate)
You can also use a selfie stick with a Bluetooth remote to trigger scans when the phone is out of reach.
External Scan Mode:
In external mode, you must send your own values (0–1024) via Bluetooth Serial.
Each received value saves one cell and moves the scan forward.
You can save mid‑scan using the menu.
Later, you can continue scanning using the movement bar and forward/back buttons.
In external mode:
- The Play/Pause (Scan) button records the value based on the input bar position
- This allows correction of unwanted values by adjusting the bar and pressing Scan again
Additional Controls:
- Phone volume keys:
- In Scan page → move forward/back
- In File page → adjust phone volume
- In Settings → adjust detector sensitivity
- Bluetooth icon:
- First tap → shows paired devices
- Next taps → reconnects to last device
- Long press → reset
- Fe icon (magnetic mode only):
Aligns nearby north/south magnetic poles to better detect iron/steel structures.
Development Notes:
The software is under active development.
If you have suggestions, find bugs, or want additional language support, I would be happy to hear your feedback.

AnyScan209


Comments