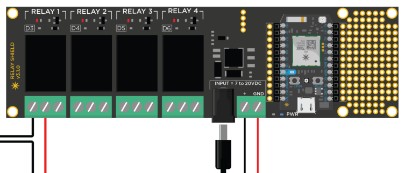
// This #include statement was automatically added by the Particle IDE.
#include "RelayShield/RelayShield.h"

// Create an instance of the RelayShield library, so we have something to talk to
RelayShield myRelays;

// Create prototypes of the Spark.functions we'll declare in setup()
int relayOn(String command);
int relayOff(String command);

void setup() {

    //.begin() sets up a couple of things and is necessary to use the rest of the functions
    myRelays.begin();

    // Register Spark.functions and assign them names
    Particle.function("relayOn", relayOn);
    Particle.function("relayOff", relayOff);
    Particle.function("toggleRelay", toggleRelay);

}

int relayOn(String command){
    // Ritual incantation to convert String into Int
    char inputStr[64];
    command.toCharArray(inputStr,64);
    int i = atoi(inputStr);

    // Turn the desired relay on.
    // From your Do Button config, call the relay, and pass in 1 through 4 for the Relay to turn on.
    myRelays.on(2);

    // Respond
    return 1;
}

// Momentarily turn on, then off the relay you want.  This simulates a button press when you hook the
// physical button to the normally open (two left) leads on the relay.  Again, pass in the number of the relay to control.
// In IFTTT Do Button app, call the Photon, then point the function to toggleRelay, and in the arguments field, jut put a 1 for example.
int toggleRelay(String command){
    // Ritual incantation to convert String into Int
    char inputStr[64];
    command.toCharArray(inputStr,64);
    int i = atoi(inputStr);
    Particle.publish("Garage_Door","Relay_on");
    // Turn the desired relay on
    myRelays.on(2);
    delay(500);

    myRelays.off(2);
    // Respond
    return 1;

}


//  This is used in toggleRelay, however, it can also be used stand alone if you have a normally closed relay and want
//  to temporarily open it.
int relayOff(String command){
    // Ritual incantation to convert String into Int
    char inputStr[64];
    command.toCharArray(inputStr,64);
    int i = atoi(inputStr);

    // Turn the desired relay off
    myRelays.off(2);

    // Respond
    return 1;
}


Comments