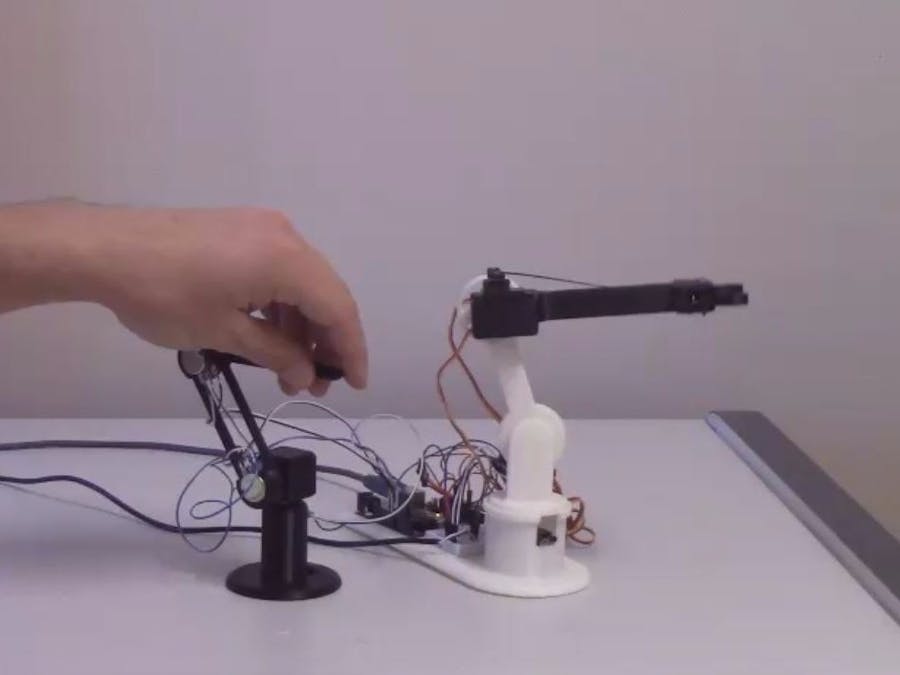
IntroductionA few of you may have seen this video we made several months ago. In it the n is dancing to a Roy Orbison song. It is able to dance because it is being controlled by a device called a Waldo.
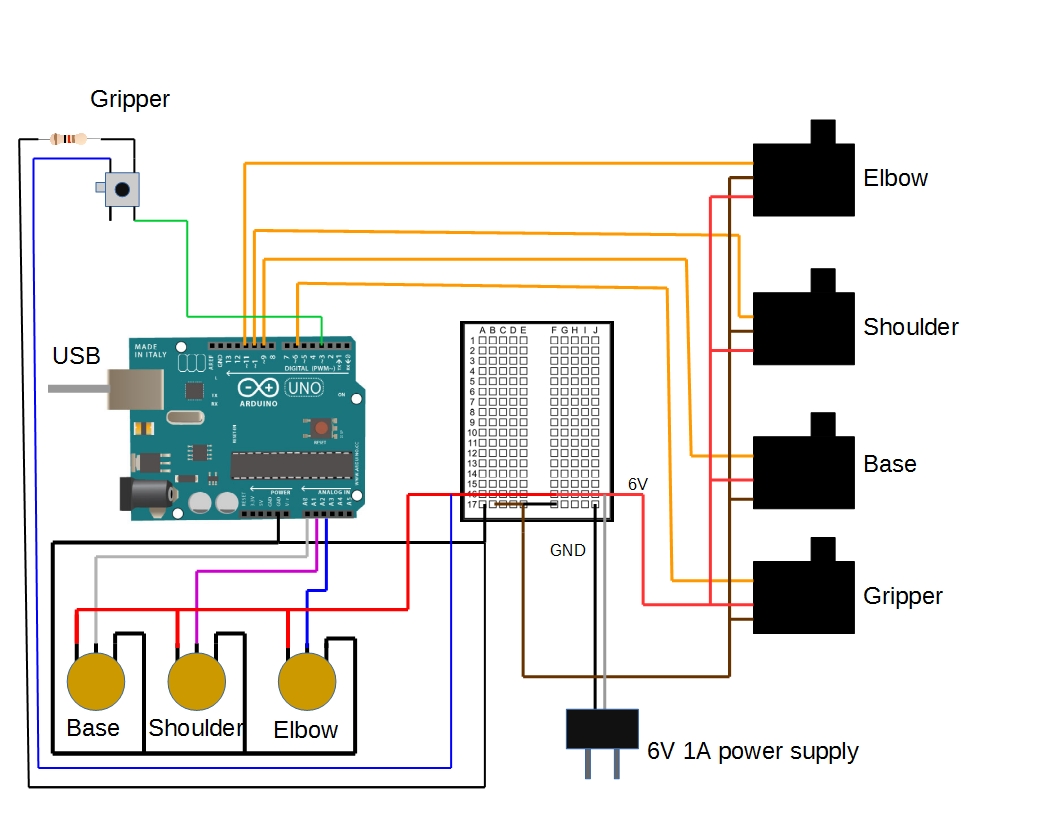
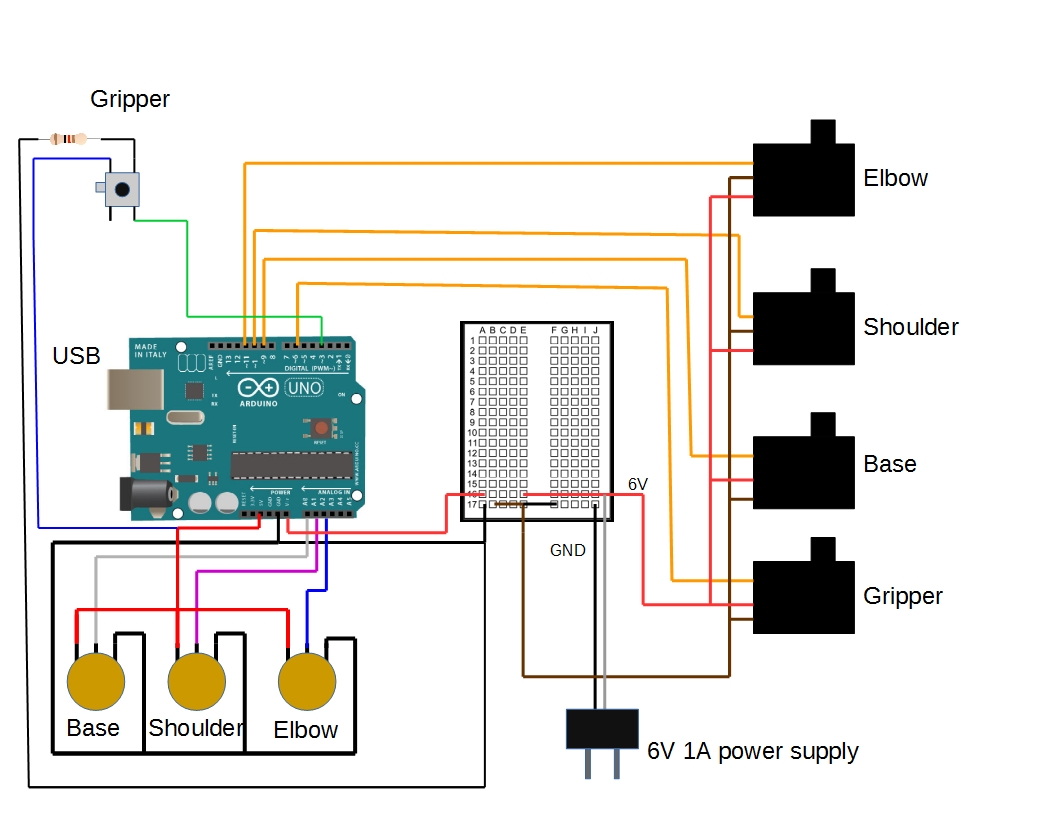
What is a Waldo?A Waldo is basically a motion capture device. We use potentiometers to control the the position of the servos on the LittleArm. When we posted the video we posted the code and the initial designs for the 3D printed parts of the Waldo on the Downloads page. Today we are posting the the electrical diagram.
We apologize that it has taken so long. But we have been pretty swamped moving LittleArms out the doors to create much content. But better late than never.
Here is the wiring diagram to build your own motion capture Waldo training pendant for the LittleArm. (Just a Note: We have also created a recording piece of software that needs another button and connects the arm and the Waldo to a computer to record the motion. That post will be coming in a few days.)


_ztBMuBhMHo.jpg?auto=compress%2Cformat&w=48&h=48&fit=fill&bg=ffffff)


Comments