


Hardware components | ||||||
 |
| × | 1 | |||
 |
| × | 1 | |||
_ztBMuBhMHo.jpg?auto=compress%2Cformat&w=48&h=48&fit=fill&bg=ffffff) |
| × | 1 | |||
 |
| × | 1 | |||
| × | 2 | ||||
Software apps and online services | ||||||
| ||||||
 |
| |||||
 |
| |||||
Hand tools and fabrication machines | ||||||
 |
| |||||
 |
| |||||
Robotic controlled cars have been raising up nowadays but imagine a situation where you can control the car from any place on this earth if the car is connected to internet. It has many applications in the fields of knowing secrets in an ethical purpose etc.
Why Chosen Boltas a Platform?
Bolt Module makes easy to work with things, as Bolt has provided with cloud facility it made still easy to develop Internet based products with a little effort.
This is my first project on Hackster.io so would love to know your feedback and suggestions about this project.
This project is based on the Bolt IoT Platform. Before we go on to what to do to accomplish this project, I would like to tell You what this Project does.
When our robotic car is connected to Internet through the means of modem or routers., etc then we can control the robotic car through a web page i.e. a web based application.
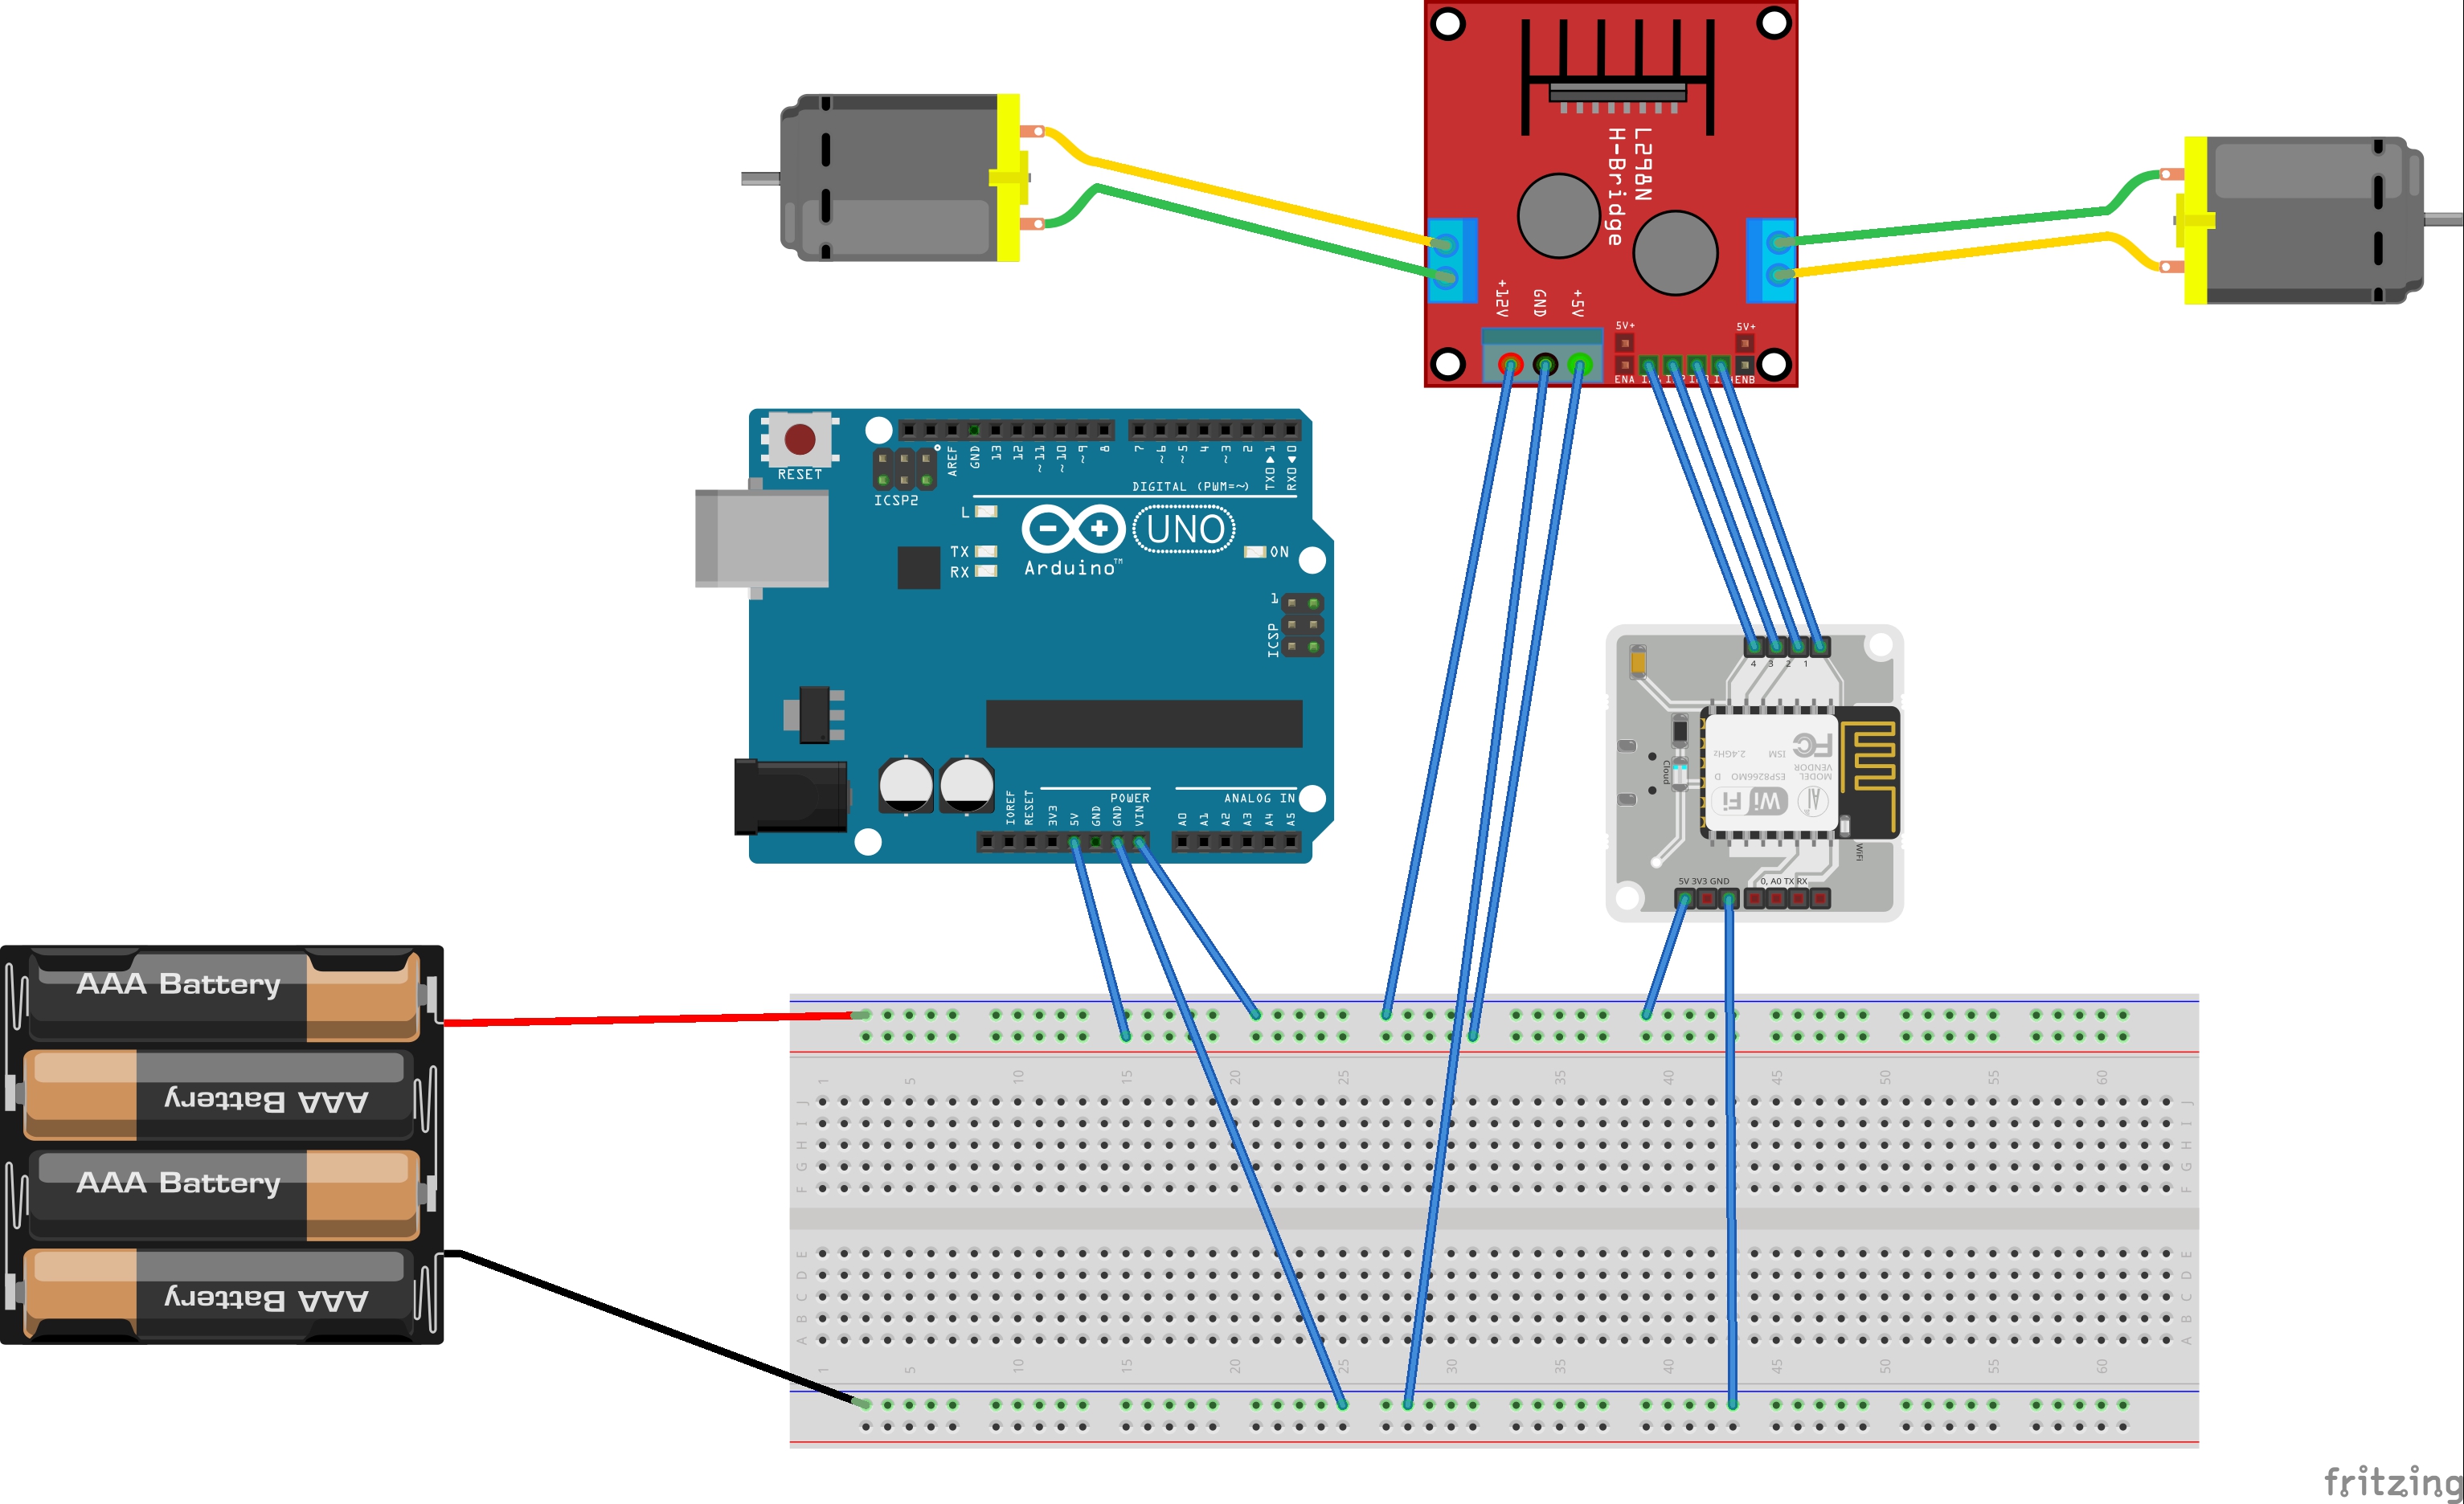
Information Flow1. Attach the caster wheel in the front middle portion of the chassis as shown.
2. Assemble the robotic car chassis and attach the two DC motors using the nuts and bolts along with the wheels provided as shown.
NOTE: Solder the wires to the motor's terminal before attaching it to chassis.3. Now connect the terminals of the motor to the L298N motor driver module as shown below.
NOTE: Connect both the terminal of the motor on the same side of the driver module.
4. Connect the 5V pin and GND pin of the driver module to 5V and GND of Arduino respectively.
5. Connect the power supply wire to Vin of Arduino so that it gets powered up and also connect the same power supply to the 5V pin of Bolt module.
6. Connect female to male jumper wires from IN1, IN2, IN3, IN4 of driver module to Bolt module's 1, 2, 3, 4 pins.
Now let's implement the software version of the code:
1. Download the code from Bolt_Robotic_car.
2. The "page.html" in the repository is a web application that takes the device Id and api key of your Bolt module.
3. The "1.php" is a scripted page that acts as an interface to control the robotic car.
4. Create a new folder named proj_bolt and place the above two files in this folder and place the this newly created folder in the htdocs folder of xampp.
Note: You can download xampp from https://www.apachefriends.org/download.html
5. You can now run the "page.html" using the following link :
http://localhost/proj_bolt/page.html
WorkFlowHere firstly we enter our details of bolt module such as Device Id and API key in the interface form provided by running the page.html in the local server provided by xampp. The initial interface page is displayed as...
After entering the details correctly then you will be redirected to the following page, which will act as an interface to control the robotic car through internet i.e. through the buttons provided in the page displayed as below:
The main principle behind working of the project is... as the pins IN1, IN2, IN3, IN4 are connected to the pins 1, 2, 3, 4 of the BOLT module. By altering the voltages at each pin we can alter the direction of rotation of each motor whether clockwise or Anticlock wise. Following are the details for the variations possible...
Here,
1 at pin x indicates that 5V is supplied at pin x.
0 at pin x indicates that 0V is supplied at pin x.
Now you have an Remote Control robot do whatever you want with it. There can be multiple things done with this, you can attach a few sensors to it or make it automatic or whatever you wish.
Here is a demo:
Please send your valuable feedback. Thank you.


_3u05Tpwasz.png?auto=compress%2Cformat&w=40&h=40&fit=fillmax&bg=fff&dpr=2)


Comments