

Software apps and online services | ||||||
 |
| |||||
 |
| |||||
| ||||||
 |
| |||||
This is the first part of my IoT environmental station project that I've developed as part of the IoT course during my Engineering in Computer Science master's degree at Sapienza - University of Rome. It is an example of how to use AWS to set up an MQTT broker to use in an IoT environment. In this first part the environmental station is simulated by a python script.
ArchitectureThe architecture of the project is the following:
- A python script simulates multiple environmental stations that regularly publish on an MQTT channel the data from sensors measuring temperature, humidity, wind direction, wind intensity and rain height;
- AWS is used to manage the MQTT broker. The messages received are also saved in a DynamoDB database;
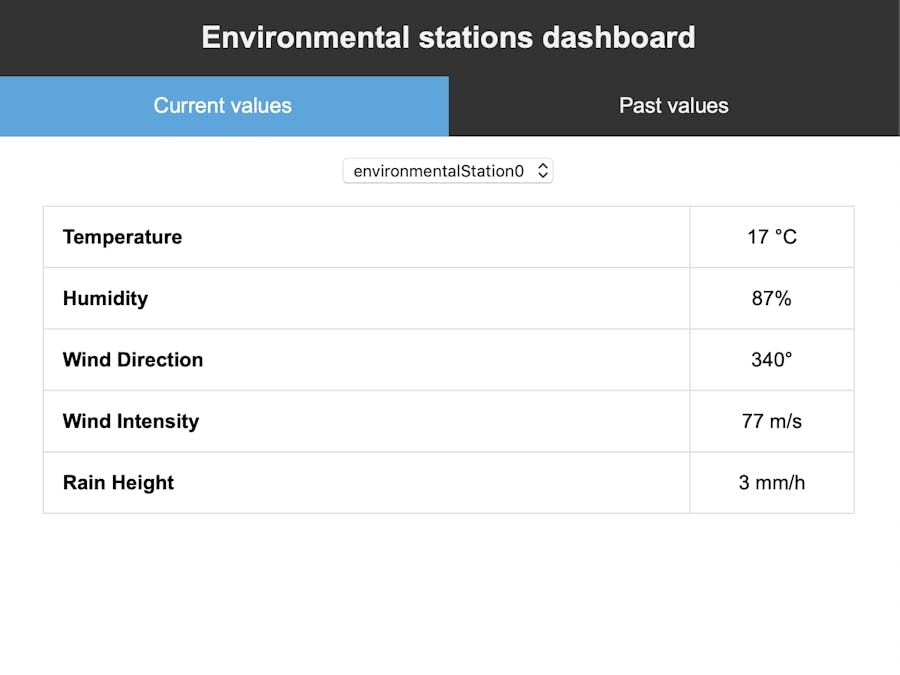
- A web-based dashboard developed in javascript displays the current state of the sensors and the values received during the last hour.
To start you need an AWS account, note that it's free if you are a student. Once created your account and logged-in we can start.
We need to do six things:
- Generate a certificate for our virtual environmental station devices;
- Associate a policy to the certificate;
- Make a rule for saving the received message in a database;
- Retrieve our Endpoint ARN;
- Create a Cognito identity pool;
- Associate permissions to the identity pool;
Generating the certificate
We can begin by going in the “IoT Core” section. From there go to "Secure" then "Certificates" and click on "Create a certificate“. Next click on "Create certificate”.
On this page download the certificate for the thing and the private key, then click on “Download” next to “A root CA for AWS IoT”.
A new page should come up, click on “Amazon Root CA 1”. Keep the three files downloaded in a safe place, we will need them later.
Now go back to the previous page and click on “Activate” and then on “Done”.
Associating a policy to the certificate
Now go to the “Policies” page and click on “Create a policy”.
Give whatever name you want to the policy, then in the “Action” field write “iot:Connect”. AWS will automatically populate the “Resource ARN” field, replace the “replaceWithAClientId” part with “${iot:ClientId}”. Now click on “Add statement” and write “iot:Publish” in the “Action” field of the new statement. This time replace “replaceWithATopic” in the Resource ARN with “stations/${iot:ClientId}”. Finally, make sure to tick the “Allow” box under “Effect” in both statements.
It should look something like this (note that your resource ARN will be slightly different):
What we are doing here is allowing our devices to connect to the MQTT broker and to publish on the topics stations/<ID_OF_THE_DEVICE>.
Now you can click on “Create”.
To associate the policy we have just created to the certificate go back to the “Certificates” page, click on the three dots over your certificate and then click on “Attach policy”. Now select your policy and click on "Attach".
Making a rule for saving the received messages
Go to “Act” then “Rules” and click on “Create a rule”.
Here give a name to the rule, then in the “Rule query statement” section write “SELECT * FROM 'stations/+’” and finally under the “Set one or more actions” section click on “Add action”.
Now select “Insert a message into a DynamoDB table”, scroll down and click on "Configure action".
Here click on “Create a new resource”, you will be redirected to the DynamoDB page.
Now click on “Create table”, give the table the name “EnvironmentalStations”, in “Partition key” write “id”, click on “Add sort key”, call it “timestamp” and change its type to “Number” and finally click on “Create”.
Now go back to the AWS IoT page, click on the little refresh button near “Create a new resource”, the table we have just created should appear in the list, select it. In the “Partition key value” field write “${topic(2)}” and in “Sort key value” write “${timestamp()}”. Now click on “Create Role”, give it a name, click on “Create role” and finally click on “Add action”. Now scroll down and click on “Create rule”.
Here we have created a table in the database with the primary key composed of two attributes, "id" and "timestamp". Upon receiving a message the server will add an entry in the table with "id" equal to the second segment of the topic, which in our case will be the id of the environmental station, and "timestamp" equal to the time the message was received. The message will be saved in a third attribute of the entry called "payload".
Retrieving the Endpoint ARN
The last thing that we need in the "IoT Core" section is to copy our Endpoint ARN. You can find by clicking on "Settings", it will be in the "Custom endpoint" section. Copy and save it, we will need it later.
Creating a Cognito identity pool
Now go back to the AWS homepage and from there go to the “Cognito” section. Here we need to create the cognito identity PoolID that will be used by the web dashboard to authenticate. Start by clicking on “Manage Identity Pools”.
Now click on “Create new identity pool” give it a name, check “Enable access to unauthenticated identities” and click on “Create Pool” and then “Allow”.
Now AWS will show you a bit of code on how to get credentials, from here you need to copy the string “Identity pool ID” and save it somewhere, we will need it later.
Associating permissions to the identity pool
The last thing we need to do is to associate to our identity pool the correct permissions. Go back to the AWS homepage and from there go to the “IAM” section. Here click on “Roles” then start typing in the search bar “Cognito_”. At least two results should show up, named “Cognito_<YOUR_IDENTITY_POOL_NAME>Auth_Role” and “Cognito_<YOUR_IDENTITY_POOL_NAME>Unauth_Role”, where <YOUR_IDENTITY_POOL_NAME> is the name you gave previously to the identity pool. Click on the second one.
Under “permission policies” expand the only policy that there is and click on “Edit policy”.
Here remove all the current permissions and then click on “Add additional permissions”.
Under “Service” select “IoT”, under Actions select “Connect”, “Receive” and “Subscribe”. Then under “Resources” click “Add ARN”. In the “client” section, insert the region you are using for AWS (if you have a student account you only have access to “us-east-1”), leave “Account” untouched and under “Client id” write “dashboard-*”. This means that we are allowing access to clients with IDs that start with “dashboard-”.
Next in the “topic” section click again on “Add ARN”, insert again your region and under “Topic name” write “stations/*”. This means that we are allowing the client to receive messages from the topics that start with “stations/”.
Finally in the “topicfilter” section click again “Add ARN”, insert the region and in “Topic filter” write “stations/*”. This time we are allowing the client to subscribe to the channels.
The last thing we need to do is to add the permissions to access the database. Click again on “Add additional permissions”. Under “Service” select “DynamoDB”, under “Actions”, select “Scan” and “Query” and under “Resources” click “Add ARN” in the “table” section, insert your region and in the "table name" field write "EnvironmentalStations". Here we are allowing the client to query and scan only the table “EnvironmentalStations” we created previously.
Finally, click on “Review policy”.
Great! We have finished configuring AWS, now we can move to the code.
Virtual Environmental StationClone the Github repo https://github.com/51m0n397/IoT2020Course.git. In the “environmental_station” folder there is the python script that simulates the environmental stations. To use it you need to install the AWS IoT SDK for python that you can get using pip with the command “pip3 install AWSIoTPythonSDK” (note that we are using pip3 since the script is written using python 3).
For further information about the SDK check out the repo https://github.com/aws/aws-iot-device-sdk-python.
Before running the script we need to change a few things. Remember the two certificates and the private key we downloaded at the beginning? Put them in the “environmental_station” folder, then open the script with your favorite editor and find this line of code:
# In this case the certificates and the key
        # are in the same folder as this script.
        # MAKE SHURE to insert the correct name for your endpoit
        # and the correct location for the certificates and the key.
        self.configureMQTT("a29wnmzjyb35x8-ats.iot.us-east-1.amazonaws.com",
                           "AmazonRootCA1.pem.crt",
                           "e0a2ae42f8-private.pem.key",
                           "e0a2ae42f8-certificate.pem.crt")
As you can see from the comment above it you need to replace the first argument with your Endpoint ARN the second with the location of the rootCA certificate, the third with the location of the private key and the fourth with the location of the client certificate.
Now you can run the script. It will start by asking how many virtual environmental stations you want to launch, then how much time should pass between each publish of the sensors data and then it will spawn a thread for each station. The threads will start by configuring the MQTT client, then they will connect to the server, update the sensors data (this is simulated by randomly generating numbers), publish the new data, disconnect and then wait for the amount of time you inputted previously before starting again. You can stop the threads and close the script by entering “stop”.
In the meantime, the server will have saved the received messages in the database.
Web dashboardIn the “web_client” folder of the repo, you will find the code for the web dashboard. You can run it locally or upload it to a hosting service to access it over the internet. To make it work you need to edit the “awsConfiguration” variable at the beginning of the “bundle.js” file.
/*
   * The awsConfiguration object is used to store the credentials
   * to connect to AWS service.
   * MAKE SHURE to insert the correct name for your endpoint,
   * the correct Cognito PoolID and the correct AWS region.
   */
  var awsConfiguration = {
    poolId: 'us-east-1:5ae4946b-fba9-42a3-b03a-8cf97ce235f0',
    host: "a29wnmzjyb35x8-ats.iot.us-east-1.amazonaws.com",
    region: 'us-east-1'
  };
  module.exports = awsConfiguration;
As the comment above suggests you need to put in “poolId” the id of the identity pool created earlier, in “host” your Endpoint ARN and in “region” your region.
The code works in this way:
In this section it configures the AWS SDK and authenticates with the server
//
  // Configuration of the AWS SDK.
  //

  //The id of the MQTT client.
  var clientId = 'dashboard-' + (Math.floor((Math.random() * 100000) + 1));

  AWS.config.region = AWSConfiguration.region;
  AWS.config.credentials = new AWS.CognitoIdentityCredentials({
    IdentityPoolId: AWSConfiguration.poolId
  });

  //The mqttClient object used for retrieving the messages from the MQTT server.
  const mqttClient = AWSIoTData.device({
    region: AWS.config.region, //Set the AWS region we will operate in
    host: AWSConfiguration.host, //Set the AWS IoT Host Endpoint
    clientId: clientId, //The clientId created earlier
    protocol: 'wss', //Connect via secure WebSocket
    maximumReconnectTimeMs: 8000, //Set the maximum reconnect time to 8 seconds
    debug: true, //Enable console debugging information
    accessKeyId: '',
    secretKey: '',
    sessionToken: ''
  });

  //The cognitoIdentity used for authentication.
  var cognitoIdentity = new AWS.CognitoIdentity();
  AWS.config.credentials.get(function(err, data) {
    if (!err) {
      console.log('retrieved identity: ' + AWS.config.credentials.identityId);
      var params = {
        IdentityId: AWS.config.credentials.identityId
      };
      cognitoIdentity.getCredentialsForIdentity(params, function(err, data) {
        if (!err) {
          mqttClient.updateWebSocketCredentials(data.Credentials.AccessKeyId,
            data.Credentials.SecretKey,
            data.Credentials.SessionToken);
        } else {
          console.log('error retrieving credentials: ' + err);
          alert('error retrieving credentials: ' + err);
        }
      });
    } else {
      console.log('error retrieving identity:' + err);
      alert('error retrieving identity: ' + err);
    }
  });

  //DynamoDB service object.
  var ddb = new AWS.DynamoDB({
    apiVersion: '2012-08-10'
  });
In this section it retrieves from the database the newest information about the sensors and puts it in a variable. This information is then used to populate the table in the “Current status” section of the website.
//
  // Building station list and initializing current values.
  //

  //List of stations in the database.
  var stationsList = new Set();

  //Variable storing the current values of sensors of the stations.
  var stationsValues = {};

  //Parameters for the scan of the database.
  var scanParams = {
    ExpressionAttributeNames: {
      "#id": "id",
    },
    ProjectionExpression: '#id',
    TableName: 'EnvironmentalStations'
  };

  //Scans the table EnvironmentalStations,
  //adds the id of the stations in stationsList and in the select menu,
  //add the stations latest values to stationsValues;
  ddb.scan(scanParams, function(err, data) {
    if (err) {
      console.log("Error", err);
    } else {
      data.Items.forEach(function(element) {
        stationsList.add(element.id.S);
      });
      stationsList = Array.from(stationsList);
      stationsList.sort();
      console.log("success", stationsList);

      stationsList.forEach(function(id) {
        //Parameters of the query.
        var queryParams = {
          ExpressionAttributeValues: {
            ":station": {
              S: id
            }
          },
          ExpressionAttributeNames: {
            "#id": "id"
          },
          KeyConditionExpression: "#id = :station",
          TableName: 'EnvironmentalStations'
        };

        //Queries the data from the selected station.
        ddb.query(queryParams, function(err, data) {
          if (err) {
            console.log("Error", err);
          } else {
            //Exploiting the fact that the data is already ordered.
            var latest = data.Items[0];
            latest.payload.humidity = latest.payload.M.humidity.S;
            latest.payload.temperature = latest.payload.M.temperature.S;
            latest.payload.windDirection = latest.payload.M.windDirection.S;
            latest.payload.windIntensity = latest.payload.M.windIntensity.S;
            latest.payload.rainHeight = latest.payload.M.rainHeight.S;
            stationsValues[latest.id.S] = latest.payload;
            document.getElementById("station-select").innerHTML +=
              '<option value="' + latest.id.S + '">' + latest.id.S + '</option>';
          }
        });
      });
    }
  });
In this section it subscribes to the MQTT channel and uses the messages received to update the table displaying the current status.
//
  // Subscibing to MQTT topic and updating current values.
  //

  //The topic where the environmental stations publish the sensors data.
  var stationTopic = 'stations/+';

  //Variable storing the name of the station we are currently displaying.
  var currentStation = "";

  //Connect handler: once the MQTT client has successfully connected
  //to the MQTT server it subscribes to the stationTopic
  window.mqttClientConnectHandler = function() {
    console.log('connected to MQTT server');
    mqttClient.subscribe(stationTopic);
    console.log("subscribed to", stationTopic);
  };

  //Function for updating the table containing the current values of the station.
  window.updateInfo = function() {
    var infoTable = document.getElementById("station-info");
    infoTable.rows.item(0).cells.item(1).innerHTML =
      stationsValues[currentStation].temperature + " °C";
    infoTable.rows.item(1).cells.item(1).innerHTML =
      stationsValues[currentStation].humidity + "%";
    infoTable.rows.item(2).cells.item(1).innerHTML =
      stationsValues[currentStation].windDirection + "°";
    infoTable.rows.item(3).cells.item(1).innerHTML =
      stationsValues[currentStation].windIntensity + " m/s";
    infoTable.rows.item(4).cells.item(1).innerHTML =
      stationsValues[currentStation].rainHeight + " mm/h";
  }

  //Message handler: upon receiving a message if it's relative to a new station
  //it adds it to the selection menu then it saves it's values in the variable
  //stationsValues and finally updates the table.
  window.mqttClientMessageHandler = function(topic, payload) {
    console.log('message: ' + topic + ':' + payload.toString());
    if (stationsValues[topic.slice(9)] == undefined) {
      stationsList.push(topic.slice(9));
      document.getElementById("station-select").innerHTML +=
        '<option value="' + topic.slice(9) + '">' + topic.slice(9) + '</option>';
    }
    stationsValues[topic.slice(9)] = JSON.parse(payload.toString());
    if (currentStation != "") updateInfo();
  };

  //Function for changing the currently displayed station.
  window.changeStation = function() {
    currentStation = document.getElementById("station-select").value;
    updateInfo();
  }

  //Installing the connect and message handlers.
  mqttClient.on('connect', window.mqttClientConnectHandler);
  mqttClient.on('message', window.mqttClientMessageHandler);
In this section it queries the database for the data relative to the last hour which is then used to draw the charts in the “Past status” section of the website.
//
  // Past values.
  //


  //Units for sensors data.
  var units = {
    temperature: ' °C',
    humidity: '%',
    windDirection: '°',
    windIntensity: ' m/s',
    rainHeight: ' mm/h'
  }

  //Settings for yAxis of the chart.
  var yAxisSettings = {
    temperature: {
      min: -50,
      max: 50,
      stepSize: 10,
      callback: function(value) {
        return value + ' °C';
      }
    },
    humidity: {
      min: 0,
      max: 100,
      stepSize: 10,
      callback: function(value) {
        return value + '%';
      }
    },
    windDirection: {
      min: 0,
      max: 360,
      stepSize: 30,
      callback: function(value) {
        return value + '°';
      }
    },
    windIntensity: {
      min: 0,
      max: 100,
      stepSize: 10,
      callback: function(value) {
        return value + ' m/s';
      }
    },
    rainHeight: {
      min: 0,
      max: 50,
      stepSize: 5,
      callback: function(value) {
        return value + ' mm/h';
      }
    }
  };

  //Function that returns the timestamp of one hour ago.
  window.lastHour = function() {
    var d = new Date();
    d.setHours(d.getHours() - 1);
    return d.getTime();
  }

  //Queries the database for the sensor data and draws the charts.
  window.refreshSensorChart = function() {
    //Clears chart div.
    document.getElementById("chart-div").innerHTML = "";
    stationsList.forEach(function(id, index) {
      //Adds canvas to chart div.
      document.getElementById("chart-div").innerHTML +=
        "<canvas id='chart" + index + "'></canvas><br>";

      //Parameters of the query.
      var params = {
        ExpressionAttributeValues: {
          ":station": {
            S: id
          },
          ":lastHour": {
            N: lastHour().toString()
          }
        },
        ExpressionAttributeNames: {
          "#id": "id",
          "#time": "timestamp"
        },
        KeyConditionExpression: "#id = :station and #time >= :lastHour",
        TableName: 'EnvironmentalStations'
      };

      //Queries the data from the last hour for the selected sensor.
      ddb.query(params, function(err, data) {
        if (err) {
          console.log("Error", err);
        } else {
          console.log("success", data);

          var sensor = document.getElementById("sensor-select").value;
          var time = [];
          var dataset = [];

          data.Items.forEach(function(element) {
            var d = new Date();
            d.setTime(element.timestamp.N);
            time.push(d);
            dataset.push(element.payload.M[sensor].S);
          });

          //Draws the chart.
          let chart = new Chart(document.getElementById('chart' +
                                                        index).getContext('2d'), {
            "type": "line",
            "data": {
              "labels": time,
              "datasets": [{
                "label": id,
                "data": dataset,
                "fill": false,
                "borderColor": 'rgb(255, 0, 0)',
                "lineTension": 0.1
              }]
            },
            "options": {
              tooltips: {
                callbacks: {
                  label: function(tooltipItems, data) {
                    return tooltipItems.yLabel + units[sensor];
                  }
                }
              },
              responsive: true,
              scales: {
                xAxes: [{
                  type: 'time',
                  time: {
                    unit: 'minute',
                    stepSize: 10,
                  },
                  ticks: {
                    min: lastHour(),
                    max: new Date()
                  }
                }],
                yAxes: [{
                  ticks: yAxisSettings[sensor]
                }]
              }
            }
          });
        }
      });
    });
}For a demonstration of the project check the video
What's nextCheck the second part of the project, where the python script of the environmental station is replaced by a program for RiotOS running on the emulated "native" board.
LinksLinkedIn profile: https://www.linkedin.com/in/simone-bartolini-9628561a3
Github repo: https://github.com/51m0n397/IoT2020Course
Youtube video: https://www.youtube.com/watch?v=9jjE9SlO0yw&t=6s


Comments