1. While reading the book "Arduino Workshop: 65 Projects, " I saw this project. My girlfriend got me the materials as a gift, so I began to put my skills to the test.
2. First, I needed to download a windows 10 FTDI drive as I had never used one of those before.
3. Once that was done, I downloaded XCTU to format my xbees. The options that I found important were channel, pan id, Interface Data Rate, and Coordinator Enable. The channel must be the same between the two as well as the pan id and interface data range. For a while, I had no signal which is when I realized I needed to make one the transmitter and one the receiver.
4. When the receiver xbee was formatted, I slipped it into the explorer board. That was then plugged into my desktop computer. The transmitter was slipped into the xbee shield I had received.
5. Because of my inexperience, the hardest part was soldering the shield to headers. This took a while, but eventually I soldered the headers and was able to plug the shield into my Arduino Uno.
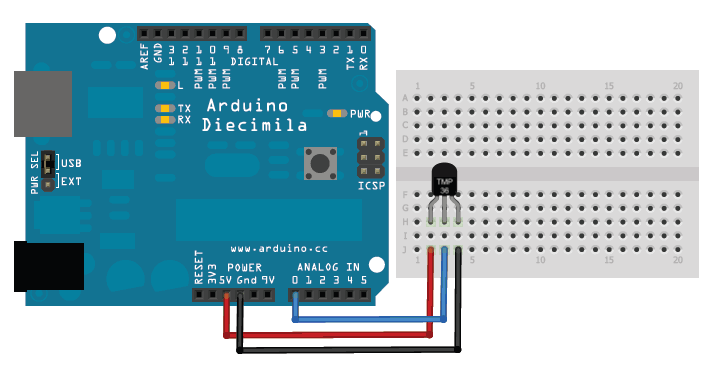
6. Finally, I wired my tmp36 to analog pin 0 as well as 5v and GND.
7. Because I didn't want my Arduino to be powered by the computer usb cable I usually use, I used a battery to dc convertor and a 9v battery to power the Arduino.




Comments