


My journey into aquaponics has been a fascinating blend of biology, engineering, and a touch of my own stubbornness. My system, a modest yet thriving ecosystem, relies on a steady supply of fresh water. The goal: harness the power of nature by collecting rainwater directly from my home's gutters. This article details the unexpected challenges and innovative solutions encountered while integrating a rain harvester into an existing gutter system – a process that led to a surprising discovery and a new project idea.
The moment of truth arrived: the irrevocable cut. Armed with tools and a mix of dread and anticipation, I prepared to modify my home's rain gutter. This was not a task for the faint of heart; a wrong cut could lead to leaks, damage, and a very unhappy family.
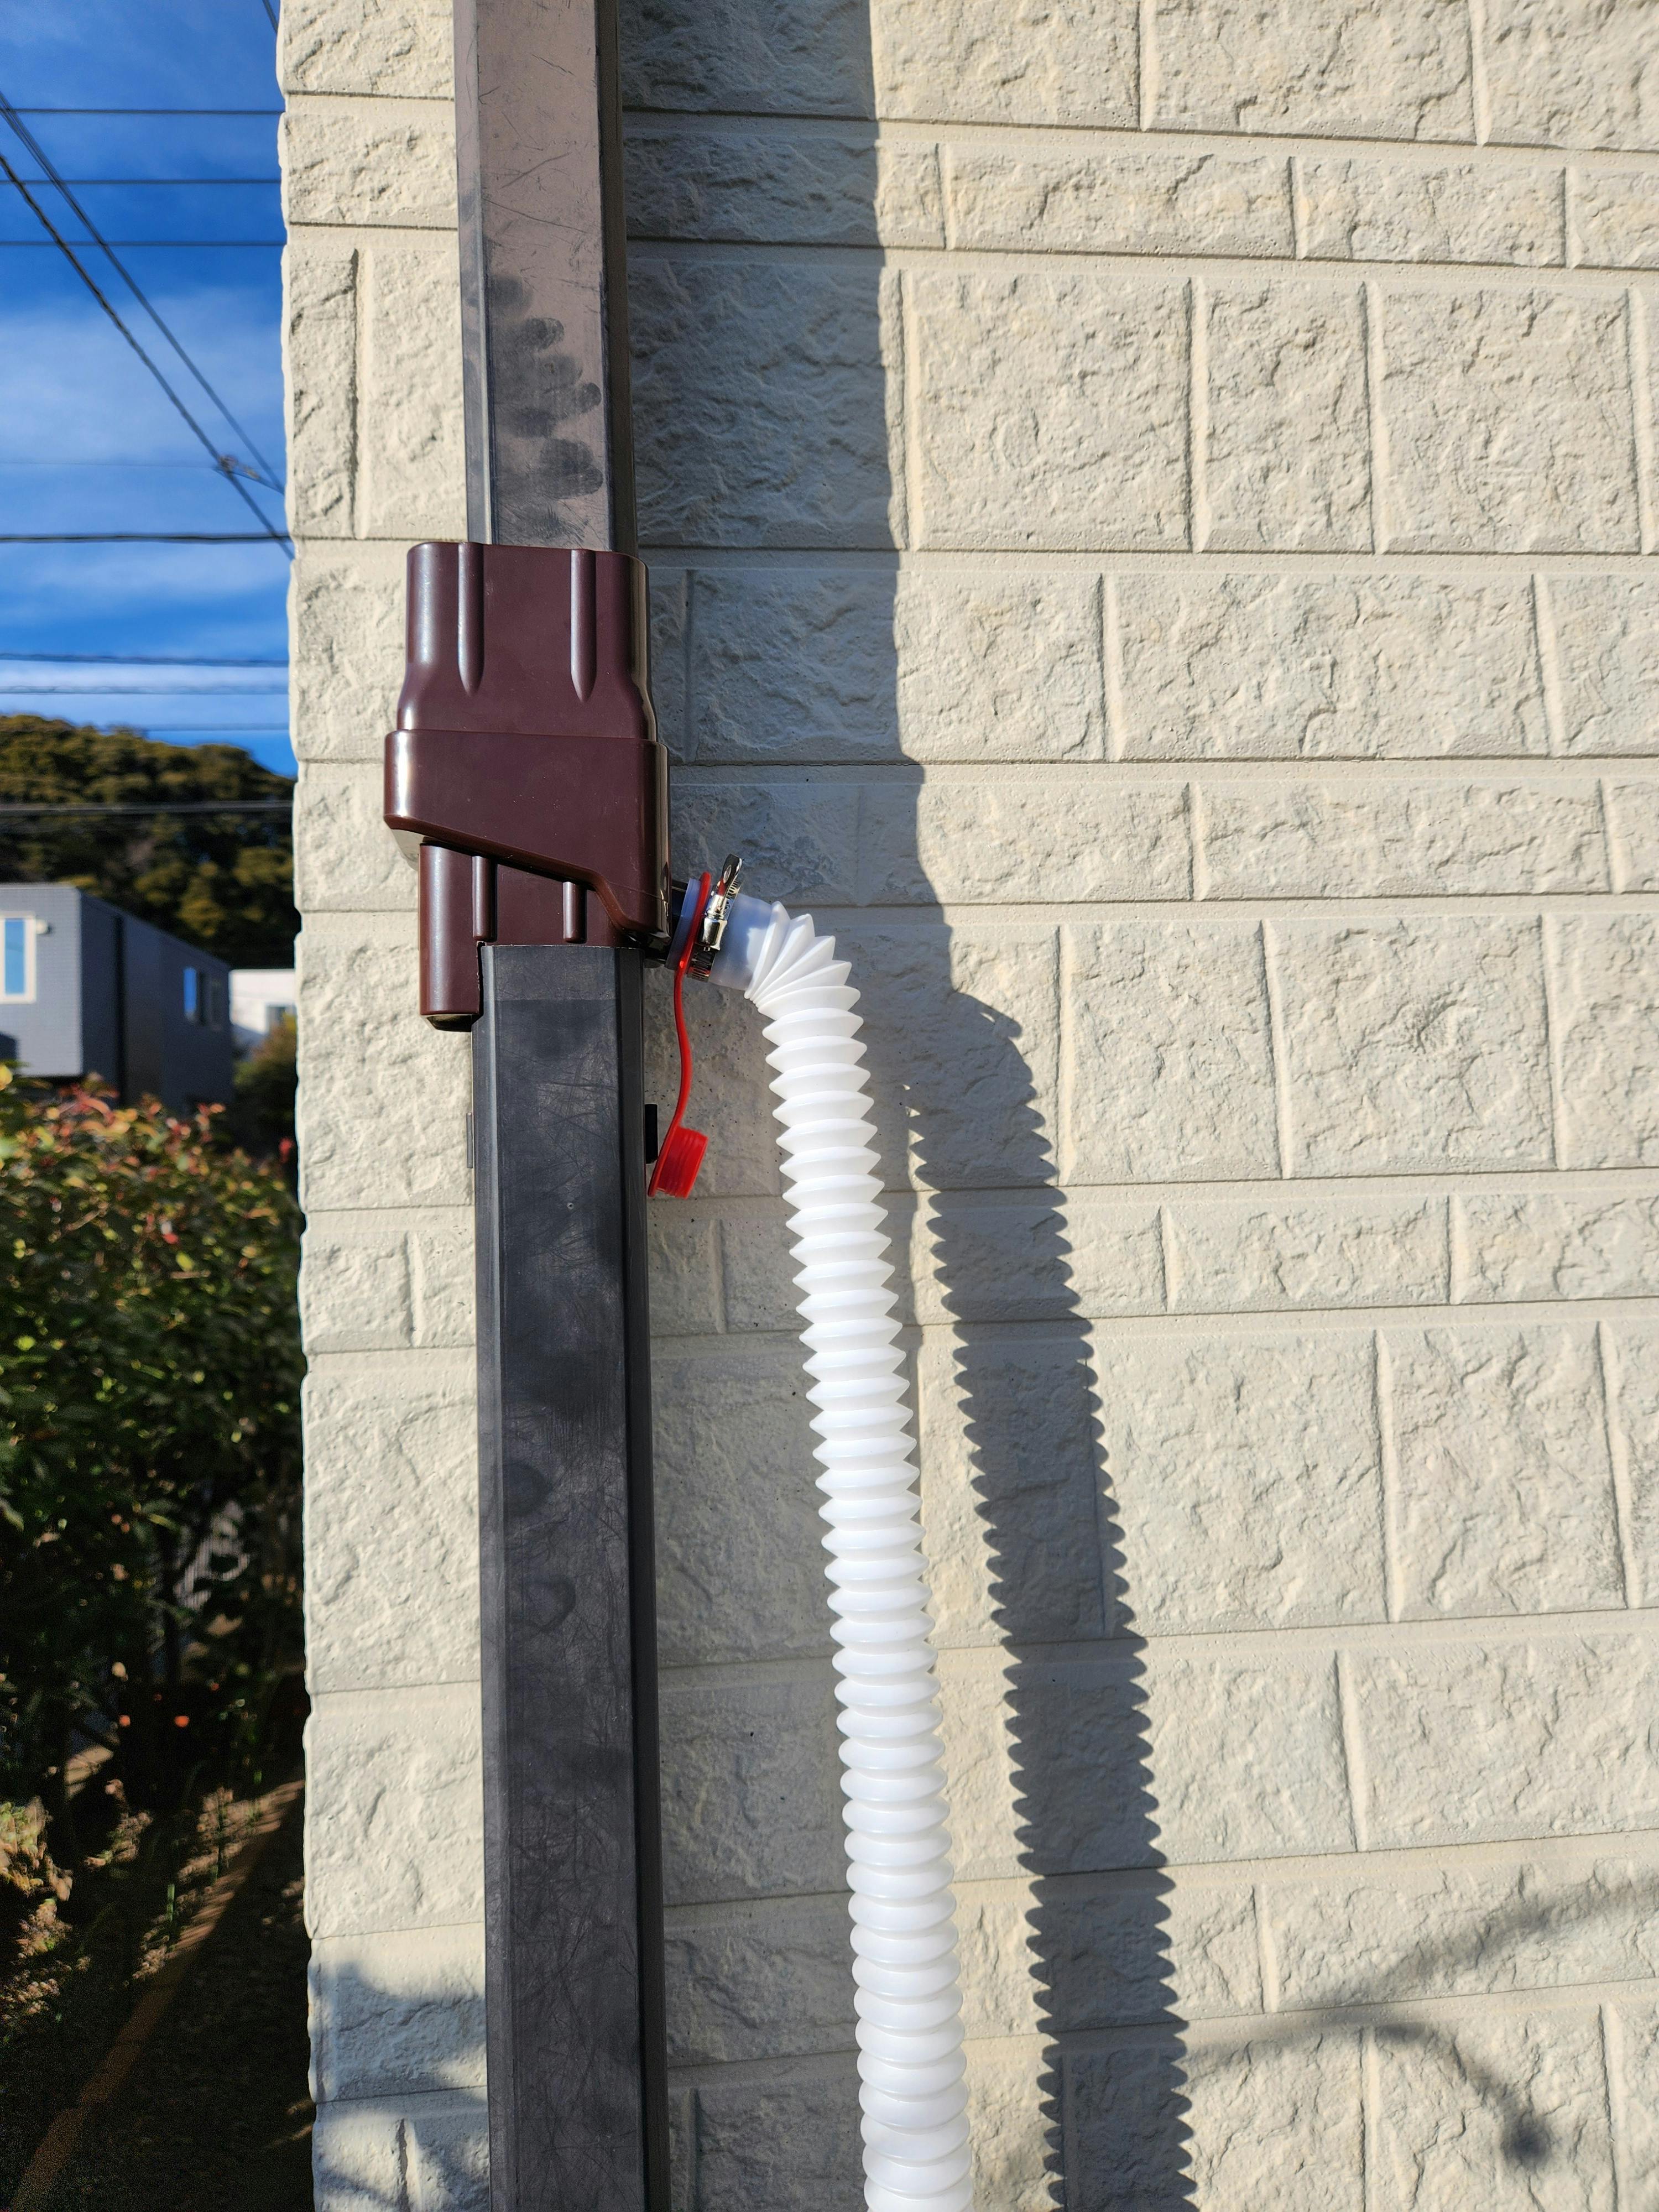
My relief was short-lived. Upon closer inspection, the brand-new rain harvester, purchased with the assumption of universal compatibility, was a mismatch. It was designed for a 2"x3" rectangular downspout – it might be a standard in some regions, but utterly incompatible with our 2"x2" Japanese gutter, which even had specific grooves for mounting. Frustration mounted, turning to a desperate scramble for a solution.
A side note: I also learned for the first time that rain collectors are typically designed to capture water flowing along the inner wall of the downspout, rather than directly filtering the entire cross-section. The absence of an internal filter, which initially surprised me, made sense in this context. This design choice, while practical, would later become relevant.
Then, a glimmer of hope. What if I shifted the collector to one side? This would leave only a 1-inch gap on one side, effectively "spilling" a small portion of the rainwater. Could this be the key to salvaging the project?
3. Ingenuity in Action: The Custom FitWith renewed determination, I devised a plan for custom modification. The tools were simple: a hacksaw for the initial cut, and a sharp utility knife for fine-tuning. Some sandpaper, surprisingly, proved unnecessary as the knife achieved a perfectly smooth edge.
The lower part of the collector required three strategic slits. In addition, I snugly fit sponge strips, secured with double-sided tape. This allowed the collector to "hug" the cut gutter perfectly. The 1-inch gap was elegantly sealed with a combination of sponge and kitchen-grade waterproof aluminum tape, creating a sufficient ramp that guided the water inward. For the upper part of the collector, a sponge strip on the left side ensured it could be pressed firmly against the left edge of the gutter opening.
With the custom modification battle has been ceased, it was time for assembly and installation.
The lower section of the collector fit precisely as envisioned. The upper section, already a good fit in the front-to-back dimension, was now perfectly aligned to the right side of the gutter thanks to the added sponge. The "downsizing" installation was a success! All that remained was to wait for the rain.
One week later, a rare snowfall on Japan's Pacific side brought our first harvest. Collected rainwater flowed into a birdbath acting as a preliminary reservoir, then into our main tank.
However, a visit to the birdbath revealed a new problem: the water was disturbingly cloudy. A quick pH test confirmed its acidity (around pH 5). Recognizing the danger this posed to our delicate aquaponics ecosystem, I immediately diverted the outflow hose away from the system.
This unexpected outcome sparked an exciting new project idea. My next endeavor will be to develop an embedded system to monitor the clarity and pH of the rainwater in the preliminary reservoir. Only clear, safe water will be automatically guided into the aquaponics system. The journey into embedded software development begins!


Comments