


Hardware components | ||||||
 |
| × | 1 | |||
 |
| × | 1 | |||
So in this tutorial we are going to learn how to switch an led on and off with use of a web server hosted by nodemcu v1.o and also how to set up nodemcu in your computer. I am using mac os in this tutorial, so please keep taht in mind. So lets start!
Setting up nodemcu in macTo make things clear, we need a micro usb data cable not power one. It took hours for me to troubleshoot this problem, as I had taken a power cable.
1. We have to go to the files>preferences of the arduino ide and paste this url in the field front of Additional board manager urls. https://arduino.esp8266.com/stable/package_esp8266com_index.json
2. Go to tools>board>Boards manager and type esp8266 in the search bar.
3. Now install esp8266 by esp8266 community.
4. next we have to install the cp1202 driver You can download it from here.
5.Now plug in your nodemcu.
6. Now go to arduino ide tools>board and click on nodemcu 1.0(ESP12-E module).
7. Now we are set! If there is any problem you can tell me below in the coments!
Setting up web serverNow lets start the actual nodemcu party!
1.Copy and paste the code from down below.
2.The code is explained line by line
3.Create the following circuit below n the schematics section.
4.Upload the code to the nodemcu, if any problem tell me in the comments section.
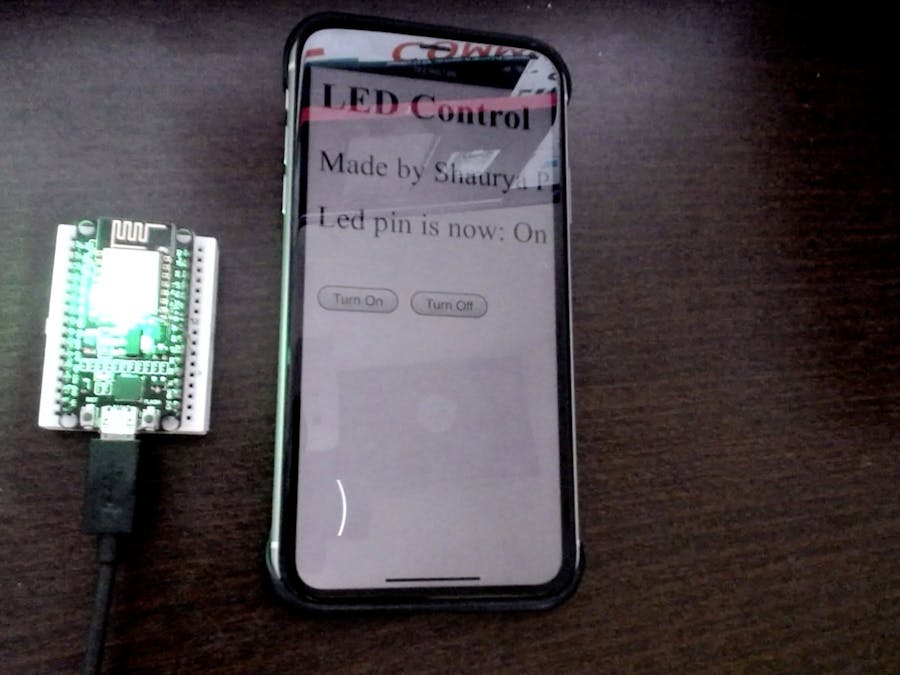
5.You can paste the url from the serial monitor in any device which is connected to the network.
Demonstration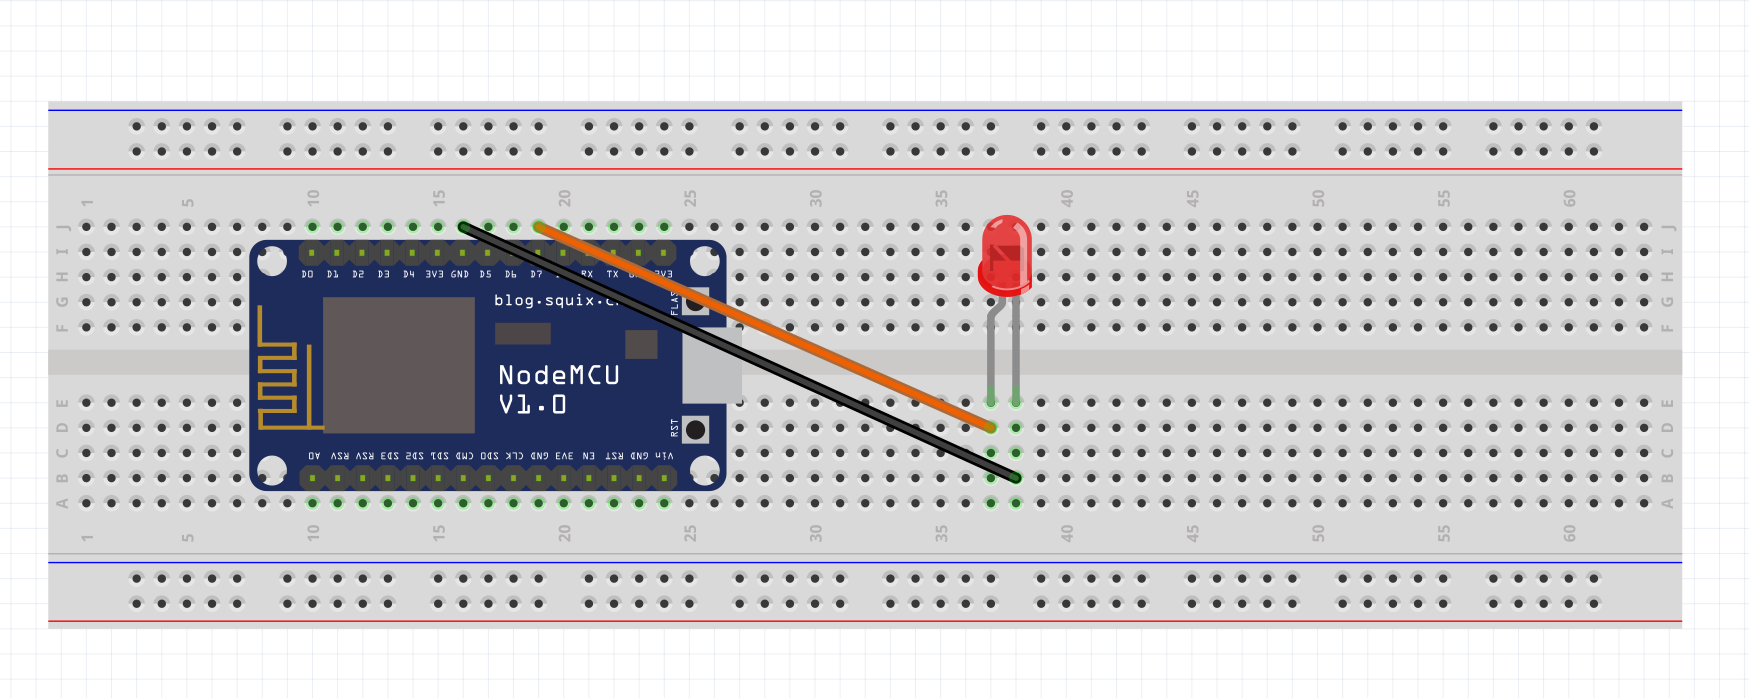


Comments