


Hardware components | ||||||
 |
| × | 1 | |||
 |
| × | 1 | |||
 |
| × | 1 | |||
 |
| × | 1 | |||
Software apps and online services | ||||||
| ||||||
 |
| |||||
In this project, we have worked on two sections which are as follows:-
Number 1): Turning ON the LED remotely.
Number 2): Turning OFF the LED remotely.
The above-mentioned tasks are performed by pressing two buttons namely (ON & Off) and these buttons are created using Javascript. When the ON button is clicked so the LED connected to the Bolt wi-fi module starts glowing and when the OFF button is clicked the LED is turned off. In other words when the LED in ON so it's state changes to HIGH and when the LED is OFF so it's state changes to LOW.
An API key is used to carry out the above-mentioned actions and this is API is implemented on the Bolt cloud platform. Now let's move on to some more details to know how to develop this project.
2) VIDEO DEMONSTRATIONThis is how the project will work after it is fully completed.
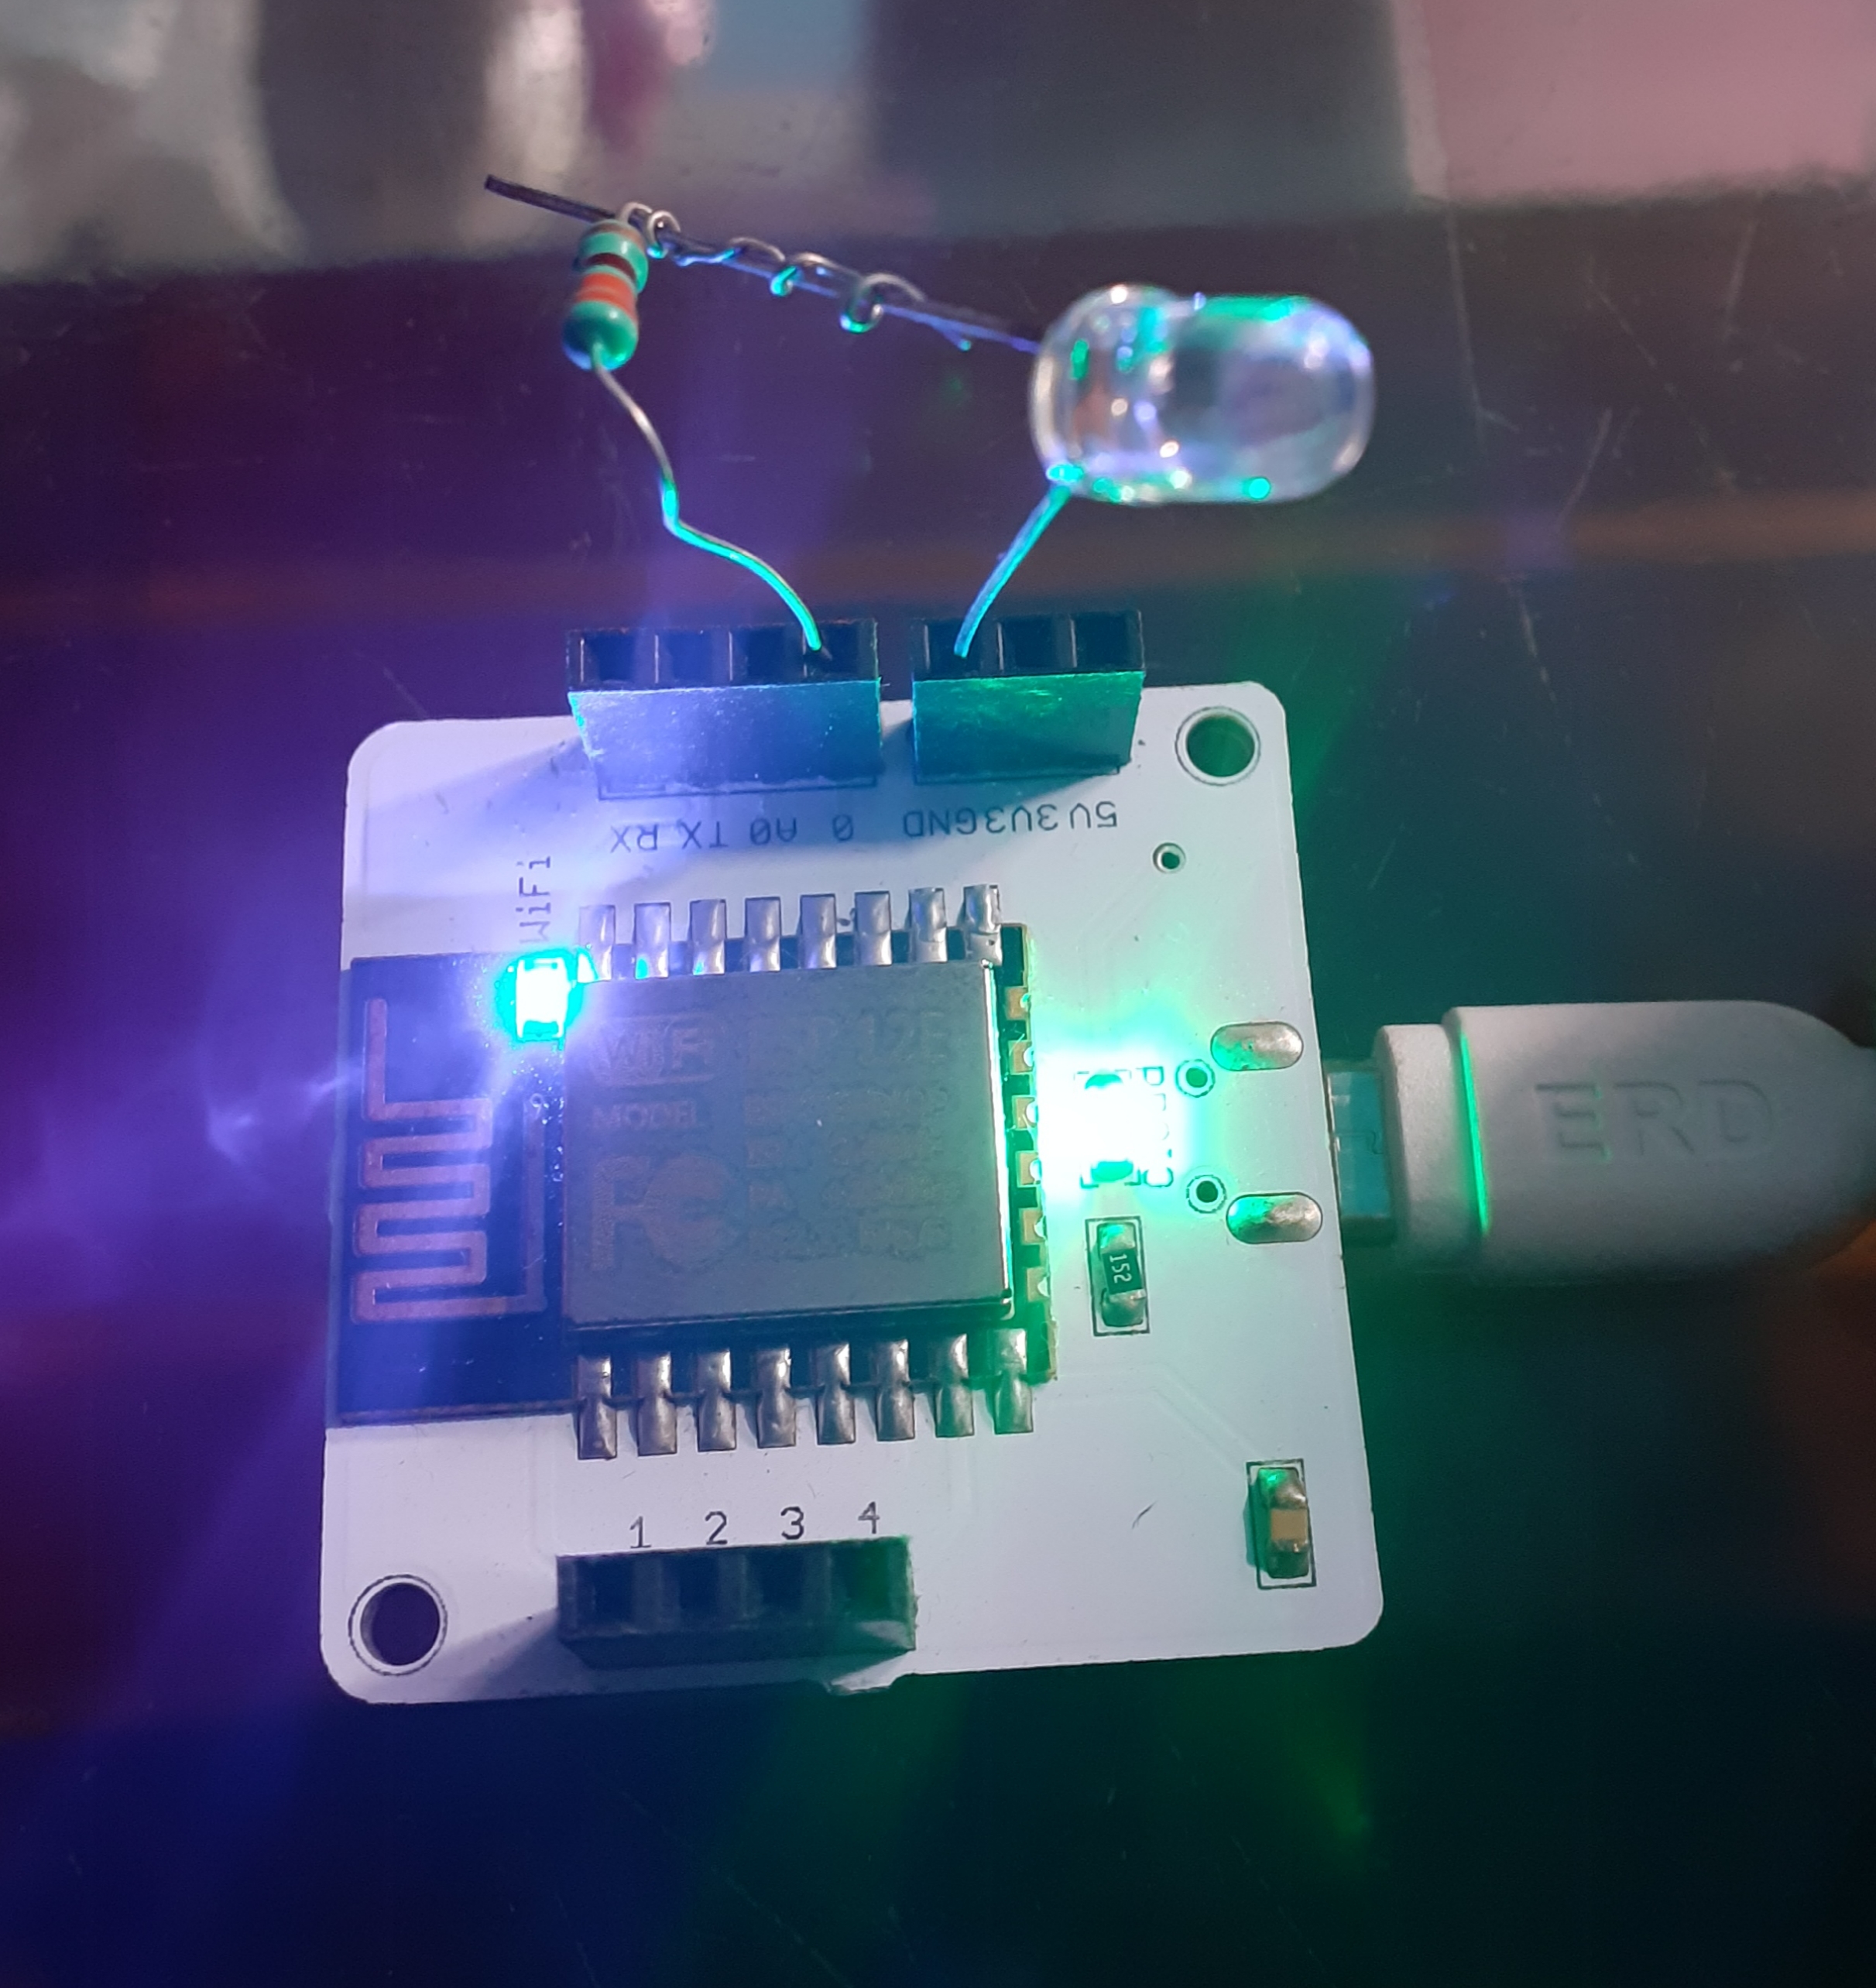
3) CIRCUIT CONNECTION OF LED AND RESISTOR IN W-FI MODULEThere are several steps involved in making the correct connection of the LED and resistor in theBOLT wi-fi module. Circuit connection is divided into steps for detailed and level by level understanding of the connections of the components.
STEP 1): The longer leg of the LED is the positive leg of the LED. At first, take one leg of the resistor and gently wrap it on the longest leg of the LED.
STEP 2): Now insert the negative leg of the LED into the ground pin of the Bolt.
STEP 3): Now insert another leg of the resistor into the digital 0 pin of the BOLT wi-fi module.
In this section, we will learn how to write code to control the LED.
4.1):Creating a new product
Go to https://cloud.boltiot.com and create a new product on it.
Step 1): Login into https://cloud.boltiot.com and click on products and from there you will see an option named as "Build Product". Click on "Build Product"
Step 2): While creating the product, you need to choose the product type as output device and interface type as GPIO. After creating the product, select the recently created product and then click on the configure icon.
Step 3): Now go to the code tab and here we will write the code as follows:
In the header we will include a javascript file which has some pre-defined function like DigitalRead, digitalWrite etc already hosted on the Bolt Cloud.
Step 4): The script which is to be included is as follows:
<script type="text/javascript" src="https://cloud.boltiot.com/static/js/boltCommands.js"></script>Step 5): Now we have to set the API key and the device name. The syntax for the this is as follows:
<script type="text/javascript">setKey('{{ApiKey}}','{{Name}}');</script>
Keep in mind that API key and Device name will be auto-initialized by Bolt cloud. we don't have to replace the device name and API key in the above code.
Step 6): Now in the body we need to place two buttons, one for turning the LED ON and other for turning the LED OFF. The syntax is as follows:
<body>
<center>
  <button >ON</button>
  <button >OFF</button>
</center>
</body>
we have to place both the butttons in <center></center> tag so that the buttons are displayed in the center of the display.
Our next task is to make these two buttons clickable/operational and to do so we need to call a javascript function named as onclick().Inside the onclick function, we are calling a function named digitalWrite().
<button onclick="digitalWrite(0, 'HIGH');">ON</button>
<button onclick="digitalWrite(0, 'LOW');">OFF</button>
when the LED is ON so the state will be 'High' and when the LED is OFF so the state is 'Low'. The parameter has value 0, which means the LED is connected to pin 0.
This is how the complete code will look like
<!DOCTYPE html>
<html>
    <head>
        <title>Bolt IoT Platform</title>
        <script type="text/javascript" src="https://cloud.boltiot.com/static/js/boltCommands.js"></script>
        <script>
        setKey('{{ApiKey}}','{{Name}}');
        </script>
    </head>
    <body>
        <center>
        <button onclick="digitalWrite(0, 'HIGH');">ON</button>
        <button onclick="digitalWrite(0, 'LOW');">OFF</button>
        </center>
    </body>
</html>
Step 7): Now we have written the complete code in the editor, so now give the name to the file as ledcontrol and select the file extension as html. This is how it will look like :
Step 8): Now click on save icon to save the code. Now go back to the dashboard by clicking on 'X' icon.
Step 9): Now in the products tab, select the product created and then click on the link icon. Select your Bolt device in the popup and then click the 'Done' button.
Step 10): Now click on view this device icon to view the page that you created. This is how the page will look like :
Make sure your Bolt wi-fi module is active and LED is connected. Now click the ON button to activate the LED and click the OFF button to deactivate the LED.


Comments