


Hardware components | ||||||
 |
| × | 1 | |||
 |
| × | 1 | |||
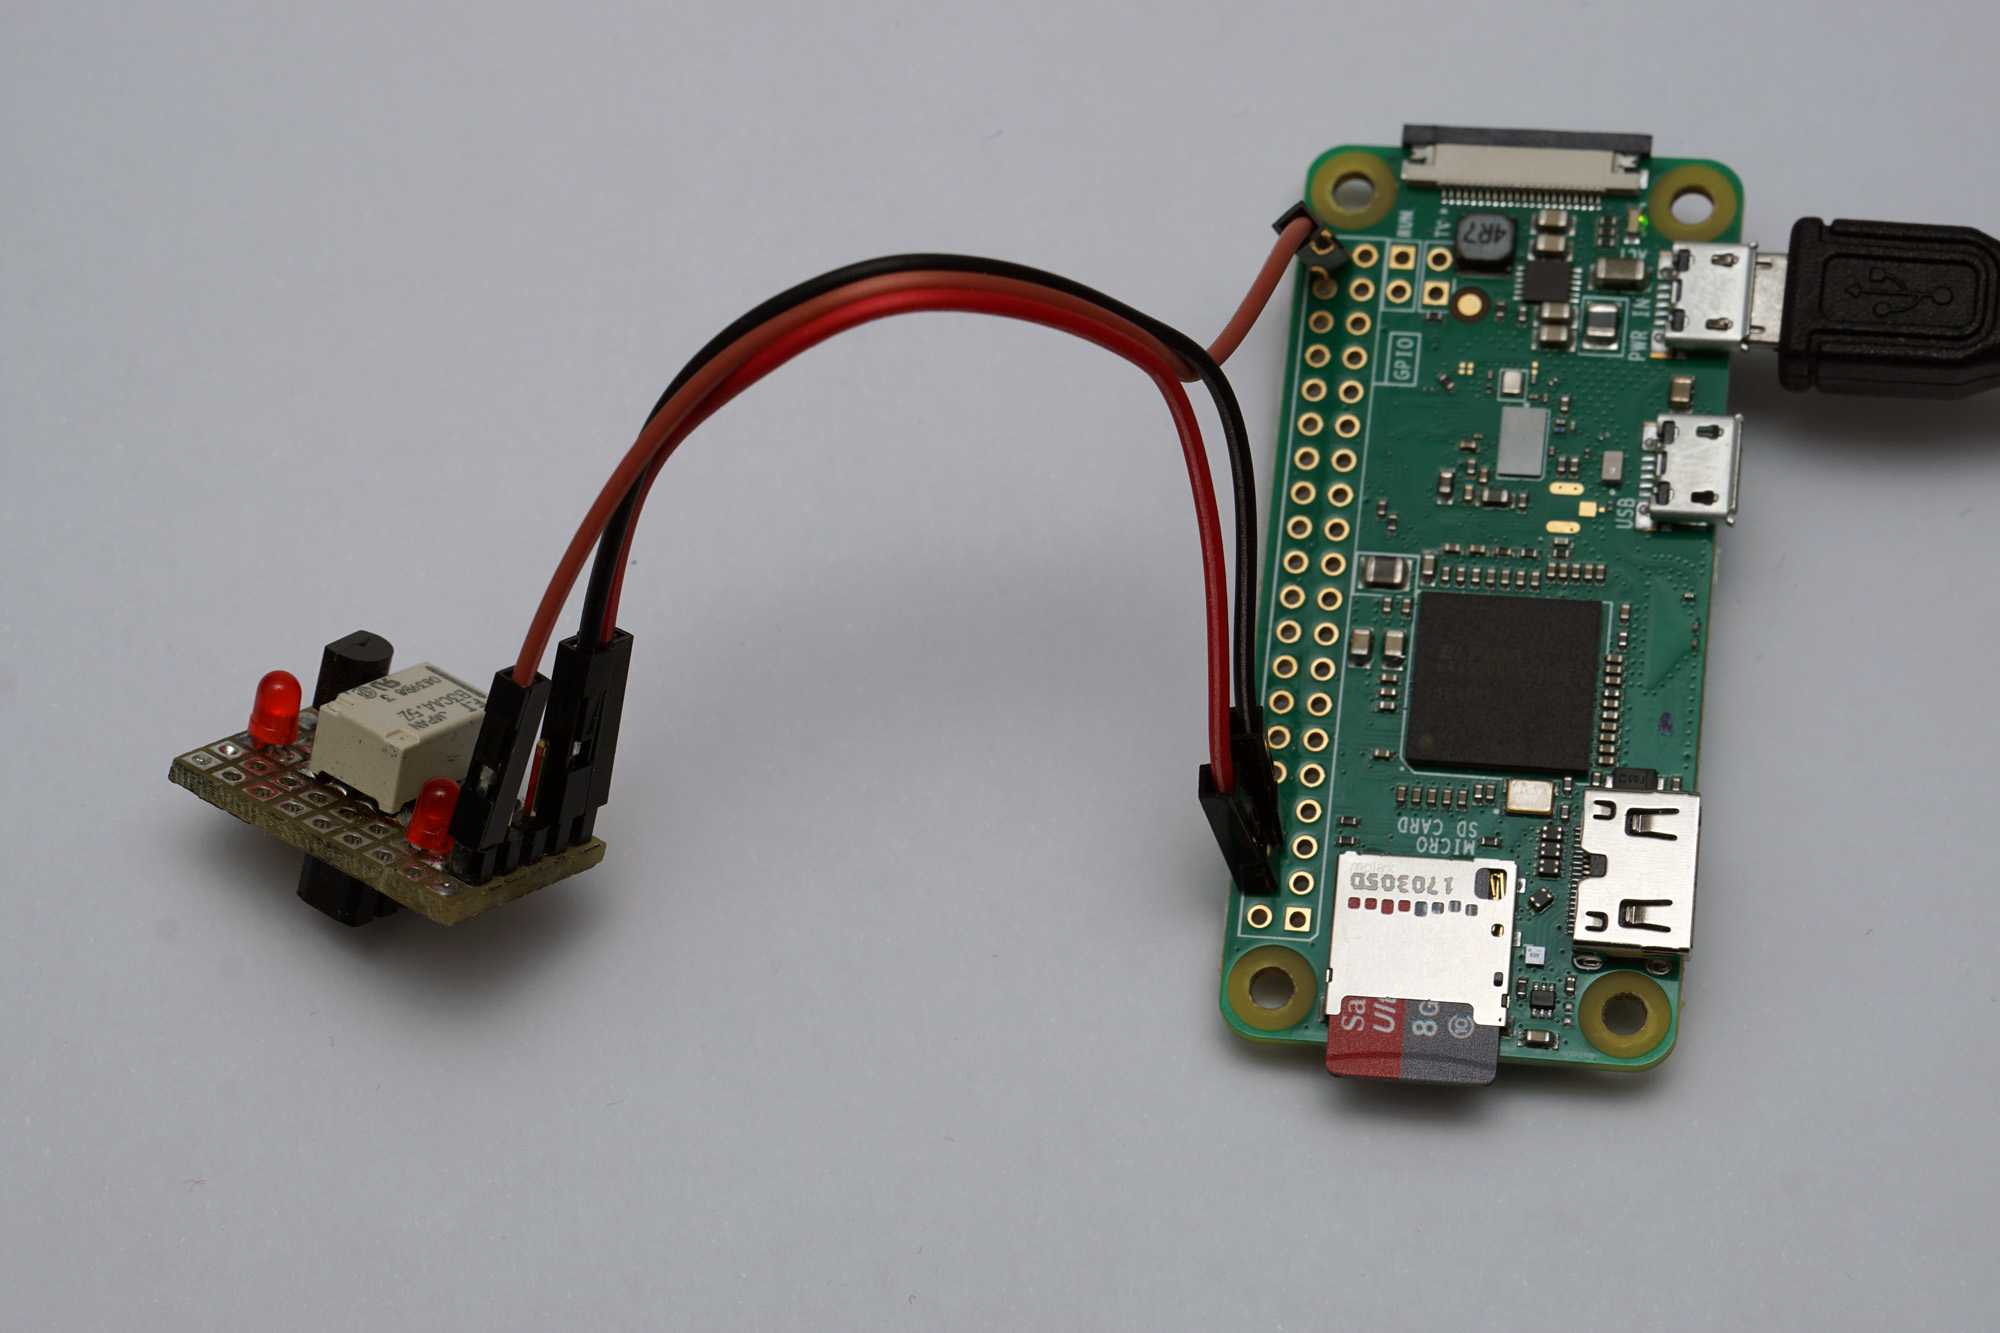
Did you ever wanted to control like the Computer within StarTrek Enterprise the world around you? Siri brings you a little bit in this direction and together with RaspberryPI you can at least toggle a LED or relay with your voice!
See also: http://blog.io-expert.com/siri-homeautomation-with-raspberry-pi
Siri Homeautomation with Raspberry Pi(for advanced users)
For Homeautomation with Siri / Apple HomeKit 2 components are required:
- FHEM
- Node.js
- Homekit
FHEM (TM) is a GPL’d perl server for house automation. It is used to automate some common tasks in the household like switching lamps / shutters / heating / etc. and to log events like temperature / humidity / power consumption. (description at www.fhem.de)
Node.js® is a JavaScript runtime built on Chrome’s V8 JavaScript engine. Node.js uses an event-driven, non-blocking I/O model that makes it lightweight and efficient. Node.js’ package ecosystem, npm, is the largest ecosystem of open source libraries in the world. (description at nodejs.org)
Homebridge is a lightweight NodeJS server you can run on your home network that emulates the iOS HomeKit API. It supports Plugins, which are community-contributed modules that provide a basic bridge from HomeKit to various 3rd-party APIs provided by manufacturers of “smart home” devices. (description of homebridge at GitHub https://github.com/nfarina/homebridge)
Bringing all togetherPreperationFirst of all we have to install the different required packages. It makes sense to update the installed packages and repository to the latest ones:
sudo apt-get update sudo apt-get upgrade
Now we can install the required packages for FHEM:
sudo apt–get –f install && sudo apt–get –y install perl–base libdevice–serialport–perl libwww–perl libio–socket–ssl–perl libcgi–pm–perl libjson–perl sqlite3 libdbd–sqlite3–perl libtext–diff–perl libtimedate–perl libmail–imapclient–perl libgd–graph–perl libtext–csv–perl libxml–simple–perl liblist–moreutils–perl ttf–liberation libimage–librsvg–perl libgd–text–perl libsocket6–perl libio–socket–inet6–perl libmime–base64–perl libimage–info–perl libusb–1.0–0–dev libnet–server–perl
After everything is installed we can start downloading and installing FHEM:
sudo wget http://fhem.de/fhem-5.8.deb && sudo dpkg -i fhem-5.8.deb
Now FHEM is installed and will be automatically started with your RaspberryPI. To configure FHEM, it can be opened by typing http://192.168.1.55:8083 in your browser. 192.168.1.55 is the IP of your RaspberryPI, so this has to be changed to the IP of your RaspberryPI.
We will now create a new script controlling GPIO21 of your RaspberryPI for turning an relais on/off:
nano fhem_gpio21
We will add following code:
#!/bin/sh
echo “21” > /sys/class/gpio/export
echo “out” > /sys/class/gpio/gpio21/direction
echo “$1” > /sys/class/gpio/gpio21/value
We will close nano with CTRL+w and CTRL+c. Now we make fhem_gpio21 executable and copy it into the binary folder:
sudo chmod 755 fhem_gpio21
sudo cp fhem_gpio21 /usr/local/bin/
We can try if a connected LED / Relais can be toggled by executing:
sudo fhem_gpio21 1
sudo fhem_gpio21 0
Now we have to make fhem_gpio21 accessible for FHEM via sudo without password, so we add following lines to sudoes by executing this commands:
sudo echo “Cmnd_Alias      FHEMGPIO21 = /usr/local/bin/fhem_gpio21” >> /etc/sudoers
sudo echo “fhem            ALL=(ALL) NOPASSWD: FHEMGPIO21” >> /etc/sudoers
We have also to restart sudo:
sudo /etc/init.d/sudo restart
Now lets configure FHEM for turning on/off the LED / Relais. Add “define relays.def dummy” to create a new realise.def object.
Add a new attribute alias “Relais” to the relais.def object:
- select attribute “alias”
- set alias to “Relais”
- save the attribute by clicking on “attr”
Now lets define the device type. Lets choose a light:
- select attribute “genericDeviceType”
- set genericDeviceType to “light”
- save the attribute by click on “attr”
To use later on the relais / LED with Siri, we have to put it into the room “Homekit”:
- select attribute “room”
- set room to “Homekit”
- save the attribute by clicking on “attr”
Lets set the on/off behaviour:
- select attribute “setList”
- set setList to “on off”
- save the attribute by clicking on “attr”
Lets set the name Siri will react on:
- select attribute “siriName”
- set siriName to “Relais”
- save the attribute by clicking on “attr”
Now lets set the options for the web frontend of FHEM:
- select attribute “webCmd”
- set webCmd to “on:off:on-for-timer:on-till:toggle”
- save the attribute by clicking on “attr”
So the attributes are done. Lets add a event that toggles the Relais. We will use the command field on top to enter “define relais.event notify relais.def dummy”:
Now we will edit the event by clicking on DEF:
Now lets add the code for “on” and “off” case. Enter following code in the text-field:
relais.def { if ( Value(“relais.def”) eq “on” ) { {system(“sudo fhem_gpio21 1”)} } if ( Value(“relais.def”) eq “off” ) { {system(“sudo fhem_gpio21 0”)} } }
After adding the text, click on “modify relais.event”. So the configuration is done and we have to safe the configuration by click on “save config”. Lets try of the LED / Relais is working by selecting room “HomeKit” and clicking at “on” or “off” at the Relais entry:
Now we are done with FHEM.
Installing HomebridgeFirst of all we need Node.js installed. This can be done by downloading the binaries from nodes.org:
Installing Node.jsFor RaspberryPI 1,2, Zero and Zero W, following instructions are valid:
wget https://nodejs.org/dist/v6.10.0/node-v6.10.0-linux-armv6l.tar.gz tar -xvf node-v6.10.0-linux-armv6l.tar.gz cd node-v6.10.0-linux-armv6l sudo cp -R * /usr/local/ cd
For newer RaspberryPIs, following instructions are valid:
wget https://nodejs.org/dist/v6.10.0/node-v6.10.0-linux-armv7l.tar.gz tar -xvf node-v6.10.0-linux-armv7l.tar.gz cd node-v6.10.0-linux-armv7l sudo cp -R * /usr/local/ cd
Avai Libraries are required to broadcast services through the network and iOS HomeKit is being able to find your device.
sudo apt–get install libavahi–compat–libdnssd–dev
Now we can start installing Homebridge from the node.js repositories:
sudo npm install –g —unsafe–perm homebridge
The installation process will take some minutes while compiling homebridge for your RaspberryPI. After the process was finished, we can start making a configuration for homebridge:
mkdir –p ~/.homebridgesudo nano ~/.homebridge/config.json
Now we can enter the default configuration for using the virtual room “HomeKit” in FHEM for your devices controlled by Siri/HomeKit:
{   “bridge”: {     “name”: “Homebridge”,     “username”: “CC:22:3D:E3:CE:30”,     “port”: 51826,     “pin”: “031-45-154”   },
“accessories”: [   ],
“platforms”: [     {       “platform”: “FHEM”,       “name”: “FHEM”,       “server”: “127.0.0.1”,       “port”: “8083”,       “filter”: “room=Homekit”     }   ] }
If FHEM is used with a user and password, following line can be added after “server”: “127.0.0.1”:
"auth": {"user": "<youruser>", "pass": "<yourpassword>"},
Close nano with CTRL+w and CTRL+x. To use homebridge with FHEM, the FHEM plugin must be installed for homebridge:
sudo npm install –g —unsafe–perm homebridge-fhem
To test homebridge manually, homebridge can be started by:
homebridge
With CTRL+c the process can be stopped. To start homebridge with system startup, we can add a homebridge entry to init.d:
sudo nano /etc/init.d/homebridge
Following code is starting homebridge with the user “pi” using the configuration in /home/pi/.homebridge/config.json:
#!/bin/sh
### BEGIN INIT INFO
# Provides: homebridge
# Required-Start: $network $remote_fs $syslog
# Required-Stop: $remote_fs $syslog
# Default-Start: 2 3 4 5
# Default-Stop: 0 1 6
# Short-Description: Start daemon at boot time for homebridge
# Description: Enable service provided by daemon.
### END INIT INFO
export PATH=$PATH:/usr/local/bin
export NODE_PATH=$NODE_PATH:/usr/local/lib/node_modules
PID=`pidof homebridge`
case "$1" in
start)
if ps -p $PID > /dev/null 2>&1; then
      echo "Homebridge is already running"
else
      su - pi -c "homebridge > /dev/null 2>&1 &"
      echo "Homebridge starting"
      $0 status
fi
;;
stop)
if ! ps -p $PID > /dev/null 2>&1; then
      echo "Homebridge is not running"
else
      kill $PID
      echo "Homebridge closed"
fi
;;
restart)
if ! ps -p $PID > /dev/null 2>&1; then
      $0 start
else
      $0 stop
      $0 start
fi
;;
status)
if ps -p $PID > /dev/null 2>&1; then
      echo "Homebridge is running PID $PID"
else
      echo "Homebridge is not running"
fi
;;
*)
echo "Usage: $0 {start|stop|status|restart}"
exit 1
;;
esac
exit 0
Close nano with CTRL+w and CTRL+x. Now we have to make homebridge executable:
sudo chmod 755 /etc/init.d/homebridge sudo update-rc.d homebridge defaults
Now the service can be started.
sudo service homebridge start
See more at http://blog.io-expert.com/siri-homeautomation-with-raspberry-pi


Comments