
Hardware components | ||||||
 |
| × | 1 | |||
Here's the original story in my blog on Medium.
The idea for this project came to me when I found a similar project described by a Russian maker in a popular online maker community, Geektimes.ru. His project used a wooden body, but I’m a true fan of a 3D printer, so I decided to make some enhancements, like a plastic body instead of wood. I’m using a MonoPrice III printer for all of my projects.
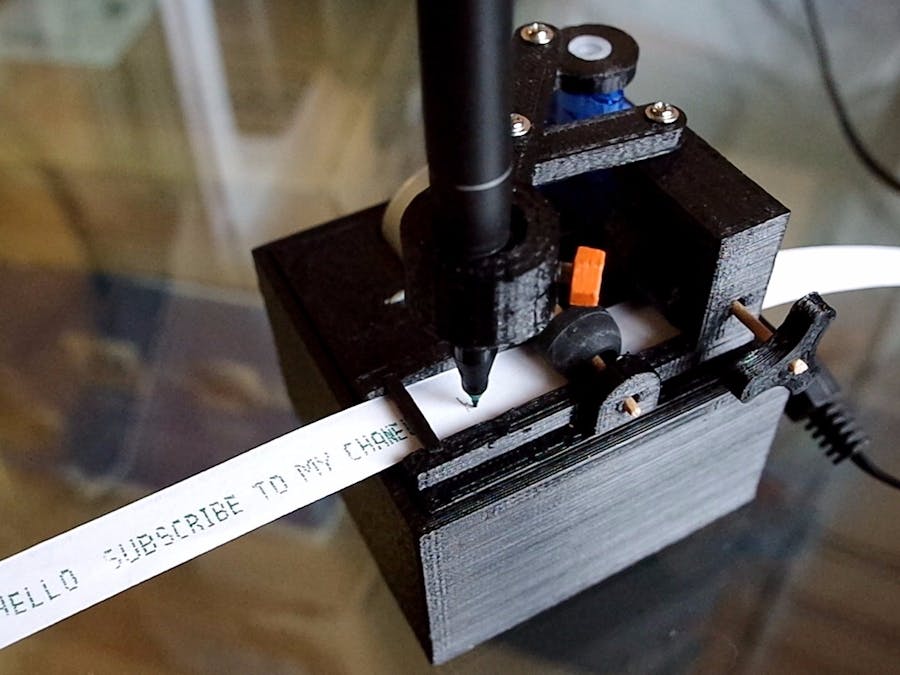
Two motors: Stepper Motor and ServomotorTwo different motors are used in this project. One pulls the telegraph paper and one rotates a pencil. A rubber bead put on a wooden stick (inserted into the first motor) will pull the paper forward. You’ll need telegraph paper for this to work, but if you do not feel like ordering that, you can cut any paper piece of paper to 0.43 inch width.
Servomotor, SG-90This is the motor I used, but you can choose any size that will fit into the small body of the gadget. Link to the servomotor on Ebay.
Again, this is the one I used, but you can replace with one that can fit into your body. Link to EBay.
0.1 Inch AxisAny material works for this, I selected a wooden one. See pics above.
Rubber beadBlack round bead shown in the photos above was taken from old, unused headphones. Or you can just buy spare parts on Amazon.
Solenoid, 5VThis pulls the paper up and down and is what is used to make spaces in the paper. Link to Ebay.
Any size is fine on this.
Arduino SketchArduino Sketch is able to print 128 different symbols, which includes Cyrillic and Latin symbols, as well as digits. If you want to add any other symbols, you can use Java-based font converter program on GitHub.
Here’s a link to the sketch file to download, and font converter.
When the program starts it types “Hello”.
Bluetooth Module HC-06This part is needed to connect the telegraph machine with your phone.
Android AppThe guy who created the original wooden telegraph mentioned earlier also developed the Android app that catches any push notifications on the phone, like text messages or tweets, and sends them to telegraph via Bluetooth.
This one fits into the small body of the telegraph so it is preferable.
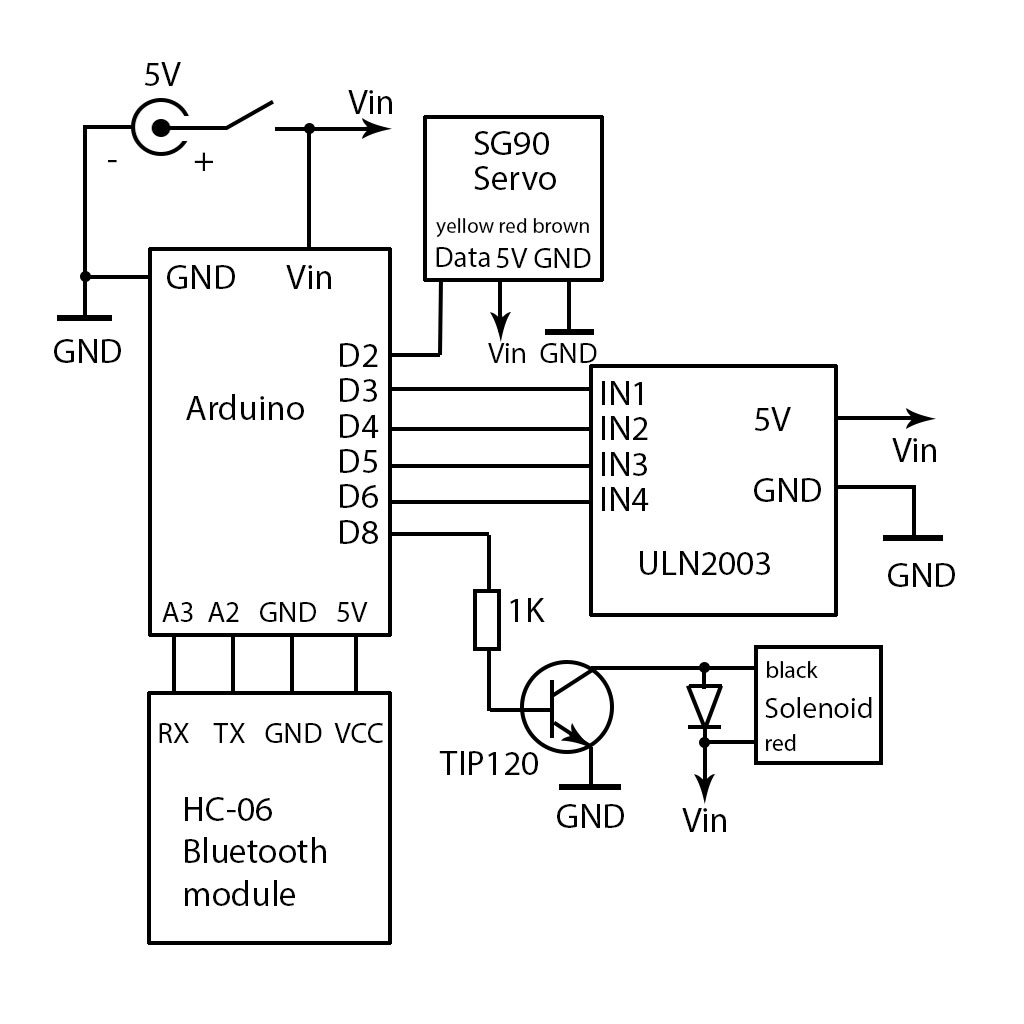
Small detailsYou’ll need a universal FR-4 Glass Fiber Breadboard, a diode, a one kOhm resistor and a TIP120 transistor. Telegraph assemble scheme is attached to the project below.
Telegraph body file in 3DI created a new body for the “future” telegraph machine that I built. Here’s a link for that. Please note that all the parts conveniently click into the body making construction very easy. Link to Givedownload.
The hardest part of the project is to adapt the quality of the printing.
When everything is in place, it’s time to test and send a text to the machine via Bluetooth. You can add the telegraph gadget as a remote bluetooth device in your settings. Don’t forget that Arduino port size is 64 bytes only. Don’t send messages that are too long — 64 characters is currently the limit.
My name is Savva Osipov, me and my dad are working on a Kickstarter campaign for our project that we are planning to launched in January. If you are interested in learning more and being kept up-to-date, subscribe to my YouTube channel!

Comments