


Hardware components | ||||||
 |
| × | 1 | |||
 |
| × | 1 | |||
 |
| × | 2 | |||
 |
| × | 1 | |||
Software apps and online services | ||||||
 |
| |||||
Most of us struggle between our lazyness and our last night‘s idea to wake up early this morning and be productive. why shouldn’t we try to make our own alarm clock ? It can be done using integromat and bolt IoT.CONNECTIONS:
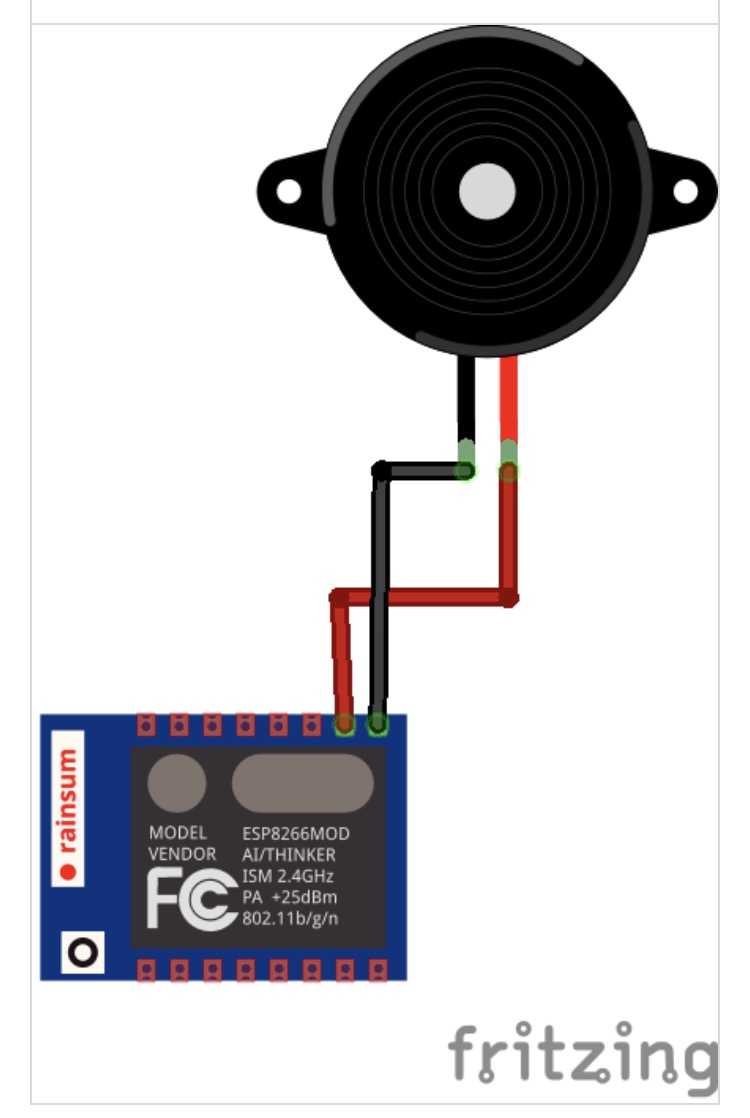
bolt device <——>Buzzer
shorter pin (-ve)<——> ground
longer pin(+ve) <——> pin 1
PROCEDURE:Step 1 :
• Finish the process of registering your bolt device to your bolt cloud account.
•Create a free account on Integromat.
Step 2:
•With the help of jumper wires, connect the buzzer to the wifi module according to the above connections.
•After finishing the connections, power on your bolt device.Since you have already registered your bolt device to your cloud account, both the LEDs should be glowing i.e; Green and blue LEDs.
Step 3:
• Login to your integromat account.
•Now, click on create a new scenario.Search for Bolt IoT and integrate it.
•Create a connection and fill in the API key which can be copied from your respective cloud account dashboard.•Now, select Write digital output command from the list of commands shown.
•Enter your device ID, select pin 1 as we conected the buzzer to it, choose state HIGH to switch on the Buzzer.
• Make sure to add a delay of a few seconds before switching off the buzzer.
• select sleep from the tools option and enter the number of seconds for which the buzzer should be ringing.
• Now to switch off the buzzer, click on adding new module and choose Bolt IoT again.
• The Bolt device ID, pin is same expect the state is set to LOW.
•As we generally use alarm to wake up in the morning, choose scheduling option ( clock icon) to set the time.Click OK to proceed. • Lastly, save the whole scenario.
• To check if the buzzer is working or not, try clicking on RUN ONCE button. • That’s it, your alarm clock is ready.


Comments