


Hardware components | ||||||
 |
| × | 1 | |||
| × | 1 | ||||
 |
| × | 1 | |||
 |
| × | 1 | |||
 |
| × | 1 | |||
 |
| × | 1 | |||
Software apps and online services | ||||||
 | ||||||
Hand tools and fabrication machines | ||||||
 |
| |||||
In this project we will display your twitter feed on a 20x4 LCD display. It will help you monitor your twitter home timeline continuously as and when new tweets are posted.
As we are using a 20x4 LCD display, which can display 80 character at a time, and a tweet can typically by 140 characters long, we have to display the tweets in two pages.
Hardware setupLet's first build the circuit. Once you have got everything in the component list, start by solder the header pin to the LCD display. Typically, you will get the LCD display without the pins soldered. Get a 16 pin single row male connector strip and solder it like this:
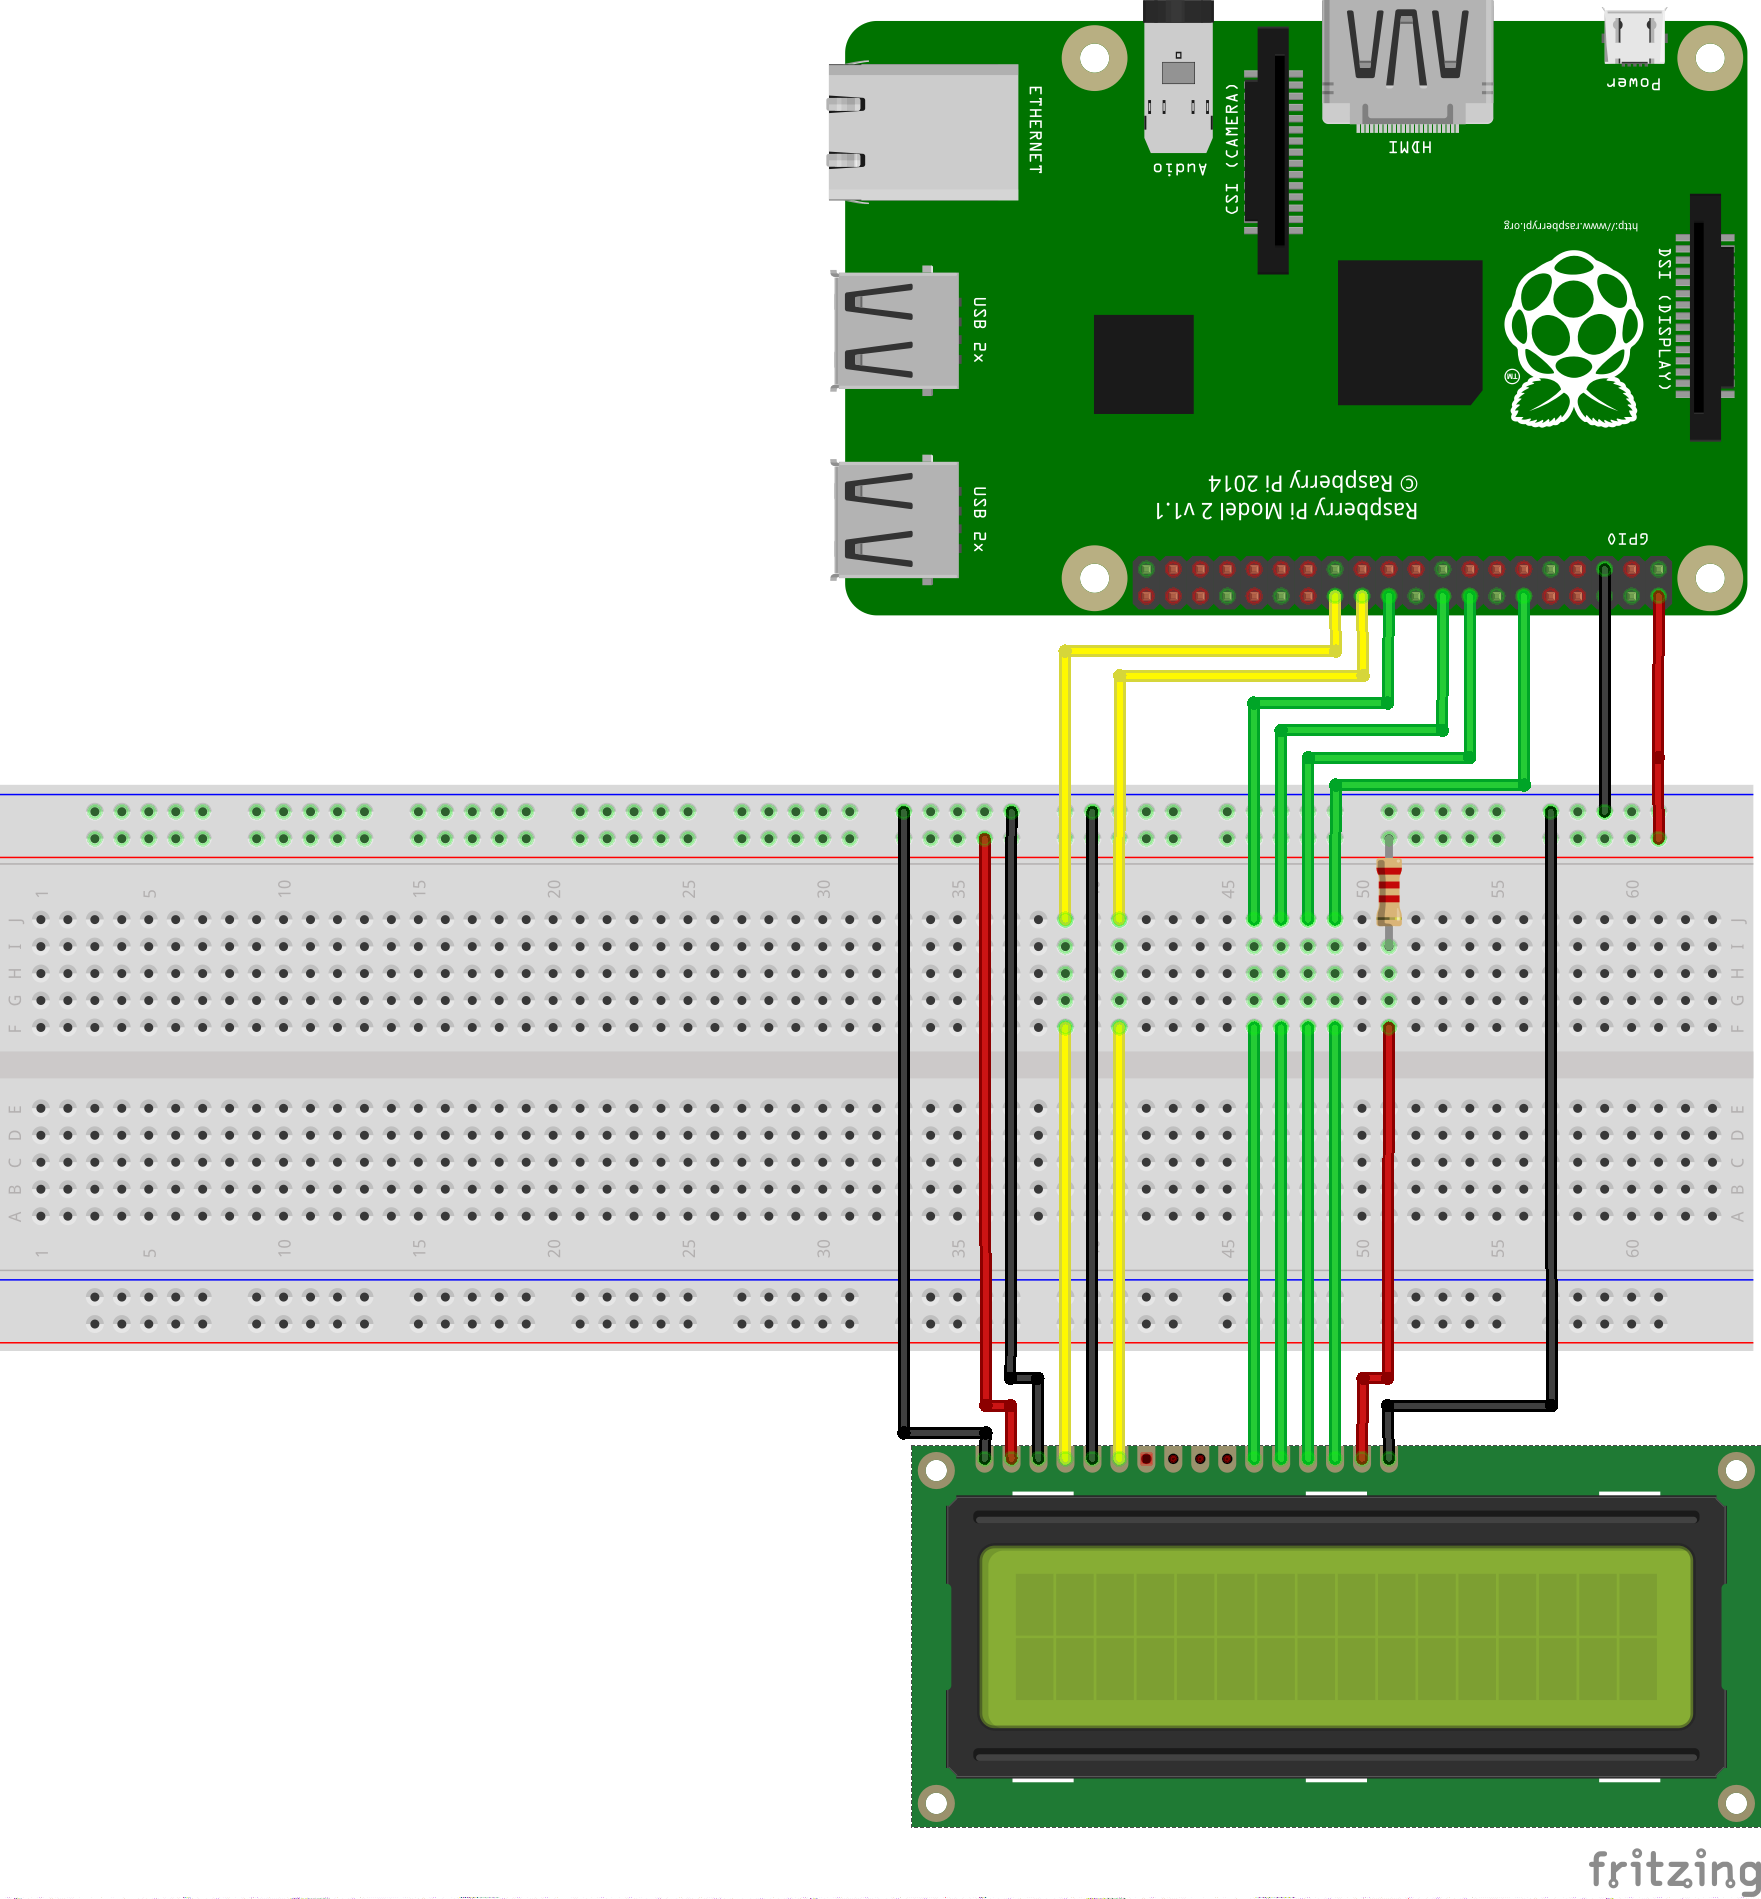
Now connect the LCD board and the Raspberry Pi GPIO pins using a bunch of jumper wires as per the schematic diagram.
- LCD Pin 01 (GND) - connect to RPi Pin 06 (GND)
- LCD Pin 02 (VCC) - connect to RPi Pin 02 (+5v)
- LCD Pin 03 (V0) - connect to RPi Pin 06 (GND). Optionally you can route it through a 10K potentiometer to adjust contrast.
- LCD Pin 04 (RS) - connect to RPi Pin 26 (GPIO 7)
- LCD Pin 05 (RW) - connect to RPi Pin 06 (GND)
- LCD Pin 06 (E) - connect to RPi Pin 24 (GPIO 8)
- LCD Pin 07-10 (D0-D3) - Not used
- LCD Pin 11 (D4) - connect to RPi Pin 22 (GPIO 25)
- LCD Pin 12 (D5) - connect to RPi Pin 18 (GPIO 24)
- LCD Pin 13 (D6) - connect to RPi Pin 16 (GPIO 23)
- LCD Pin 14 (D7) - connect to RPi Pin 12 (GPIO 18)
- LCD Pin 15 (A) - connect to RPi Pin 02 (+5v) via 560 Ohm
- LCD Pin 16 (K) - connect to RPi Pin 06 (GND)
Voltage on LCD pins 15 and 16 determines the LCD backlight brightness. You can use a variable resistor to adjust brightness. But, make sure you do not connect it directly to 5v.
TwitterTo be able to access your own twitter feed programmatically, you first need to create a application.
Go to https://apps.twitter.com and create a new app. Once you have created an app you get the following four keys. Note these down as we will need them in our program.
- Consumer Key (API Key)
- Consumer Secret (API Secret)
- Access Token
- Access Token Secret
We will write our program in Python. Assuming you are running the latest version of Raspbian, you will need to install the following libraries. SSH into your RPi and type the commands.
RPLCD library for controlling the LCD display:
$ sudo pip install RPLCD
python-twitter library:
$ sudo pip install python-twitter
Now, open a text editor using the command:
$ nano twitter-lcd-display.py
Paste the code from the code section and replace the keys with the ones from the twitter app you have created.
You can start the program using the command:
$ python twitter-lcd-display.py
To put it in background, so that it runs even if you sign out of your RPi, use the command:
$ nohup python twitter-lcd-display.py &


_3u05Tpwasz.png?auto=compress%2Cformat&w=40&h=40&fit=fillmax&bg=fff&dpr=2)

Comments