


Hardware components | ||||||
| × | 1 | ||||
Software apps and online services | ||||||
| ||||||
CARDBOARD FURNITURE
Final table and model
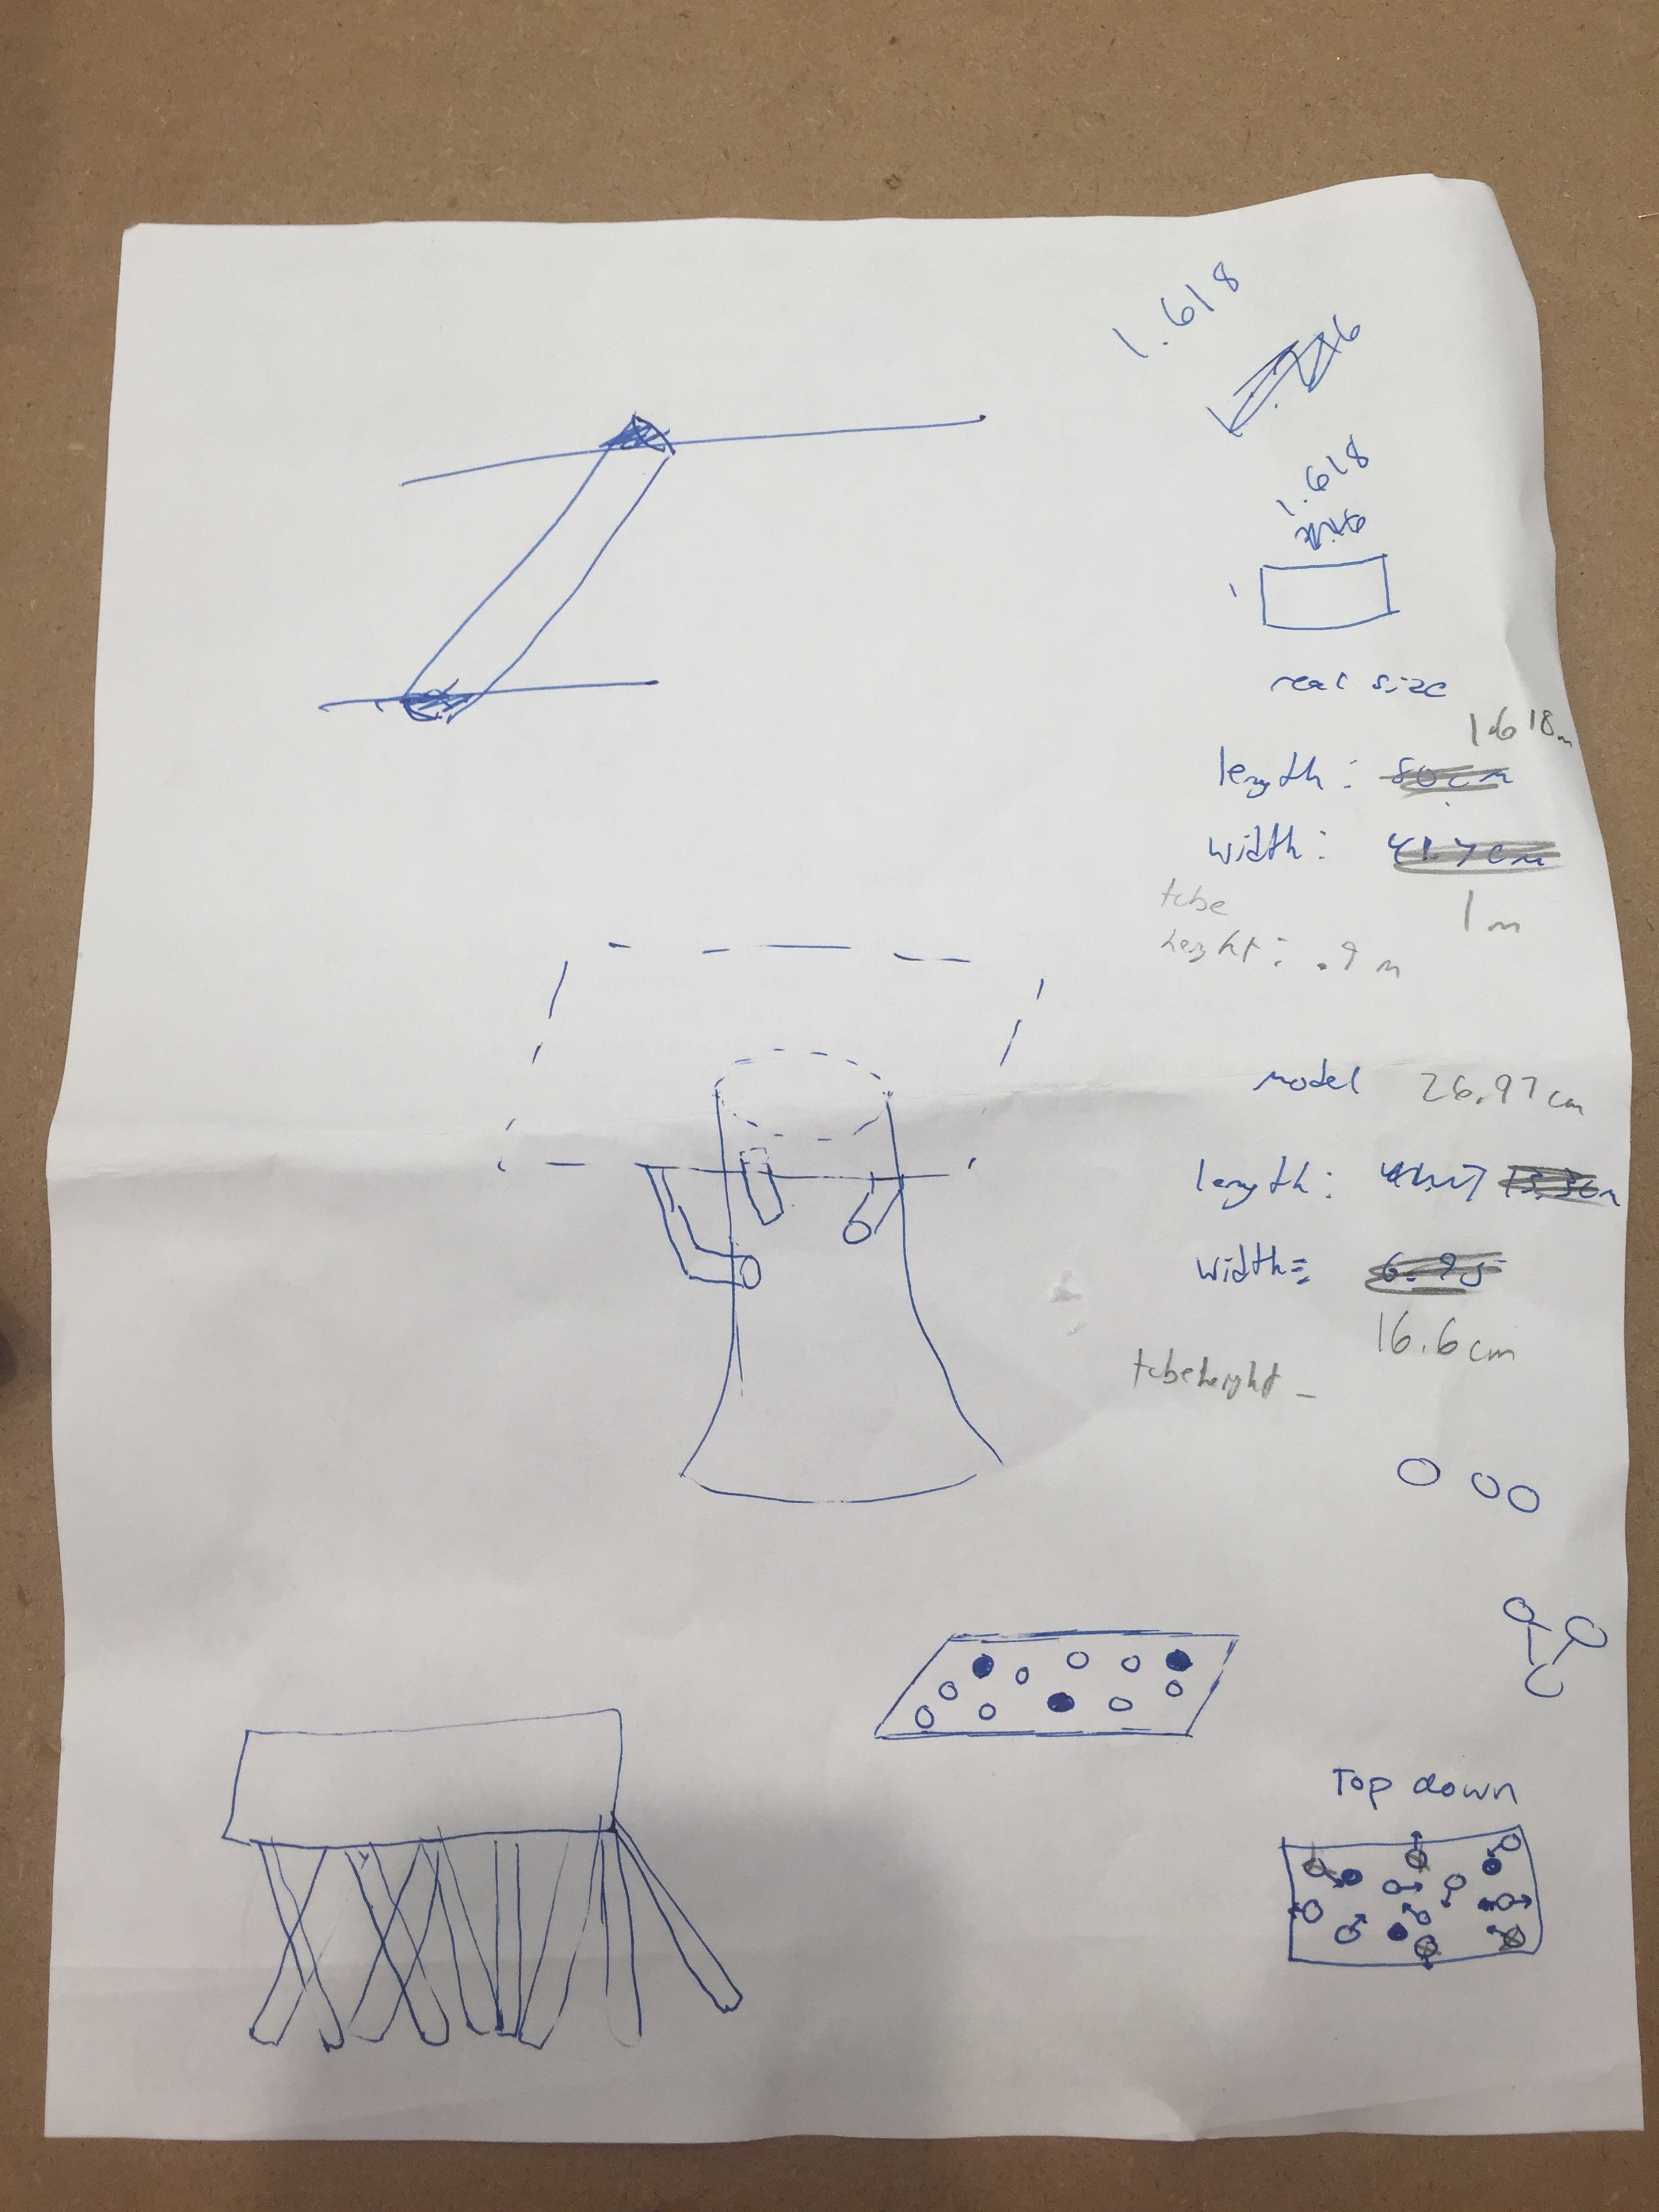
Our first challenge was putting our ideas on paper. We knew we wanted to make something abstract using cardboard tubes, and after some careful planning we settled on a design.
The first design was a tree-like table with small tubes branching out from a big center tube (sketch in middle of the page).
First we layered a few pieces of cardboard together, glued them, and cut them to make a tabletop.
We cut wooden dowel rods with a handsaw at varying lengths.
We then poked small holes in the bottom layer and hot glued the legs into them.
We used some cardboard supports to hold up the legs while the glue dried.
Finally we sanded the ends of the legs to (hopefully) make them level with the ground.
With the model done, its time to move on to the real deal.
We salvaged as much usable cardboard as we could for our tabletop.
We decided on a length and a width using the golden ratio, and cut out each layer the same size.
At first, we glued them together using a paintbrush and wood glue. Little did we know, Dave had a much more efficient solution.
Using Dave's advice, we diluted the glue with water and used a paint roller to cover a large area with glue fast.
We stacked layer on layer on top of each other to reach our desired thickness.
Or tubes finally arrived! We ordered 12 cardboard tubes with a 4 inch diameter.
The first thing we did was cut our 3 straight legs. These 3 will hold most of the weight of the table.
After the 3 straight tubes were cut, we attached them to the table in a triangle.
Next, we marked out a place and direction for each of the angled legs, labeled with the angle, direction, and unique number for each tube.
We cut one end on each of them using a heavy-duty saw, some at a 25 degree angle and some at a 30 degree angle. Each were given a number to correspond with the number on the table.
After one side of all the legs were cut, we laid out where each would go and cut a few layers into the cardboard so they wouldn't fall out when we glued them.
Finished all the holes, no we need to fit in the tubes.
After fitting the tubes to their corresponding holes, the table really started taking shape. At this point, none of the angled legs had been cut on the other side or glued in.
We then made a device to make a level mark on each of the tubes. If we put the table on the ground, the wooden structure would be at the exact height we wanted to cut the bottom of the legs.
Finished device. We put 3 screws on each of the corners to secure it together.
Using the device, we marked the other angle on the tubes.
Using the heavy-duty saw, we cut each tube at our marked angles.
After fitting them all back on the table, they're all level!
We then used wood glue to glue all of the legs into their designated spots.
After some sanding on the edges, our table is done!


Comments