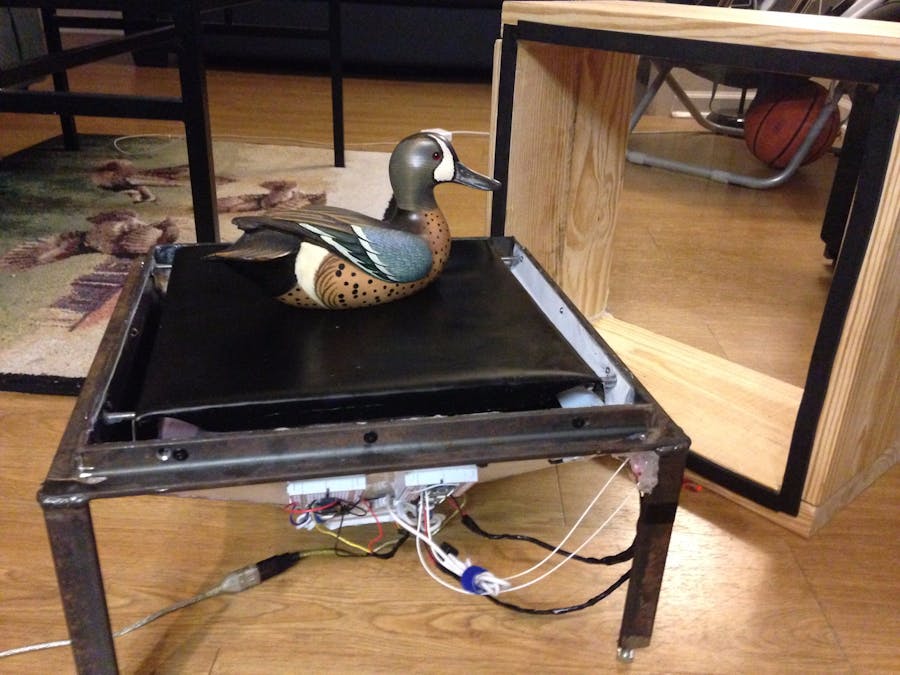
For our project we decided to make a carbon fiber vacuum chamber. Normal methods for vacuum forming involve a type of vacuum bagging. This method works well for flat parts or simple parts with curves, but can struggle with parts that have big crevasses or abnormal features. To combat this we decided to build a vacuum chamber that in theory should allow for complex parts to be successfully vacuumed. The chamber itself is a metal frame 15in x 15in made out of .75in angle iron. The component we decided to use to create the vacuum is a simple 3 wire computer fan.
The fan is connected to the chamber via the aluminum duct work. The part to be made rests on a 14in x 14in aluminum bed that is centered in the 15in x 15in frame to allow for 1in of space all around. The top is made out of wood with a plexiglas glass top to allow the user to view the part while its being vacuumed.
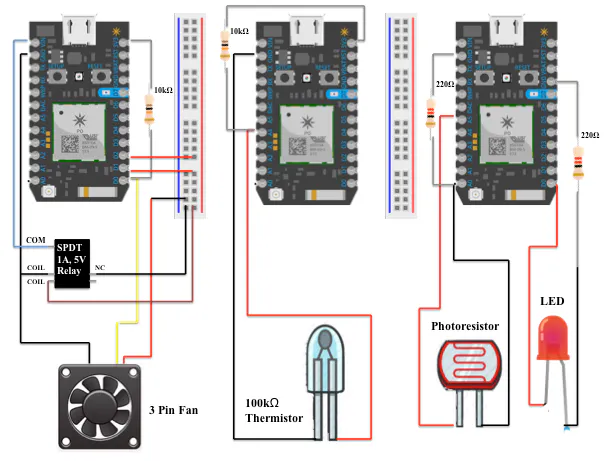
Now for the electrical side of the project. To start we have mounted a photo resistor on the lip of the stand to tell when the lid is on or if it is off. When the photo resistor detects that the lid is on it sends the signal over to the lid photon. Then the fan photon subscribes to our lid photon, powering on the relay, in turn powering on the computer fan when the lid is on. To ensure the temperature stays within the correct range for the epoxy and hardener we installed a thermistor in the duct work which communicates with our temp photon which sends the data to the console on particle.io.
Here is our graphical representation of the data collected from each sensor. The thermistor was increased by placing thumb over top sensor. The fan was purposefully brought close to stall and brought back up to 300rpm. Finally, the lid sensor just shows ON or OFF.
Generated with Microsoft Excel


Comments