

Hardware components | ||||||
 |
| × | 1 | |||
| × | 1 | ||||
| × | 1 | ||||
| × | 8 | ||||
 |
| × | 8 | |||
 |
| × | 1 | |||
Software apps and online services | ||||||
| ||||||
 |
| |||||
Hand tools and fabrication machines | ||||||
 |
| |||||
 |
| |||||
Hi,
In this post I will show you how you can build a diy seven segment display with the help of a 3D printer, an arduino and some led bars.
Needed tools:- 3D printer
- soldering iron
- cutting pliers
- wires
- BSS138 (8pcs)
- 10k resistors(8pcs)
As usual for my 3D designs I’m using FUSION 360. I will add directly the STL files because scope of this article is not to teach you how to work in Fusion 360 :-). If you want to learn it than you can find plenty of youtube tutorials. I can recommend this one https://youtu.be/sw8BW0IXWZw. My design is an update of this one. Update consist in dimension (mine is 125x85mm), interlinkable design, fitting of the electronics onboard, fixing points, cover.
For downloading the parts go to this address on thingiverse .
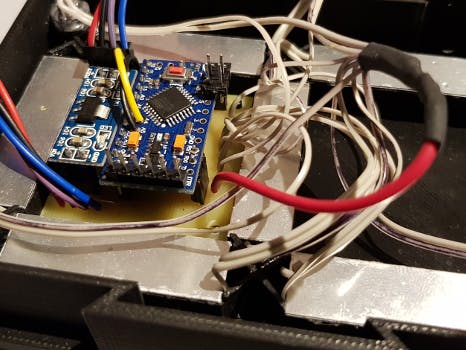
Schematics:Schematics are made with eagle, but started in Fritzing. Please use the eagle version and also take in account that you will need to solder some jumpers on pins on D8,D7,D6 and also a resistor for the DOT led. In short future I will update the schematics with this change.
Here you can download the schematics:
Software:I will show you 2 versions of the software. But before make sure that you have arduino ide installed and seg7 library.
First version is a simple standalone counter for the display:
/*  7 segment display counter

    This sketch counts from 0 to 9 on a 7-segment display

    The circuit:

           A
          ____
         |    |
      F  |____|  B
         | G  |
      E  |____|  C
                o DP
           D

      7-segment 10-pin package:

      10 9 8 7 6
       ________
      |   __   |
      |  |__|  |
      |  |__|o |
      |________|

      1 2 3 4 5

      * If you have a common cathode device, uncomment line X
      * You only need to connect either pin 3 OR pin 8
      * 1 (E) connect to arduino pin 4
      * 2 (D) connect to arduino pin 3
      * 3 common-anode connect to +, common-cathode to -
      * 4 (C) connect to arduino pin 2
      * 5 (DP) connect to arduino pin 7
      * 6 (B) connect to arduino pin 1
      * 7 (A) connect to arduino pin 0
      * 8 common-anode connect to +, common-cathode to -
      * 9 (F) connect to arduino pin 5
      * 10 (G) connect to arduino pin 6

      This example is placed in the Public Domain and is free
      for your use/modification for any purpose
*/

#include "Seg7.h"

Seg7 s7;  // object

void setup()   {
  s7.set_cathode(true);  // set for common-cathode
  s7.attach(10, 13, 15, 17, 14, 12,11, 16);  // attach a single 7-segment display
//Serial.begin(9600);
}

void loop()
{
  for (int i = 0; i < 10; i++) {  // count from 0-9
    s7.write(i);
    //Serial.println(i);
    delay(1000);  // wait 1 second
  }
}
Now, below comes the magic of making this display interlinkable with I2C. For this purpose we will need a master arduino (I was using a arduino micro) and the arduinos from the digits will be the slaves. Remember that I told you that you will need to add some sumpers? Well with those jumpers we will establish the address of the digits. Current version of software suport as much as 4 digits linked. If you add a 3’th jumper you will be able to go to 10 digits. But enough with the talks and let’s go to the software:
Slaves:
#include "Seg7.h"
#include <Wire.h>

Seg7 s7;
int x, oldx;
void setup() {
  //Address handling pins
  pinMode(8, OUTPUT);  pinMode(6, INPUT);  pinMode(7, INPUT);
  digitalWrite(8, HIGH);

  int adress = 1;//here we establish the adress of the digit
  if (digitalRead(6) == HIGH) adress += 1;//here we establish the adress of the digit
  if (digitalRead(7) == HIGH) adress += 2;//here we establish the adress of the digit

  s7.set_cathode(true);
  s7.attach(10, 13, A1, A3, A0, 12, 11, A2); // attach a single 7-segment display
  /*below are the pin config
             A[10]
            _____
           |     |
    [12]F  |_____|  B[11]
           |G[13]|
    [A1]E  |_____|  C[A0]
                  o DP[A3]
             D[A2]
  */

  Serial.begin(9600);
  Serial.print(adress);
  Wire.begin(adress);                // join i2c bus with address #2
  Wire.onReceive(receiveEvent); // register event
  x = 0;
  oldx = x;
}

void loop() {
  // put your main code here, to run repeatedly:
  if (oldx != x) {//only update if we have a change
    s7.write(x);
    oldx = x;
  }
  //delay(100);
}

//what is received via I2C is shoun on the display
void receiveEvent(int howMany) {
  while (1 < Wire.available()) { // loop through all but the last
    char c = Wire.read(); // receive byte as a character
  }
  x = Wire.read();    // receive byte as an integer
}
Master:
#include <Wire.h>
void setup() {
  // put your setup code here, to run once:
  Wire.begin();
  Serial.begin(9600);
}
int nDevices, u;
int adrese[10];
int contor = 999;
void loop() {
  // put your main code here, to run repeatedly:
  scanare();//make a scann to see if aditional digits were added
  for (int j = 0; j <= contor; j++) {
    if (j <= (contor % powint(10, nDevices))) {
      numar(j);
      delay(100);
    }
  }

  delay(5000);
}


// transmit to device
void numar(int nr) {
  for (int i = 0; i < nDevices; i++) {
    u = ((nr / powint(10, i)) % 10);
    Wire.beginTransmission(adrese[nDevices - i - 1]);
    Wire.write(u);
    Wire.endTransmission();
  }
}

void scanare() {
  byte error, address;
  nDevices = 0;
  for (address = 1; address < 10; address++ )
  { Wire.beginTransmission(address);
    error = Wire.endTransmission();
    if (error == 0)
    { adrese[nDevices] = address;
      nDevices++;
    }
  }
}

//function used for rais an int at a specific power
int powint(int x, int y)
{
  int val = x;
  for (int z = 0; z <= y; z++)
  {
    if (z == 0)
      val = 1;
    else
      val = val * x;
  }
  return val;
}
You can find the above code also on my github page.
And of course the youtube video:


_t9PF3orMPd.png?auto=compress%2Cformat&w=40&h=40&fit=fillmax&bg=fff&dpr=2)


_3u05Tpwasz.png?auto=compress%2Cformat&w=40&h=40&fit=fillmax&bg=fff&dpr=2)
Comments