



Hardware components | ||||||
 |
| × | 1 | |||
 |
| × | 1 | |||
 |
| × | 1 | |||
Software apps and online services | ||||||
 |
| |||||
| ||||||
| ||||||
Are programming languages getting you overwhelmed? How hectic it feels to type lots and lots of statements and commands to execute a small chore. How do you react when I say that you can switch ON/OFF the light with just one command. sounds interesting right. why to wait lets start working then.Now most of you may be wondering where to start at. Do not worry it just takes 5 minutes to complete this task.
I believe most of them are acclimated with google assistant. Well!! There are many tasks that google assistant can do like setting alarm, reminders, calling, browsing and so on. But what if I say you can switch on the lights of your room using Google assistant with just one command. Sounds like fun right. Yes it is because Bolt wifi module and Bolt IoT cloud makes your lights turn on with just one command.
Moreover, you dont need heavy hardware setup to perform this. You just need Bolt wifi module, your phone with internet access.
So lets start with the first step
STEP 1
HARDWARE SETUP
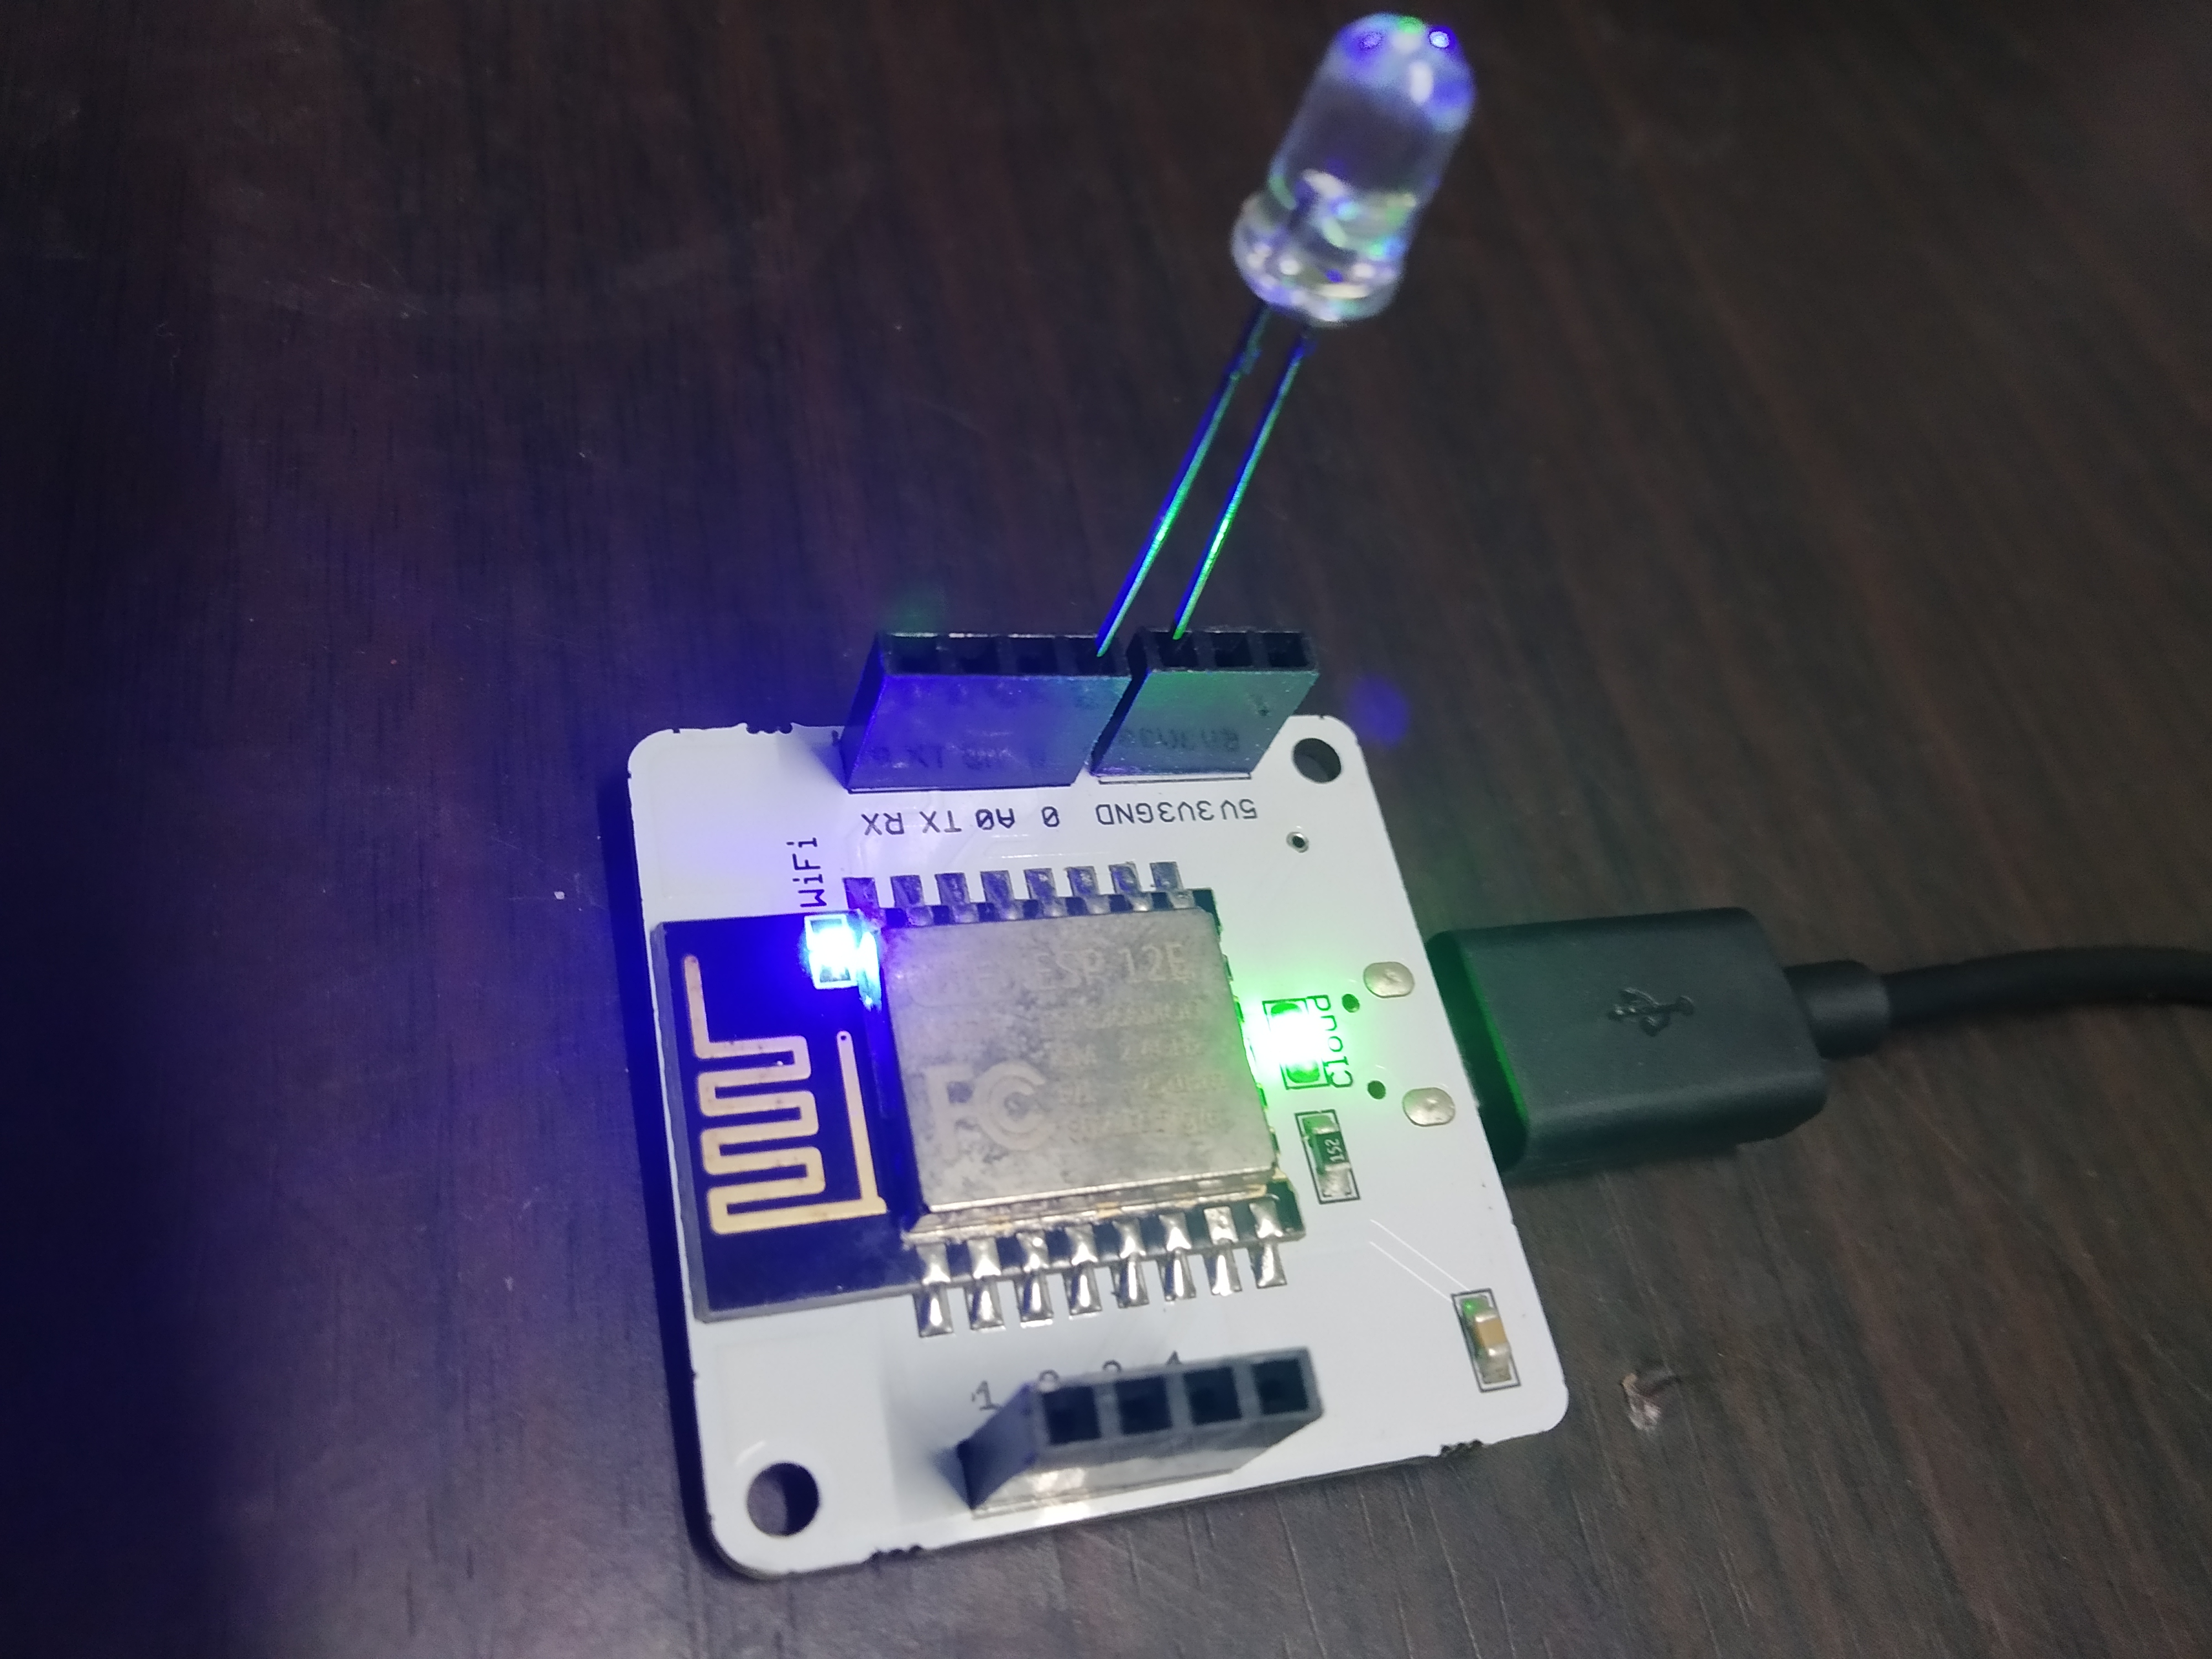
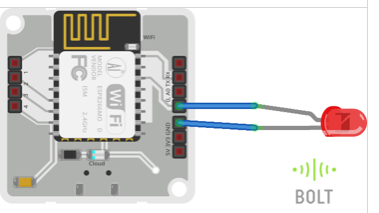
Connect the shorter leg of the Light emitting diode to the Ground(GND) and long leg to the pin 0( You can connect to any GPIO pins from 0, 1, 2, 3, 4) on Bolt wifi module.
Switch on the bolt module by connecting to a 5v power supply with USB cable.
Thats it you are all set with the harware connections.
NOTE: Do not switch on the bolt module before connecting LED.
STEP 2
Save Bolt API KEY and Device ID
- BoltAPIkey -> This is your API key for the Bolt Cloud. Visit this link to find your API key. Press enable button and show API Key to see your API Key.
- Deviceid -> This is the ID of your Bolt device. It will be something like BOLTXXXXXXX. You will find it in your Bolt IoT account also see your Bolt ID in your bolt mobile application.
- Copy and save both API KEY and Device ID somewhere.
Step 3
Insertingkeys in the command
Since LED is a digital output device, we will need to get a Digital Write command that can be sent to Bolt over the Internet to switch on the LED.
Click here Bolt Cloud go to API Tab -> API Documentation -> GPIO Commands API -> Write Digital Output, to understand how to create a API command link to turn on or turn off a pin of the Bolt.
Command syntax
https://cloud.boltiot.com/remote/API_KEY/digitalWrite?pin=PIN_NUMBER&state=HIGH/LOW&deviceName=DEVICE_ID
Substitute below keys in the above command:As mentioned above Copy the previously saved API KEY and Device ID and substitute in the above.PIN_NUMBER: Substitute the GPIO Pin to which you have connected the LED. Values can be either 0, 1, 2, 3 or 4HIGH/LOW: This value indicates if you want to turn on/off the LED. HIGH will turn it on, LOW will turn it off.
Here is my sample url command command to turn ON the LED.
Command to turn off
NOTE: You can connect to any GPIO pin, but do not forget to change mention it in the url command. There will be different API keys and device ID for different Bolt module, do not copy the above mentioned keys in the command.
Step 4:
Linking IFTTT with gmail and triggering with Google Assistant and Webhooks
Go to IFTTT by clicking here
Login using your Gmail account.
Followthe instructions mentioned under every image.
NOTE: Make sure you use same gmail account which you'll be using on your mobile to interact with Google Assistant.
Method will be GET
Content type will be Application/json
Now you can change the url command to turn off the LED.
click save and test with the google assistant
Now get your Android phone and say two magical words "OK Google" along with the instructions to see the magic happen.
Conclusion
This was just a beginning to the wonder land, you could do many more technical wonders with just one Bolt wifi module. Have a look at these project here You can check out some other projects from Bolt IoT here.
Schematics
Components
With this one wifi module we can perform multiple operations. with this beginning stage projects we can get handy even for the intermediate and hard projects.


Comments