I always have been interested in measure humidity and temperature. I decided to create a device that measures those variables and send them to an IoT platform.
I decided to create this device because I want to see a graphic about temperature and humidity throughout the day.
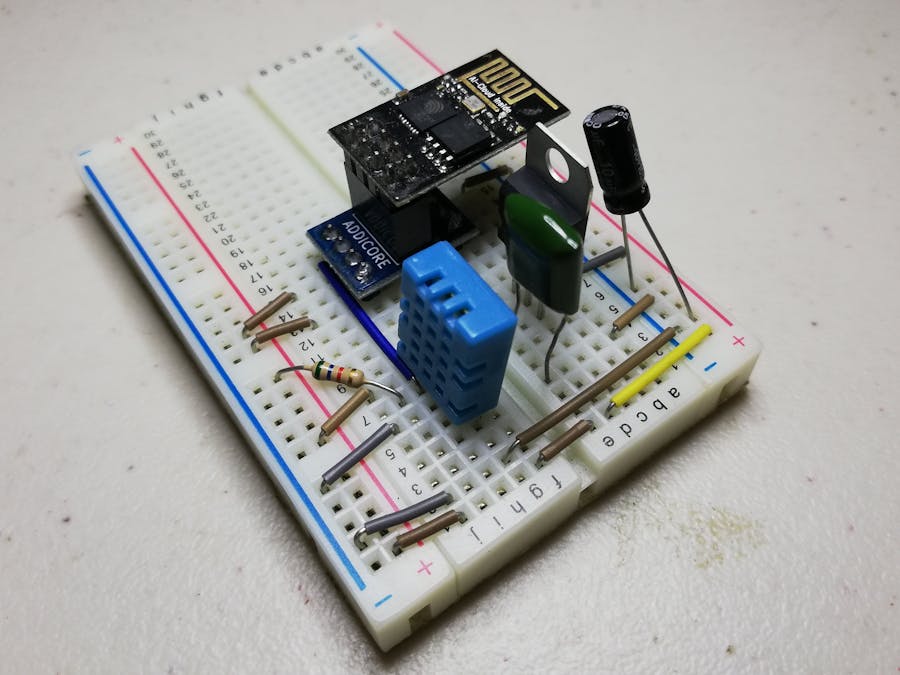
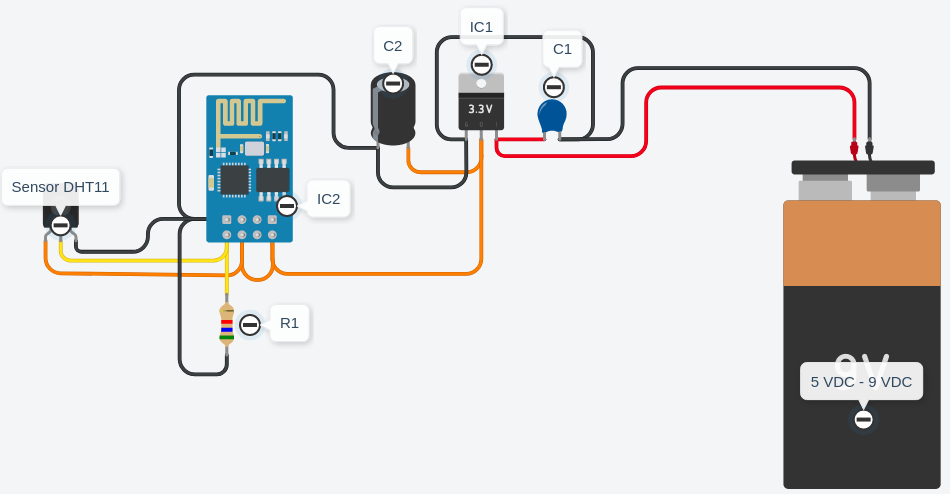
The device is based on a cheap ESP-01 and a DHT11 humidity and temperature sensor. The data is sent every minute to Adafruit IO and it shows them in dashboards.
You can see the data in real-time in the following link:
https://io.adafruit.com/rjconcepcion/dashboards/temperatura-and-humedad
If you have any questions, just let me know.
I hope you enjoy this project.
Note: If you are having issues connecting, please ensure you have the latest Adafruit IO Arduino library.


Comments