


Hardware components | ||||||
_ztBMuBhMHo.jpg?auto=compress%2Cformat&w=48&h=48&fit=fill&bg=ffffff) |
| × | 1 | |||
| × | 1 | ||||
 |
| × | 1 | |||
 |
| × | 1 | |||
Hand tools and fabrication machines | ||||||
| ||||||
| ||||||
| ||||||
Hi everybody!
I will show you a project that will entertain your children or even yourself. It is a pinwheel (which I will show you how to build your own) controlled by Arduino and a button for switching.
DemonstrationBuilding the PinwheelThat is all you need:
- a perfect square made of cardboard (with the side of about 12cm / 4,7in)
- a ruler
- a pen
- scotch tape
- scissors
With the aid of a ruler, track with the pen the two diagonals of the square. The point where these two diagonals intersect will be the center of the square.
We see that we have divided the square into four triangles.
With a steady hand, cut along the newly marked lines from the corners and going towards the center; we pay attention to stop approximately 4 cm (1,6 in) before reaching it (watch the picture below for clarity).
Once you make the four cuts raise the left corner of the first of the four triangles, with the greatest care not to ruin the roundness and attach it on the center using the tape.
You can also make small cuts around the center where tuck the corners and secure them with tape from the back.
Now make a hole at the center of the pinwheel, where we're going to attack the axis of our engine.
Ok the pinwheel is ready. Let's go to do all the nerdy things.
Recycling the DC MotorAs I said at the beginning there is no need to buy the engine. We can recycle an old portable CD player which you may have in your home and that you will not use more. Let's see how.
Open the CD player:
Now we have to disassemble the piece inside the red rectangle.
The piece inside the red rectangle is the DC motor that we need: unmount it.
Ok. Now we have everything we need. We finish the installation, and run the pinwheel.
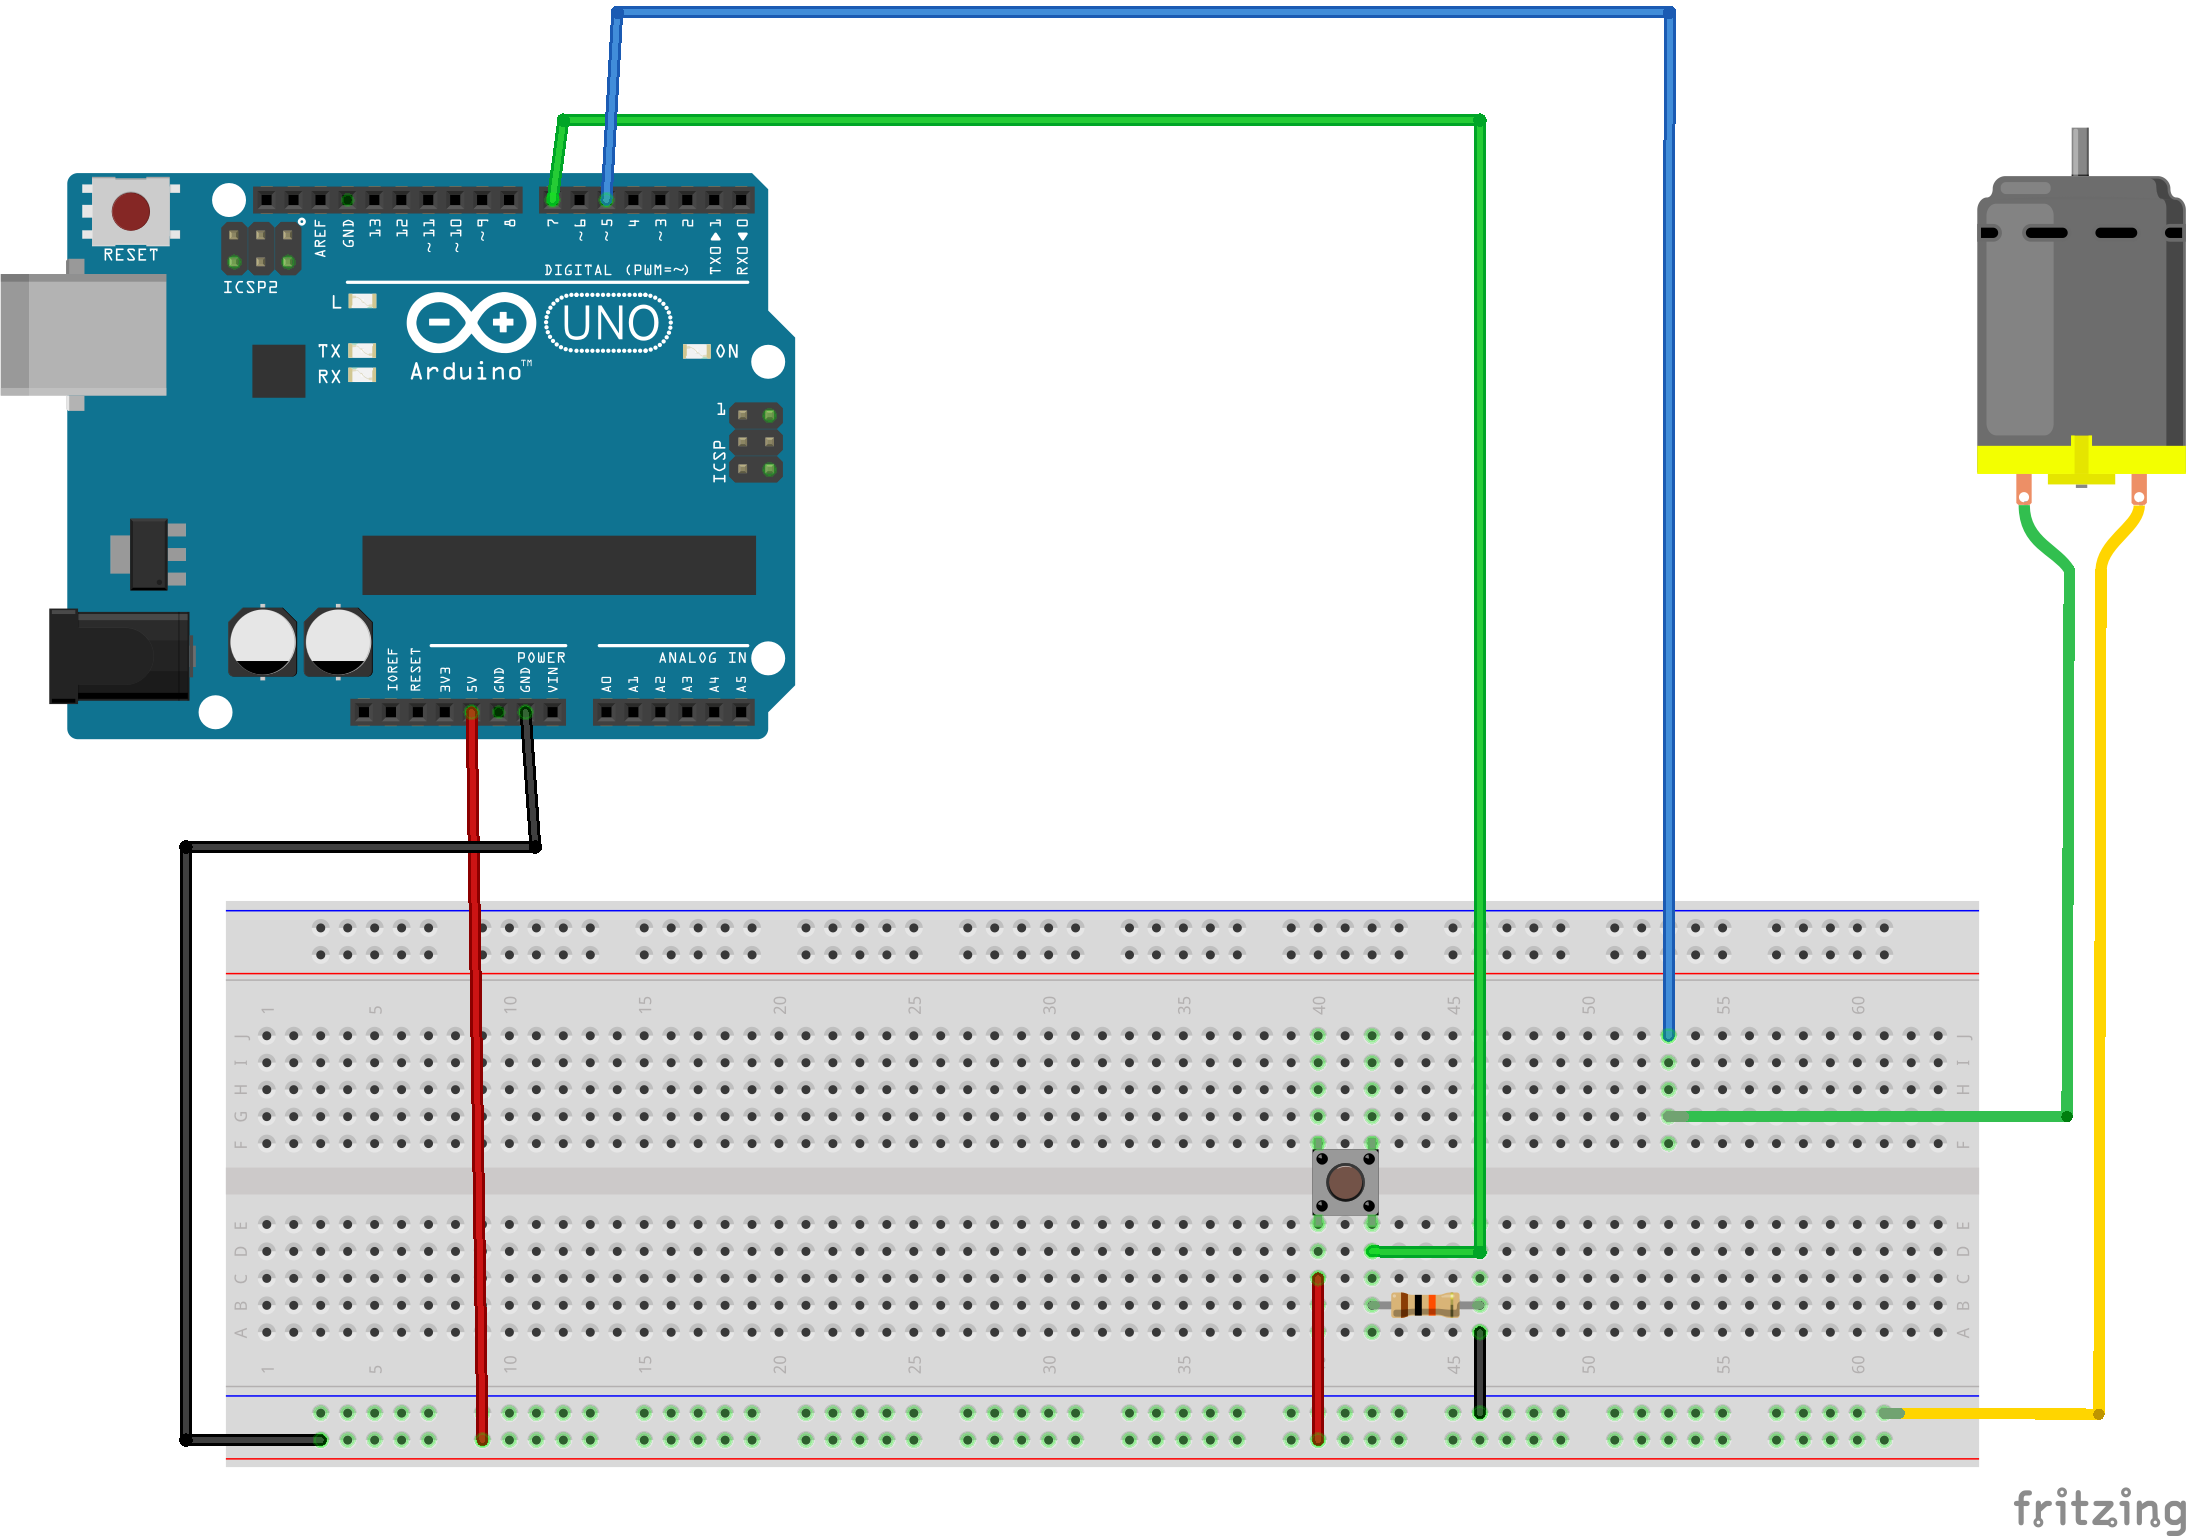
InstallationFollow this scheme to assemble all the pieces:
Now download the Arduino sketch or copy it in a new one. Click on upload, and good fun!


_3u05Tpwasz.png?auto=compress%2Cformat&w=40&h=40&fit=fillmax&bg=fff&dpr=2)


Comments