
Hardware components | ||||||
| × | 1 | ||||
 |
| × | 10 | |||
 |
| × | 10 | |||
Software apps and online services | ||||||
 |
| |||||
| ||||||
| ||||||
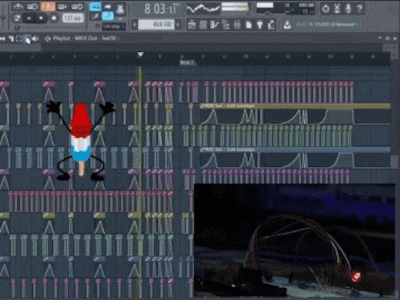
Hello my friends in this project I made a led midi controller using Arduino and fl-studio to synchronize between music and lights, in order to do that I had to made a research about midi messages witch is the most important thing in this project. I know that there are some midi libraries in Arduino that can do the work for you without any knowledge about midi messages but midi messages is a grate thing to add to your knowledge so I recommend you to search about it. I used the leds with midi messages because of that the only thing I have and can use with it so this project is not limited to leds with a batter materials you can use midi to automate robots movement or synchronize between music and fountains...
II- Explanation:1- About the project:This project is a very simple project, all you need to have is the basic knowledge about pwm pings and serial communication on Arduino.
2- About midi messages:So, MIDI is a music description language in digital form also it is used for communication between musical instrumentation.
Etch midi message consist at maximum of three bytes:
The first one is the status byte and it holds information about the midi message and the other two are data bytes and they hold the data of the message
and there are a lot of types in midi messages
In our case we will use cc midi messages and they consist of three bytes. The first 4 bits of the status byte hold the value of 11 which indicate a cc midi message and the other 4 hold the number of communication channel. The first data byte holds the controller number which is in our case the led number.
The second data byte holds the controller value and it controls the brightness of the led:
Usually we use a midi to usb cable to connect a midi devise to the computer
In my case it will cost a lot of money but we can use this two programs:
The first one is loop midi that will create a virtual midi devise to the system in order to connect it to fl-studio. The second one is hairless midi that will connect the virtual midi to the serial of the Arduino and debug the messages too.
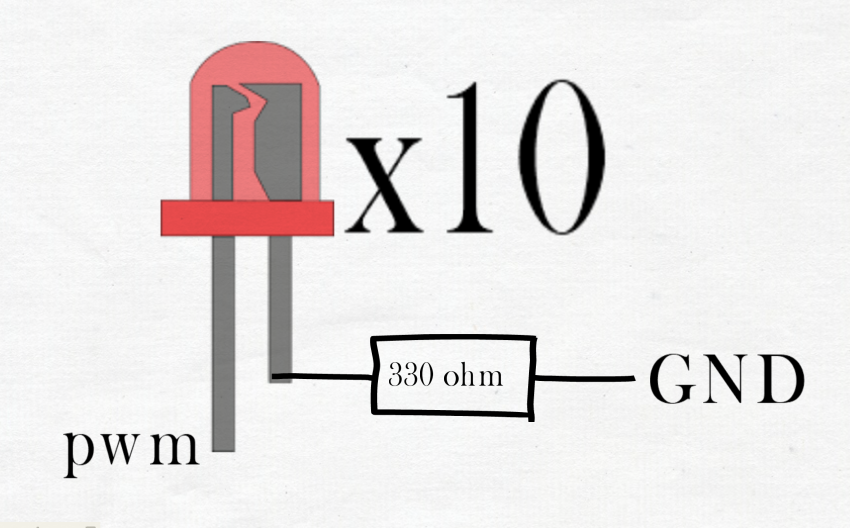
4- The circuit:The circuit is very simple, we will use 10 leds connected with pwm pins in Arduino mega in order to control the brightness. In series with 330ohm resistors:


Comments