

Hardware components | ||||||
 |
| × | 1 | |||
Software apps and online services | ||||||
| ||||||
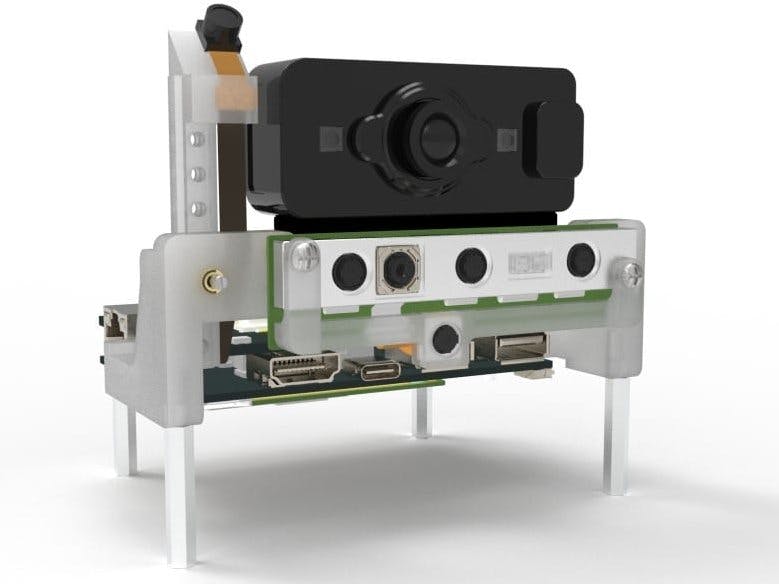
This project is designed to show how you can use the Qualcomm® Robotics RB3 development kit, specifically using the Qualcomm® Hexagon™ DSP with Hexagon Vector extensions (HVX), coupled with Hexagon DSP SDK to achieve high speed and high performance on device Machine Learning.
ObjectiveThe idea for this project is to use Hexagon DSP in combination with Hexagon SDK to build an optimized multimedia app, while overcoming development hurdles such as lack of battery and insufficient processing power. Additionally, the goal was to build a compelling Image Classification app to showcase on-device Machine Learning, with the ability to offload high computational burdens from the CPU to a heterogeneous computing environment like DSP.
Materials Required / Parts List / Tools
Source Code / Source Examples / Application ExecutableSource Code for Image Classification
Additional ResourcesBuild / Assembly InstructionsBuilding the Image Classification application is done in 2 parts.
The first part involves generating Hexagon compatible shared libraries and Inception V3 frozen graph and pushing them to Target robotics development kit.
The second part involves compiling the shared libraries and running the application using OpenCV.
Part 1 - On Host PCStep 1: Setting up the Host Linux MachineBuild Hexagon NN DSP library for the Qualcomm Robotics RB3 CDSP
- Download the Hexagon SDK version 3.4.2 for Linux from here
- Unzip the file and install the SDK using the following commands
$ cd qualcomm_hexagon_sdk_3_4_2_linux/
$ chmod +x qualcomm_hexagon_sdk_3_4_2_eval.bin
$ ./qualcomm_hexagon_sdk_3_4_2_eval.bin
This will pop up a window for the installer, follow the instructions accordingly and complete the installation.
Note: If you encounter an error “Malformed \uxxxx encoding” like here, change the PS1 prompt and then execute the bin file
- Set the environment variable $HEXAGON_SDK_ROOT by the command
$ source /work/Qualcomm/Hexagon_SDK/3.4.2/setup_sdk_env.sourceSet the environment variable $HEXAGON_SDK_ROOT by the command
- Compile Hexagon NN using the following commands and generate a hexagon library
$ cd $HEXAGON_SDK_ROOT/libs/hexagon_nn/2.5/
$ make tree VERBOSE=1 CDSP_FLAG=1 V=hexagon_Release_dynamic_toolv82_v65 V65=1
- The libhexagon_nn_skel.so generated here is the shared library for the CDSP
Note: If you get a Hexagon clang error, it is because the Hexagon SDK 3.4.2 has 8.3.02 version of Hexagon Clang instead of 8.2.07. To continue with the build process, Download the Hexagon SDK 3.4.1 for Linux from here and build using all the steps listed till now.
Create a soft link between the 3.4.1 SDK and 3.4.2 SDK, so that Hexagon clang 8.2.07 can be used to build SDK 3.4.2
- To generate a Testsig, the serial number of Target robotics development kit is needed.
- Get serial number from the robotics development kit ’s console using command
$ cat /sys/bus/soc/devices/soc0/serial_number
If this path is not present in the Target robotics development kit, you may try re-flashing it with one of the new releases, the serial number could be seen during the flashing.
- Pass the serial_number to elfsigner.py using the following commands:
$ cd $HEXAGON_SDK_ROOT
$ python tools/elfsigner/elfsigner.py -t $SERIAL_NUMBER - Sign the shared library libhexagon_nn_skel.so using elfsigner.py
$ python tools/elfsigner/elfsigner.py -i
libs/hexagon_nn/2.5/hexagon_Release_dynamic_toolv82_v65/ship/libhexagon_nn_skel.so
In this project, you will use an Inception v3 model’s frozen graph for the image classification. In the following steps, download TensorFlow, Bazel and generate a Hexagon DSP compatible version of the Inception V3 frozen graph.
- Download TensorFlow Inception V3 model Frozen graph using
$ curl http://download.tensorflow.org/models/image/imagenet/inception-2015-12-05.tgz -o /tmp/inceptionv3.tgz and unzip it to /tmp directory.
$ tar -xzf /tmp/inceptionv3.tgz -C /tmp/
- Download and install Bazel (version 0.20.0) using the following commands:
$ wget https://github.com/bazelbuild/bazel/releases/download/0.20.0/bazel-0.20.0-installer-linux-x86_64.sh
chmod +x bazel-0.21.0-installer-linux-x86_64.sh
$ ./bazel-0.21.0-installer-linux-x86_64.sh –-user
Make sure to add /home/bin to $PATH to avoid bazel not found error.
- Download and build TensorFlow(version 1.13.2) using the following commands
$ wget https://github.com/tensorflow/tensorflow/archive/v1.13.2.tar.gz
$ tar -zxvf v1.13.2.tar.gz
$ cd tensorflow-1.13.2
$ ./configure
To complete the configuration, specify the location of Python and select the appropriate options to build TensorFlow.
- Build transform_graph tool in TensorFlow using the following commands
$ touch WORKSPACE
$ bazel build tensorflow/tools/graph_transforms:transform_graph
The build would take a bit longer.
(More information about transform_graph can be found here)
- Quantize protobuf using Graph Transform Tool
$ bazel-bin/tensorflow/tools/graph_transforms/transform_graph --in_graph=/tmp/classify_image_graph_def.pb --out_graph=/tmp/inception_v3_quantized.pb --inputs="Mul" --outputs='softmax' --transforms='add_default_attributes strip_unused_nodes(type=float, shape="1,299,299,3") remove_nodes(op=Identity, op=CheckNumerics) fold_constants(ignore_errors=true) fold_batch_norms fold_old_batch_norms quantize_weights quantize_nodes fold_constants strip_unused_nodes sort_by_execution_order'
- Convert the quantized protobuf into a C file (iv3.c) using the following commands
$ cd $HEXAGON_SDK_ROOT/examples/hexagon_nn/
$ virtualenv -p python2 env2
( If this gives an error “virtualenv not found”/ “pip missing”, install pip using
$ sudo apt install python-pip
and install virtualenv using
$ sudo apt-get install python-virtualenv )
$ source env2/bin/activate
$ pip install -r environments/req2.txt
Enter the command below to generate Hexagon compatible iv3.c file
$python $HEXAGON_SDK_ROOT/examples/hexagon_nn/scripts/tensorflow_to_hexagon_nn.py /tmp/inception_v3_quantized.pb $HEXAGON_SDK_ROOT/examples/hexagon_nn/tutorials/007-tensorflow-to-hexagon-nn/inceptionv3_v1.yaml > iv3.c
And copy iv3.c to the folder as shown in the command
$ cp iv3.c $HEXAGON_SDK_ROOT/libs/hexagon_nn/2.5/
- Navigate to your workspace (Here it is /local/mnt/workspace),
$ cd /local/mnt/workspaceNavigate to your workspace (Here it is /local/mnt/workspace)
- Download the GNU toolchain using the command below and untar it
$ wget https://releases.linaro.org/components/toolchain/binaries/7.1-2017.08/aarch64-linux-gnu/gcc-linaro-7.1.1-2017.08-x86_64_aarch64-linux-gnu.tar.xz
$ tar -xf gcc-linaro-7.1.1-2017.08-x86_64_aarch64-linux-gnu.tar.xz
$ cd Hexagon_SDK/3.4.2/libs/hexagon_nn/2.5/
$ ln -sf /local/mnt/workspace/gcc-linaro-7.1.1-2017.08-x86_64_aarch64-linux-gnu
Add the GNU toolchain location to $PATH
$ export PATH=$PATH:/local/mnt/workspace/gcc-linaro-7.1.1-2017.08-x86_64_aarch64-linux-gnu/bin/
- Download fastRPC and compile new libraries
$ git clone -b automake https://git.linaro.org/landing- teams/working/qualcomm/fastrpc.git
$ cd fastrpc
$ ./autogen.sh
If you do not have automake already installed, this step gives an error. Install automake with:
sudo apt-get install automake
$ ./configure --host=aarch64-linux-gnu
$ make
Copy the shared object files to the location as shown in the commands
$ cp src/.libs/libadsprpc.so*
$HEXAGON_SDK_ROOT/libs/common/remote/ship/UbuntuARM_Debug_aarch64/
$ cp src/.libs/libcdsprpc.so*
$HEXAGON_SDK_ROOT/libs/common/remote/ship/UbuntuARM_Debug_aarch64
$ cd $HEXAGON_SDK_ROOT/libs/hexagon_nn/2.5/
- Download the patch using
$ wget http://people.linaro.org/~srinivas.kandagatla/hexagon_nn_3.4.2_shared_lib.patch - Patch Hexagon NN with the downloaded patch to compile as shared library for user space
$ patch -p1
$ make tree V=UbuntuARM_Debug_aarch64 CDSP_FLAG=1 V65=1 GRAPHINIT="iv3.c"
- Establish an SSH connection from the host Linux PC to the Target robotics development kit and copy the files into the target using the following commands
$ ssh linaro@DB_IP_ADDR mkdir /home/linaro/apps /home/linaro/dsp
$ scp $HEXAGON_SDK_ROOT/output/testsig*.so linaro@DB_IP_ADDR:~/dsp/
$ scp $HEXAGON_SDK_ROOT/output/libhexagon_nn_skel.so linaro@DB_IP_ADDR:~/dsp/
$ scp$HEXAGON_SDK_ROOT/libs/hexagon_nn/2.5/UbuntuARM_Debug_aarch64/ship/libhexagon_nn.so linaro@DB_IP_ADDR:~/apps/
$ scp $FASTRPC_LIB_PATH/src/.libs/libcdsp* linaro@DB_IP_ADDR:~/apps/
$ scp $FASTRPC_LIB_PATH/src/.libs/libadsp* linaro@DB_IP_ADDR:~/apps/
$ scp $FASTRPC_LIB_PATH/src/.libs/*rpcd linaro@DB_IP_ADDR:~/apps/
Once the files are pushed to the Target, you do not need to use the host PC anymore.
Part 2 - On the Qualcomm Robotics RB3 Development Kit (Target)Step 1: Make hardware connections and power up Robotics Development Kit, set the Screen to avoid blanking- Connect Robotics Development Kit with USB Camera and wireless USB for Keyboard and mouse.
- Connect Robotics Development Kit with HDMI cable and the other end of the cable to the HDMI Screen/monitor that is powered on.
- Connect the power cable to Robotics Development Kit and wait for the desktop to pop up.
- Open a terminal by navigating to System Tools > QTerminal as shown below
- Change the screen properties using the commands below, to avoid blanking of screen after a short period of inactivity on the board.
$ xset s off
$ xset dpms 0 0 0
$ xset dpms s off
- In the terminal, login as sudo and check if there are any old adsprpc libraries and remove them
$ sudo su
$ rm /usr/local/libadsp* /usr/local/libcdsp* /usr/local/bin/cdsprpcd /usr/local/bin/adsprpcd - Copy the fastRPC libs to /usr/local/lib and /usr/local/bin
$ cp /home/linaro/apps/libcdsp* /usr/local/lib/
$ cp /home/linaro/apps/libadsp* /usr/local/lib/
$ cp /home/linaro/apps/*rpcd /usr/local/bin
$ mkdir /dsp
$ mount /dev/disk/by-partlabel/dsp_a /dsp
$ cp /home/linaro/dsp/* /dsp/cdsp/
$ export ADSP_LIBRARY_PATH=/dsp/cdsp
$ export LD_LIBRARY_PATH=$LD_LIBRARY_PATH:/usr/local/lib
$ cdsprpcd&
- In another terminal, type in the following commands to download and install OpenCV
$ git clone https://github.com/opencv/opencv.git(If this gives an error “cmake not installed”, install cmake with
$ cd ~/opencv
$ mkdir build
$ cd build
$ cmake -D CMAKE_BUILD_TYPE=Release -D
CMAKE_INSTALL_PREFIX=/usr/localapt-get -y install cmake)
$ make -j8
$ sudo make install
- Download the application from the camera branch and build using the following commands
$ git clone https://git.linaro.org/people/srinivas.kandagatla/ImagenetCv.git
$ cd ImagenetCv
Build application using
$ cmake .
$ make
Run the application using the command$ ./ImagenetCv
If this shows an error like “install libgtk2.0-dev”
Install libgtk2.0-dev using the commands given below and run the application
$ apt get update
$ apt get upgrade
$ apt get install libgtk2.0-dev
Running the application pops up a window that shows video captured by the camera and the image classification being done
- Download the application from the images branch and build using the following commands
$ git clone https://git.linaro.org/people/srinivas.kandagatla/ImagenetCv.git4 windows pop up, that show image classification being done on local images.
$ cd ImagenetCv
$ cmake .
$ make
$ ./ImagenetCv
Qualcomm Robotics Development Kit and Qualcomm Hexagon are products of Qualcomm Technologies, Inc. and/or its subsidiaries.


Comments