Build a real-time AI powered text to voice converter using ESP32 Development Board,MAX98357A I2S Audio Amplifier, and the WitAITTS Library. This project connects the ESP32 to the Wit.ai cloud platform through WiFi and converts typed text into natural sounding speech in real time. The system supports multiple voice characters including male, female, pirate, wizard, cartoon, vampire, and British butler style voices. Audio output is streamed directly through the MAX98357A amplifier and speaker using the ESP32 I2S interface. The project demonstrates practical implementation of cloud-based AI speech synthesis, WiFi communication, I2S digital audio streaming, Serial Monitor interaction, and multi-voice text-to-speech generation using embedded hardware.
Installing the WitAITTS LibraryThe WitAITTS library is required for WiFi communication, cloud-based speech synthesis, and I2S audio streaming on the ESP32. Install the library before uploading the project code.
- Open Arduino IDE
- Go to Sketch → Include Library → Manage Libraries
- Search for WitAITTS
- Install the latest version of the library
Fig. Installing WitAITTS Library in Arduino IDE
Generating the Wit.ai API TokenThe ESP32 requires a Wit.ai API token to access the cloud-based text-to-speech service. The token can be generated from the Wit.ai developer dashboard.
- Open the Wit.ai website and create an account
- Create a new Wit.ai application
- Open the application settings page
- Copy the Server Access Token
- Paste the token into the Arduino code
Arduino · C++
const char* WIT_TOKEN = "YOUR_WIT_AI_TOKEN";
Fig. Generating Wit.ai API Token
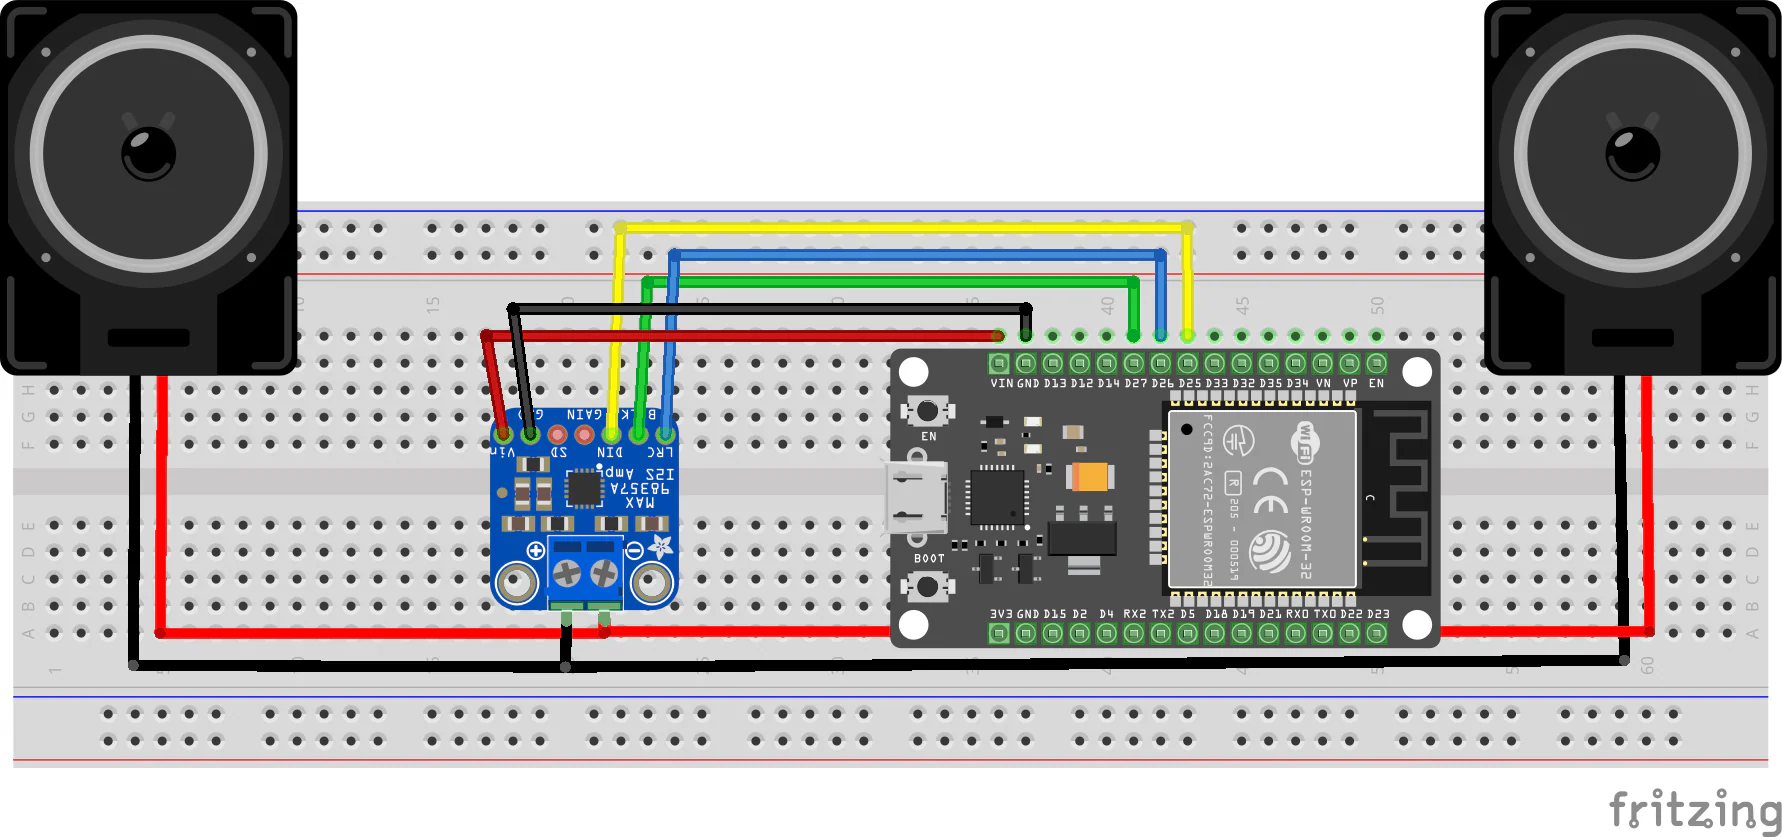
System SummaryThe ESP32 connects to the internet using WiFi and communicates with the Wit.ai cloud platform through the WitAITTS library. Text entered through the Serial Monitor is converted into speech audio using multiple selectable AI voice characters. The generated digital audio stream is sent through the ESP32 I2S interface to the MAX98357A amplifier module, which drives the speaker for real-time voice output.
Why this Architecture Works- Cloud-based TTS enables natural sounding speech generation
- ESP32 provides built-in WiFi connectivity
- I2S audio ensures clean digital sound output
- MAX98357A simplifies audio amplification
- Dynamic voice switching increases interactivity
- Serial Monitor control simplifies testing and debugging
Real-Life Applications- AI Voice Assistants: Smart embedded voice response systems
- Talking Robots: Speech-enabled robotics projects
- Home Automation: Voice notification systems
- IoT Devices: Audio feedback for connected devices
- Accessibility Systems: Text-to-speech assistive technology
- Interactive DIY Projects: Multi-voice entertainment systems
Checkout the full tutorial:


Comments