


Hardware components | ||||||
 |
| × | 1 | |||
Hand tools and fabrication machines | ||||||
| ||||||
Make sure that you follow all of the Qtechknow Creator Kit projects in order! - they progressively teach you more complicated skills. To start on the first project, click here: https://www.hackster.io/qtechknow/creator-kit-project-1-blink
Open up the Arduino IDE with the Circuit 4 - ServoMotor.ino sketch, which should look like the photo below:
Click Tools > Boards > Qduino Mini.
Then click Tools > Port > /dev/cu.usbmodemXXXX where XXXX is any string of numbers - make sure that it is not anything similar to /dev/cu.Bluetooth
Hit the right arrow at the upper-left hand corner of your screen, to upload the program to your Qduino Mini!
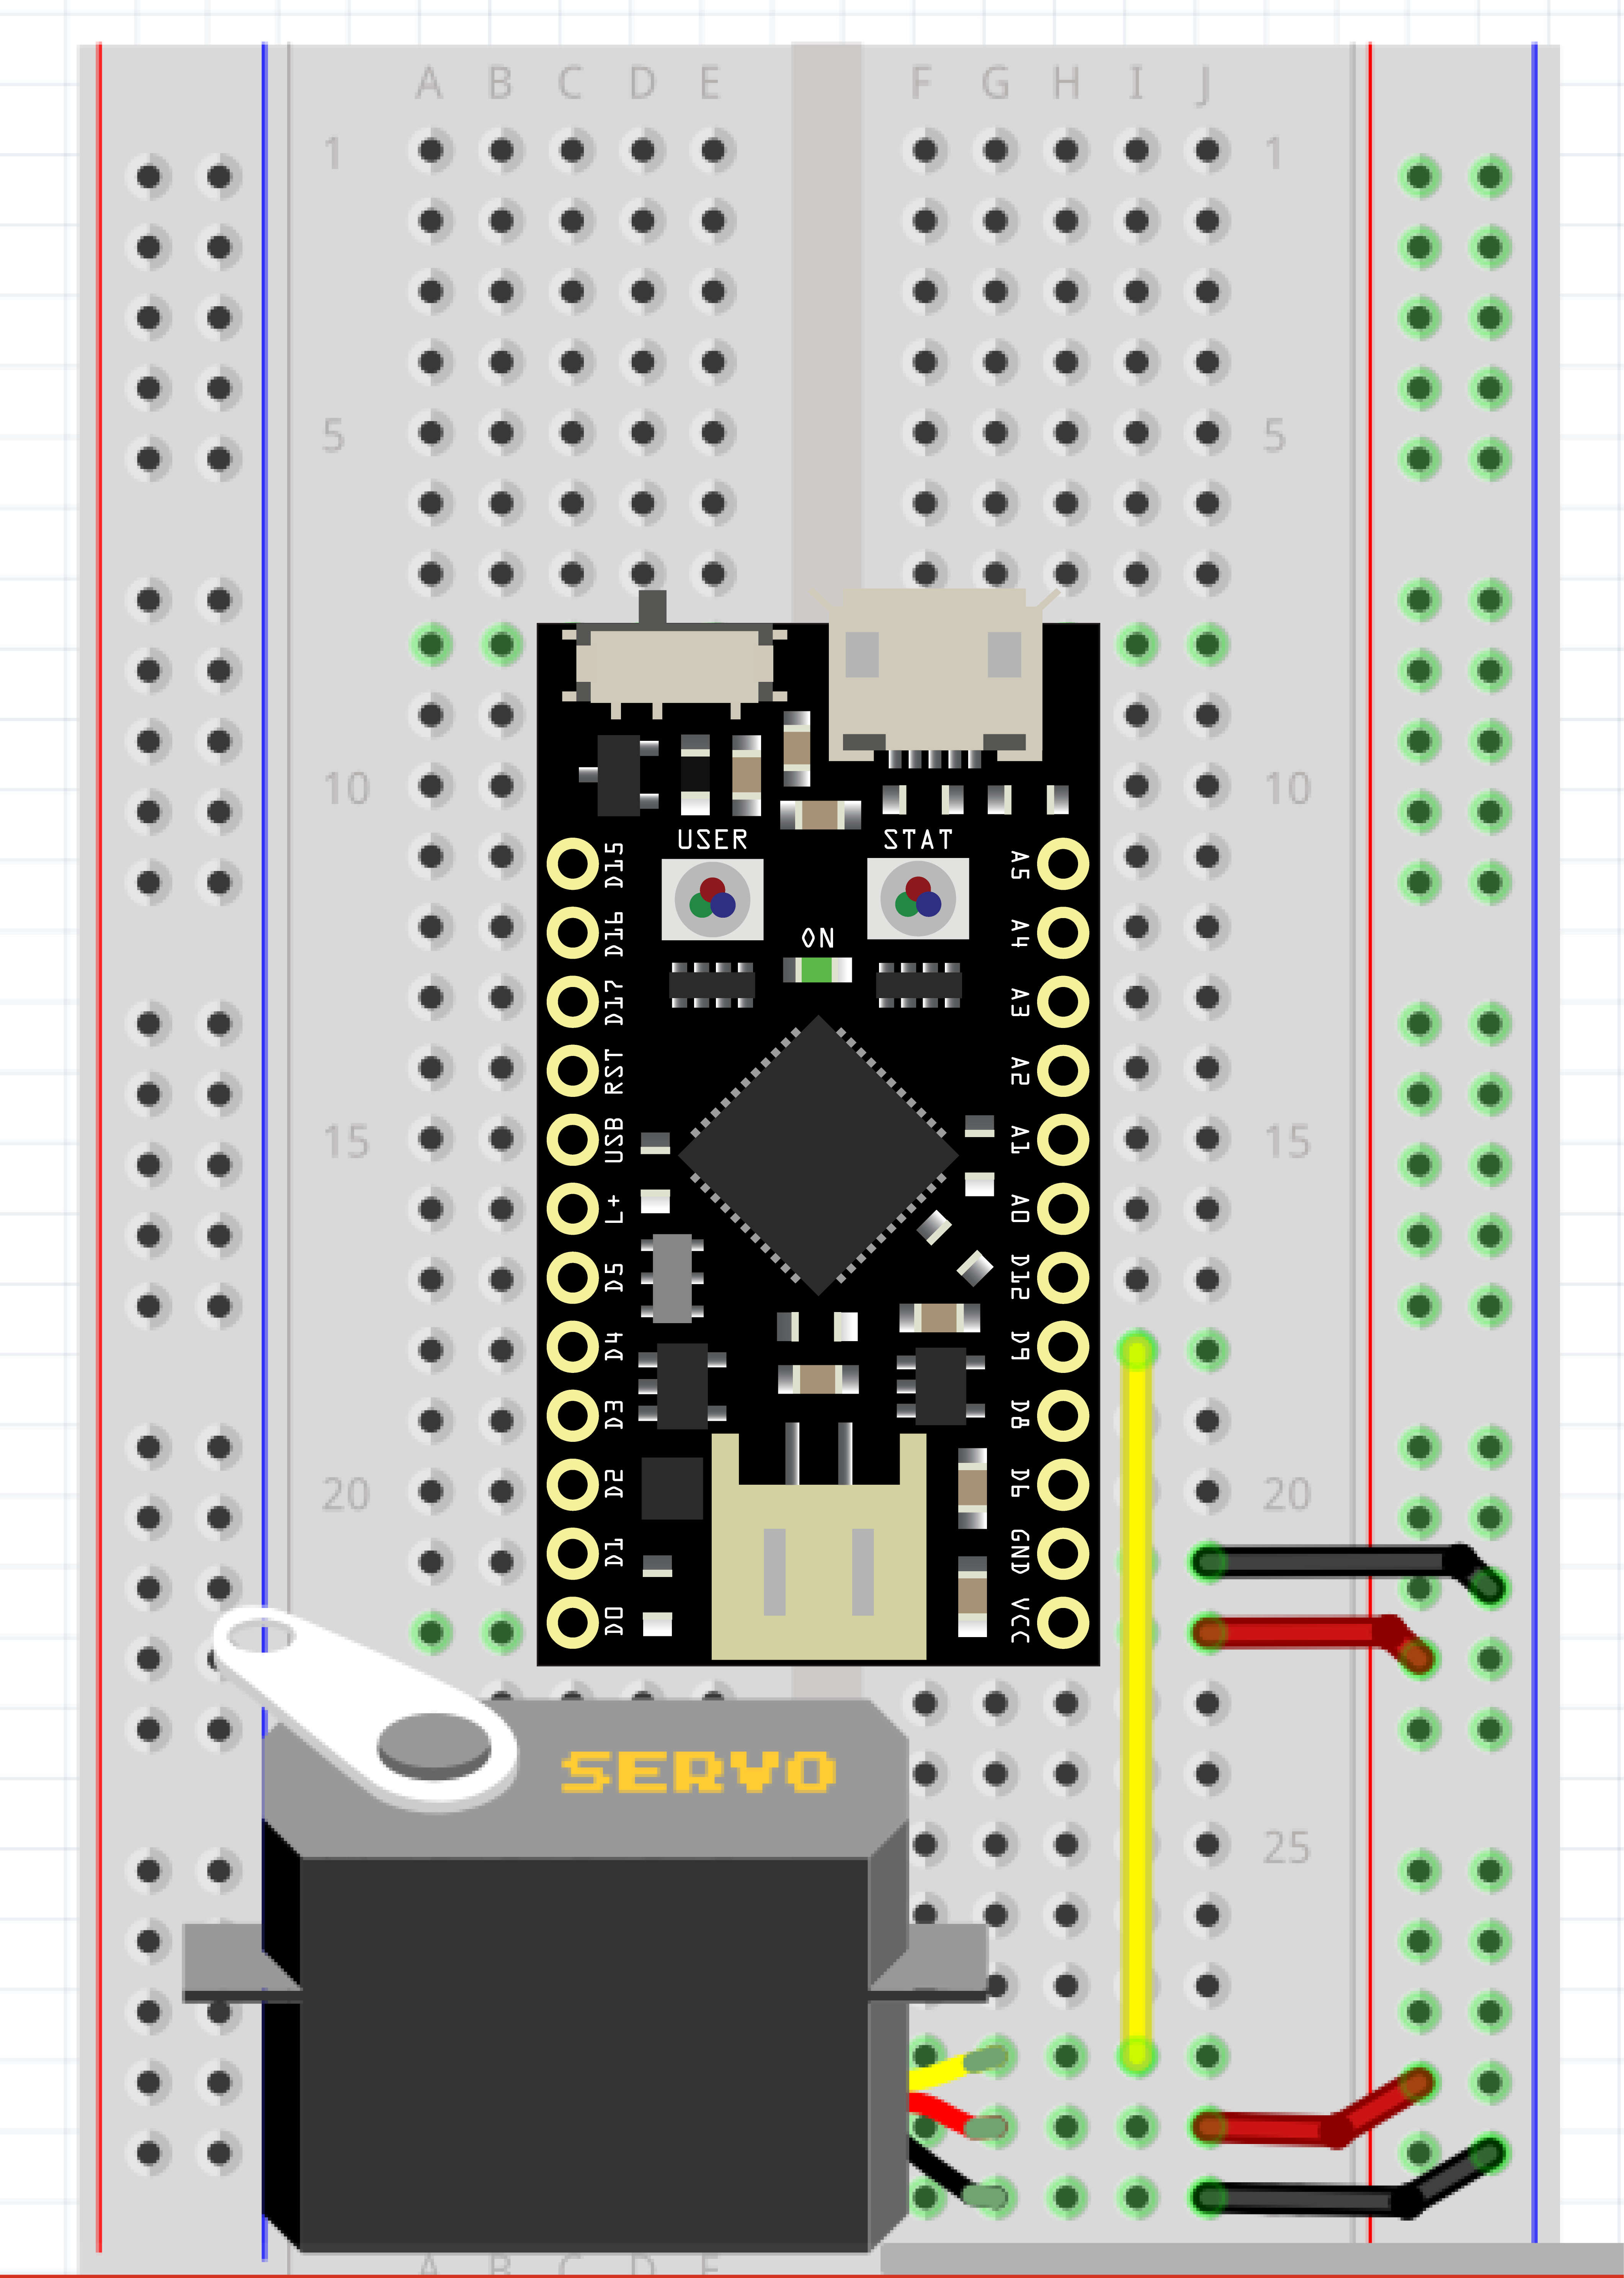
Set up the circuit below on your breadboard (the white colored rectangle with small holes to place components into) -
Watch the Servo motor move! You can even take a screwdriver and add a propeller to the top of the motor.
Let's go over the code in depth:
First - we include the Servo motor library - which controls the speed and accuracy of the . A library is hundreds of lines of code that are bare bones level usually, so that you have an easier time of coding! - they're really easy to use.
Then, we setup the Servo library, and in setup up, declare that it's attached to pin 9. Next, we make a variable - an object that stores a value. In this case, we are declaring 'pos', which we will use to store how much the Servo should turn.
In the loop, we make a 'for' loop - this lets us run code more than 1 or two times, in just a few lines & can increase or decrease a variable how ever much we'd like. The first time the for loop runs, the servo motor turns one degree - then turns another degree, and so forth and so on.
In the other 'for' loop, the servo motor turns one degree backwards - then turns back another degree, and so forth and so on.

Comments