


Hardware components | ||||||
 |
| × | 1 | |||
| × | 1 | ||||
| × | 1 | ||||
| × | 1 | ||||
 |
| × | 1 | |||
| × | 1 | ||||
| × | 1 | ||||
 |
| × | 1 | |||
| × | 2 | ||||
Hand tools and fabrication machines | ||||||
 |
| |||||
| ||||||
In this tutorial you will learn to play a WAV file from an SD card using the LightBlue Bean.
We will then use it to play sounds in an elevator as soon as it moves. What about the sound of wires snapping, or zombies waiting outside of the door? Or a fart sound? The elevator ceiling is the limit in this DIY prank!
Software
* Bean Loader
* Arduino IDE
Hardware
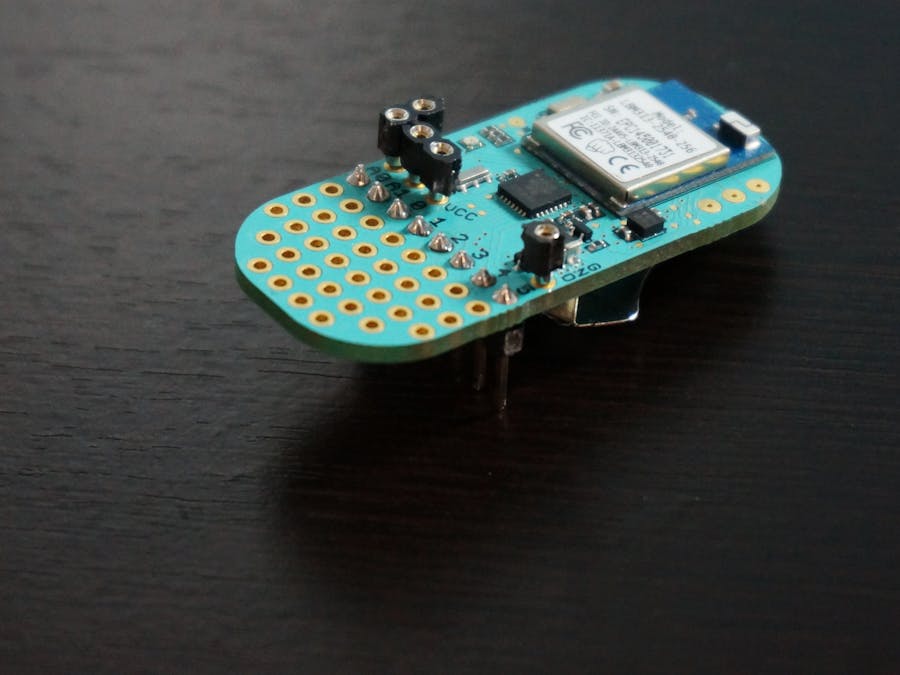
* LightBlue Bean
* Computer
Connect the Micro SD CardStep 1: Get the partsTo build this you will need:
- A LightBlue Bean
- A microSD card with microSD to SD adapter
- An amplifier
- A 4 ohm 3W speaker
- Jumper wires
- Male header pins
- Female header pins
- A breadboard
- Two 2xAA battery holder with batteries
- A soldering iron
- An elevator!
In this project we will use a breadboard to avoid a serious case of wire wrath. To connect the LightBlue Bean to the breadboard, solder male headers to the back of the Bean. Then solder female headers to the front side on BAT, VCC and the two GNDs.
To wire the SD card to the breadboard we can either buy a SD card breakout board or solder male headers directly on the pins on the adapter. These are the pins we will need:
Take the male headers and put the short end against the pins on the SD card adapter. To avoid melting the plastic, put a drop of solder on the soldering iron and quickly put it on the SD card adapter pin and male header.
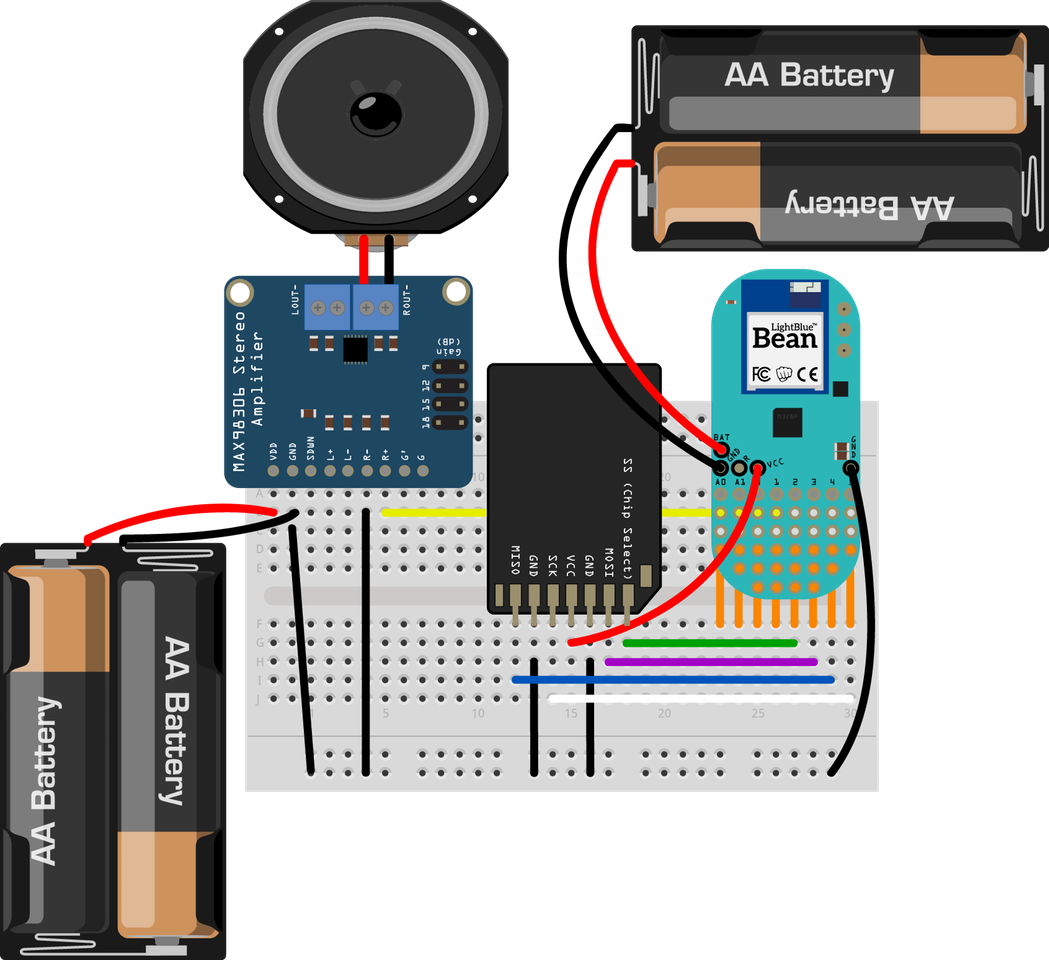
Solder the male headers and the screw-terminal blocks that you get with the amplifier. Put the black wire of the speaker to ROUT- and the red one to ROUT+.
Put the amplifier, SD card and Bean next to each other on the breadboard. Put some jumper wires under the Bean to cover the gap in the middle of the breadboard. Put a jumper wire from pin 1 on the Bean to R+ on the amplifier.
To connect the SD card to the Bean we need to wire the following pins to each other:
- Pin 2 – SS
- Pin 3 – MOSI
- Pin 4 – MISO
- Pin 5 – SCK
- VCC – VCC
Also connect the two GNDs on the SD card to GND on the breadboard.
We will use separate power supplies for the LightBlue Bean and the amplifier to make sure that the Bean keeps on running even if the speaker is using a lot of power. Connect one of the battery packs to BAT and GND on the Bean, and then put a jumper wire between the other GND on the Bean and ground on the breadboard.
Connect the other battery pack to VDD and GND on the amplifier. Also connect the GND on the amplifier to ground on the breadboard.
This is what the final breadboard wiring should look like:
Illustration made using Fritzing.
Step 6: Install TMRpcm libraryTo play audio files from an SD card we need to download a library called TMRpcm. It lets us asynchronously play PCM/WAV files directly from an SD card. We will use a fork of the library that is optimized for 8MHz microcontrollers like the LightBlue Bean. Download the TMRpcm library.
If you need help installing Arduino libraries, check out this guide.
Step 7: Modify SD libraryTo read the audio files from the SD card we will use the SD library that is preinstalled in the Arduino IDE. We will need to modify it a bit though to use it with the LightBlue Bean.
To find the library, navigate to the Arduino app in Finder, right click the icon and choose “Show package contents”.
From there, open Contents > Resources > Java > libraries > SD > utility > Sd2PinMap.h
On line 278-281 change SS_Pin to 2, MOSI_PIN to three, MISO_PIN to 4 and SCK_PIN to 5. Save and close!
Step 8: Prepare audio filesThe WAV files we play need to be 8-bit, mono and with 8-32kHz sample rate. If you’re using iTunes click Edit > Preferences > Import Settings. Change the dropdown to WAV Encoder and Settings to Custom > 16.000kHz to 32kHz, 8-bit and Mono. Then right click your file and select Create WAV Version.
If you’re using Audacity, click Tracks > Stereo Track to Mono. Then choose Project Rate (Hz) to 32000, 22050, 16000 or 11023. File > Export > Save as type: Other uncompressed files > Options and then select WAV, Unsigned 8 bit PCM.
Get the fart audio file that we used.
Upload the formatted audio file to the SD card.
Step 9: Program the BeanUpload this code to your Bean.
Step 10: Put in elevatorHiding the breadboard in an elevator might be easier said than done. The elevator at our office has some wood panels hanging just below the elevator ceiling and we managed to put the stuff there, but that is probably not the case for every elevator. Be creative! Why not put up a fake lamp for example? Just make sure that the Bean is placed with its front facing up, otherwise you will have to change which axis you’re checking the acceleration for in the code.
After that, all you need is to wait for some poor unsuspecting fellow to ride the elevator and then laugh and laugh and laugh… Until the elevator reaches your floor, that is.
*Line 12: we define a macro. The compiler can then substitute the token string for each occurrence in the source file.
*Line 11 & 13: we include two Arduino libraries.
*Line 15: we initialize TMRpcm object.
*Line 19-20: we initialize two variables to integers.
*Line 22: is the setup function. This function is executed only once during the duration of the program.
*Line 24: we initialize a speaker pin to GPIO pin 1.
*Line 28-30: we check to see if the card is present.
*Line 34: is the loop function. This function is executed multiple times.
*Line 37: we get the current acceleration with range of +/- 2g
*Line 40-47: we check to see if the elevator is moving. If so, we wait for a few seconds, then play the fart.wav. Afterwards, we wait for 15000 ms (15 secs) and check the accelerometer again.
*Line 50: Bean sleep for 100ms.
TroubleshootingHaving trouble with this guide? Reach out to BeanTalk to get directed feedback from our developers and community!


Comments