


Hardware components | ||||||
 |
| × | 1 | |||
| × | 1 | ||||
Software apps and online services | ||||||
| ||||||
| ||||||
| ||||||
"We are computer Scientists, and computer scientists are lazy."
That's what my CS professor always says. That is why we invent things. But aren't we all lazy to get up from a super comfortable position to turn off the lights before going to bed? Don't you just wish that you can tap a button and the light just turns off? Well, the control is just at your fingertip.
This device aims to do all of that for you, so you can control your light by just one tap. You can turn the smart light on or off by toggling an on/off button on a provided web server, which connects to your Raspberry Pi using MQTT and sends a message to the Smart Bulb over Wi-Fi.
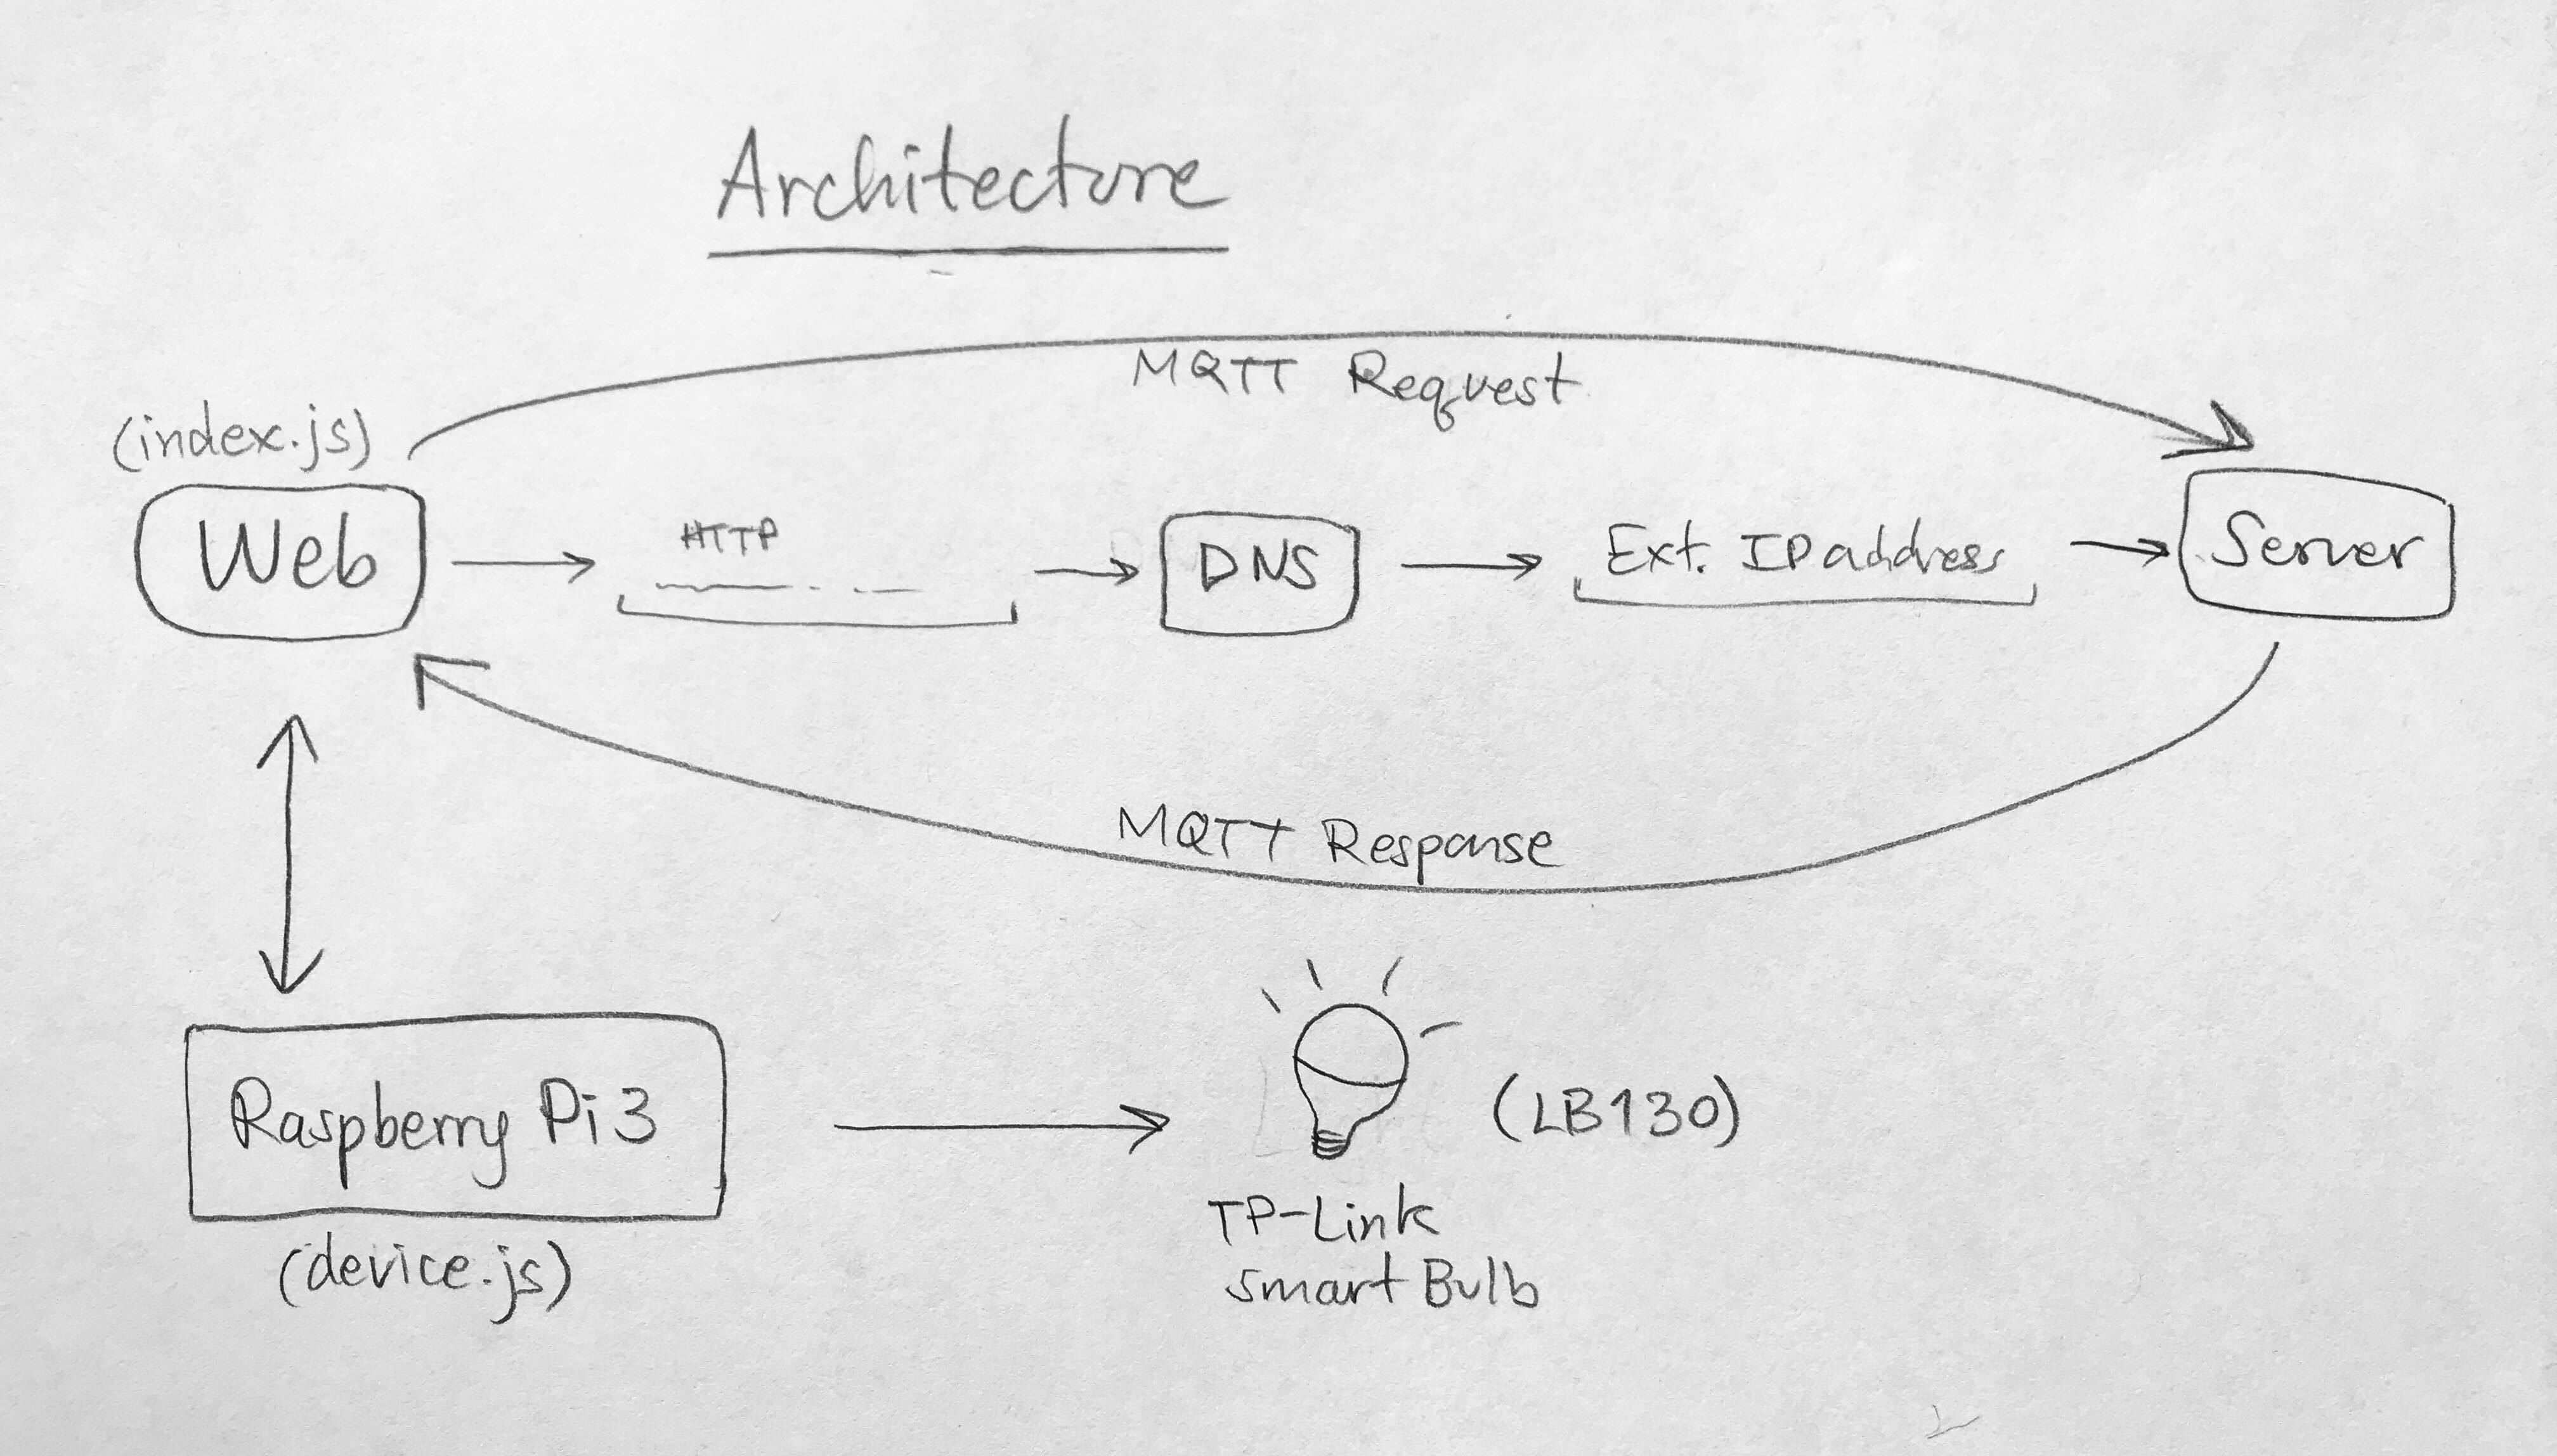
FunctionalityAs simple as it sounds, there is much more behind the scenes. And as mentioned above, the Web server connects to Raspberry Pi over MQTT and thens sends a message to the Bulb over the Wi-Fi.
The Web server is written in JavaScript and uses Express as a web framework for node.js. It uses Now, a realtime global deployment to deploy the server. The difference between Now and other deployment online service is that Now gives you a different website every time you deploy using a command 'now'.
On the Web Server page, when a button ('on' or 'off') is pressed, the server sends a message to the Pi over the MQTT, which in this case is CloudMQTT, which provides users lightweight methods of carrying out messaging using a publish/subscribe message queueing model. After the Pi receives a message, it then sends a message to the TP-Link Smart Bulb over the Wi-Fi using TP-Link Smart Bulb library.
Below is an overview architecture diagram just as described above:
Step 1: Required Apparatus
There are a few things needed in this project, the list of them are below:
- 1, Raspberry Pi 3 Model B (and all the required apparatus for Pi)
Step 2: Installing needed software and online services
Before running the project, make sure to install the following
- ExpressJS or run the command below
npm install express --save
- CloudMQTT or run the command below
npm install mqtt --save
- TP-Link Smart Bulb Library or run the command below
npm i tplink-lightbulb
- Clone all the files on GitHub into a specified directory on your computer
- Last, but not least, install on your handheld device KASA application to activate the TP-Link Smart Bulb
**Make sure to clone the files and install everything on your Pi as well
Step 3: Running the project
After cloning and installing everything, you directory should have at least the following items. I named my directory 'myproject'
The index.js file is a web server and the device.js runs on the Pi (gateway from Web to light). After everything is installed correctly, running a command line
now
in your directory should give you the following:
When following the provided link above, the web server should appear as shown below:
When a 'Light ON' or 'Light OFF' button is pressed, MQTT receives message from the web (index.js) and sends message to the Pi (device.js), in which it connects to the Smart Bulb. Shown below are messages CloudMQTT receives from the Web Server and the Raspberry Pi.
And when device.js is running on the Pi, every time the light is turned on/off, the bulb status is returned on the terminal (as shown below).
The video below demonstrates how the project works
Special Thanks
Project contributor and advisor: Taron Foxworth

Comments