


Hardware components | ||||||
 |
| × | 1 | |||
 |
| × | 1 | |||
 |
| × | 1 | |||
 |
| × | 1 | |||
Software apps and online services | ||||||
 |
| |||||
 |
| |||||
 |
| |||||
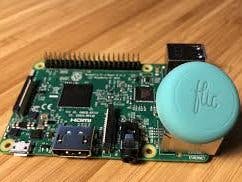
Recently I bought some new BLE buttons from Flic together with the Flic hub. I discovered the Flic buttons a few years ago while I was in Stockholm for en IoT event. Although the concept looked nice, I was not convinced of the solution as it always needed a smartphone nearby with the BLE buttons paired on it. My expectations were high when Flic announced the Flic2 and Flic HUB last year via their second kickstarter campaign, this would remove the showstopper for my use-case. The Xmas period was the perfect time to test it out. Although the HUB works fine with the pre-configured channels, such as for the Sonos. The HTTP integration did not work in my setup. I was unable to set it up to connect to my AllThingsTalk Maker account.
After scrolling through the different forums out there, it seemed I was not the only one having troubles with HTTP requests which need some kind of authentication. But in my research for a solution I bumped into their SDK.
This SDK has been revamped (they got rid of the unstable Bluez bluetooth stack). I also discovered that there is actually a Node-RED version available which was a breeze to set-up.
Node-RED is a programming tool for wiring together hardware devices, APIs and online services in new and interesting ways.
It provides a browser-based editor that makes it easy to wire together flows using the wide range of nodes in the palette that can be deployed to its runtime in a single-click
Instead of the Flic HUB, I used a Raspberry PI Model 3B+ to setup my BLE gateway which I connected to My AllThingsTalk Maker account to rollout all of my BLE buttons.
Building PlanThe first thing we are going to do is to Setup a Raspberry Pi and connect it as a gateway on AllThingsTalk Maker.
Burn an SD card with a Raspbian image- Download a Raspberry Pi image from: https://www.raspberrypi.org/downloads/raspbianI always have the habit of downloading the leanest version. So I used : ‘Raspbian Buster Lite’. This is the minimal image based on Debian Buster.
- Burn the image onto your SD card. You can use Etcher for this
We want to use the RPI ‘headless’, meaning without monitor or keyboard, so let’s open SSH so we are able to login after the RPI has booted from the image. To enable SSH
- Add an empty file called ssh on the root of the SD image.
I used a Raspberry Pi model 3B, but it would also work with another Raspberry, including the RPI-zero-W
- Insert your SD card from the previous step
- Connect the Raspberry PI 3B+ to your LAN network
Use a good Power supply, at least 2A version!.
- Power up the device
- Use a SSH client such as Putty or MAC Terminal
the default username on Raspbian is pi and the default password is raspberry
- Run sudo raspi-config and change the default password
- Follow the instructions outlined on the Node-RED website: https://nodered.org/docs/getting-started/raspberrypi
- bash <(curl -sL https://raw.githubusercontent.com/node-red/linux-installers/master/deb/update-nodejs-and-nodered)
- sudo systemctl enable nodered.service
- Sudo reboot
Now we have Node-RED installed, let’s all the additional nodes we will need.
- Login using an SSH connection
- Login to the Node-Red environment by using your browser. The Node-red interface is accessible on port 1880
- http://<your Pi IP address>:1880
You should see the following interface:
Note: IF your are not familiar with Node-RED, this series of youtube videos give a good introduction. Of course you can also go the the official Node-RED website.
Installing the Flic NodesThis is a Node-RED node to interact with the flic.io BLE buttons
- In the menu (Top right corner), select manage palette
- Click the install tab and search for node-red-contrib-flic-buttons
- Select the correct package and click install
If everything went well, you should find the node in the nodes list on the left side
This node requires the fliclib-linux-hci daemon to handle the low level communication with the buttons. You will need to install this before you start:
- Login to your Pi using an SSH connection
- Enter the following commands:
- sudo apt install git
- sudo git clone https://github.com/50ButtonsEach/fliclib-linux-hci.git
- cd /fliclib-linux-hci/bin/armv6l
- sudo./flicd -f flic.sqlite3
The last instruction will start the Flic daemon manually. The Flic Daemon needs to run in the background to listen to the BLE payloads, so it would be better to run it at startup:
- sudo nano /etc/rc.local
Add the following line just before the exit 0:
- sleep 10 && /home/pi/fliclib-linux-hci/bin/armv6l/flicd -d -l /var/log/flic.log -f /home/pi/fliclib-linux-hci/bin/armv6l/flic.sqlite3 &
Reboot your Raspberry Pi to verify if the daemon starts automatically at boot.
- Login to your Pi using an SSH connection
Enter the following command:
- ps -ef | grep "flicd"
You should see a process running as root called: /home/pi/fliclib-linux-hci/bin/armv6l/./flicd -d -l /var/log/flic.log -f /home/pi
Pairing ButtonsButtons need to be paired before you can use them. We do this using the scanwizard.js located in the lib folder.
- Ensure that the daemon are running
- Ensure that any phones or other devices that your flic buttons were previously paired with are switched off or have bluetooth disabled
- cd.node-red/node_modules/node-red-contrib-flic-buttons/lib
- node scanwizard.js
- press your flic button
If it has previously been paired to another device you will have to hold the flic button down for 7 seconds to put it into public mode
You should see something like this:
Welcome to the add new button wizard. Press your Flic button to add it.Found a public button. Now connecting...Button 80:e4:da:76:e1:2f successfully added!
- once paired take a note of the bluetooth address
- repeat this for all your flic button noting down the address for each button
Before we are going to build the Node-Red Flow to setup the connection with AllThingsTalk Maker, let’s first set up the Gateway on AllThingsTalk Maker.
- If you do not have an account yet on AllthingsTalk Maker, create one first.
You can sign up for free on https://maker.allthingstalk.com/signup
- By default you will have a playground under your account.
Grounds are distinct areas of an AllThingsTalk Space that groups relevant IoT resources together, allowing for easier access management, delegation and separation of concerns.
A ground allows people with common interest to build and share their IoT devices, assets and data either internally within a team, externally to a selected audience or publicly with everyone.
Within your Playground, you can set up a new gateway.
- Select Gateway from the menu and click on the button ‘+ New gateway’
- Enter a Gateway Name
When you have created the gateway:
- click on the Gateway
- In the left upper corner, select settings
- Click on Authentication in the menu
You will now see a unique Gateway ID and Gateway Token. Remember this place because we are going to use this When we set up the Node Red Flow on the Raspberry Pi to setup the authentication & authorization for our gateway.
Create a First BLE device on AllThingsTalk MakerLet’s now create a first digital representative for our Flic button.
- Under the gateway you have created in the previous step, click ‘+ New Device’
- Give your device a unique identifier, for example use the BLE unique identifier which was shown during the pairing button Step but remove the “:” characters
- Under the device you have created, click ‘+ New Asset’
- Create a Sensor Asset with Name: Button of type Boolean
The result should look similar to this:
Note: Attention naming is case sensitive!
Upload the Node-Red flowNow we have created the gateway and a first device, let’s go back to our Node-Red environment and setup the Flow.
Below is an example flow which detects the ButtonDown, ButtonUp events and sets the Button state accordingly.
To import the Flow:
- Within Node-Red, in the upper right menu, select import
- Copy/paste the code blockin attach and click import
The result should look similar to this:
- Click on the Flic nodes and change the Button Address to the one you have discovered in the ‘Pairing Buttons’ step.
- Click the Function node, replace <enter your gateway ID here> with your gateway ID
- In the MQTT node, In the server settings, in the username field, enter your Gateway token.
- In the MQTT node, In the server settings, in the username field, enter a random password eg (Fake)
Note: We don’t need a Password for the MQTT connection, but most of the MQTT client don’t like a blank password.
- Click on ‘Deploy’ in the upper right corner of the Node-Red interface.
Now we are ready to test our set up. When you press the BLE button, the state of the Button asset in AllThingsTalk Maker should update.
You can opt to create a Pinboard for your device in AllThingsTalk Maker to see the state change:
The result would look as follows:


Comments