

Hardware components | ||||||
 |
| × | 2 | |||
| × | 2 | ||||
Software apps and online services | ||||||
 |
| |||||
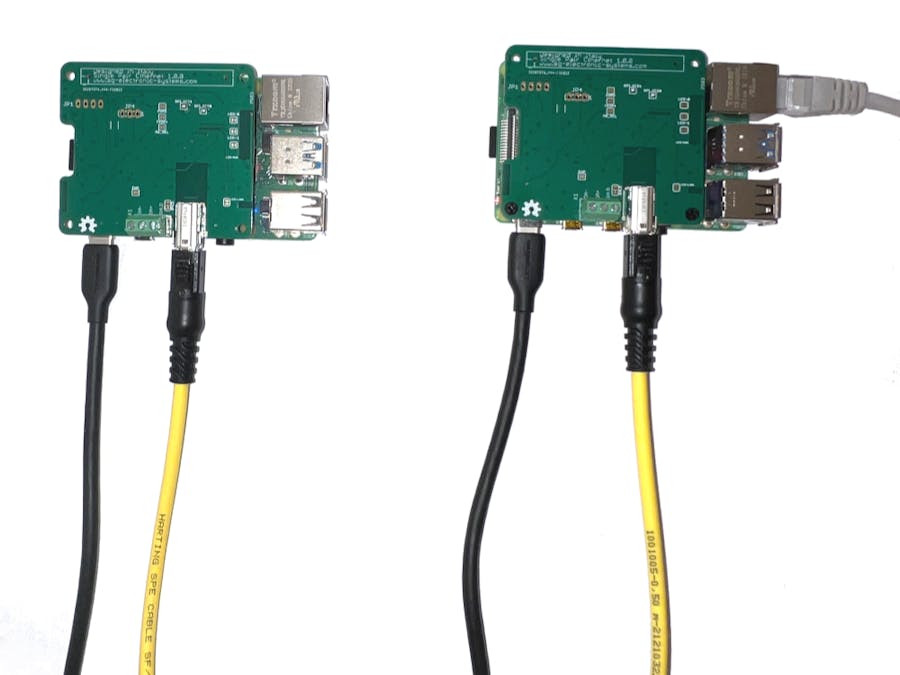
Single Pair Ethernet (SPE) is a technology that enables the transmission of Ethernet data over a single twisted pair of wires, as opposed to the traditional Ethernet which typically uses four pairs of twisted wires. Today, a bridge Ethernet-SPE is an expensive item, but using a Raspberry Pi with a SPE Shield it is implement one with a small investment.
PrerequisiteBefore to implement the router configuration proposed in this tutorial, it is mandatory to configure eth1 on Raspberry as described in ADIN1110 Linux kernel configuration and read Raspberry pi as wireless router of Yoganathan V.
Hardware setupThe hardware setup for this tutorial is very simple, we have a couple of Raspberry with SPE shield. The first works as router, the second as a connected device.
Install the following packages
sudo apt install hostapd
sudo apt install dnsmasq
edit dhcpcd.conf
sudo nano /etc/dhcpcd.confadd to the end of file the following configuration
interface eth1
static ip_address=192.168.2.1/24
static routers=192.168.2.1
static domain_name_servers=8.8.8.8
The address for single pair Ethernet interface eth1 of Raspberry Router is 192.168.2.1
Reload dhcpcd with
sudo systemctl daemon-reload && sudo systemctl restart dhcpcdTo allow traffic to flow from one network to the other in the Raspberry Pi, create a file using the following command
sudo nano /etc/sysctl.d/routed-ap.confadd
# Enable IPv4 routing
net.ipv4.ip_forward=1
This process is configured by adding a single firewall rule in the Raspberry Pi
sudo iptables -t nat -A POSTROUTING -o eth0 -j MASQUERADENow save the current firewall rules for IPv4 (including the rule above) and IPv6 to be loaded at boot by the netfilter-persistent service using the below command
sudo netfilter-persistent saveConfigure the DHCP and DNS services for the SPE network. The DHCP and DNS services are provided by dnsmasq. Rename the default configuration file and edit a new one
sudo mv /etc/dnsmasq.conf /etc/dnsmasq.conf.orig
sudo nano /etc/dnsmasq.conf
Add the following to the file and save it
interface=eth1
dhcp-range=192.168.2.2,192.168.2.20,255.255.255.0,24h
domain=wlan
address=/gw.wlan/192.168.2.1
Now restart systemctl
sudo systemctl rebootIf the configuration was executed correctly we can see the address 192.168.2.1 in eth1 with command ifconfig
It is important to note that the eth1 MAC address is defined in overlay file, then is mandatory to edit adin1110-overlay.dts on Raspberry as Device and change it. In this example the MAC address of Router is CA 2F B7 10 23 63, instead on Raspberry as Device it is CA 2F B7 10 23 64. After that recompile adin1110-overlay.dts with
sudo dtc -@ -I dts -O dtb -o adin1110.dtbo adin1110-overlay.dtsCopy the adin1110.dtbo in /boot/overlays/. Add adint1110 in /boot/config.txt
dtoverlay=adin1110Reboot the board
sudo rebootAfter the boot phase enable eth1 with
sudo ifconfig eth1 upIf the configuration was executed correctly we can see the address 192.168.2.x in eth1 with command ifconfig.
The first test is to check the link the communication with a simple pig from router to device
ping 192.168.2.19Now we can ping the device to router with
sudo ping 192.168.2.1If the link works correctly we can try to ping an external server from Raspberry as Device, with the following command
ping -I eth1 www.google.comWe can repeat the test with eth0 of Raspberry Router disconnected
We can see that ping command response is Destination Host Unreachable.
Final testThe final test consists on web browsing with chromium through SPE.
Single Pair Ethernet standard is very interesting, we hope in a fast diffusion on industrial environment.


Comments