


Hardware components | ||||||
 |
| × | 1 | |||
 |
| × | 1 | |||
 |
| × | 4 | |||
| × | 4 | ||||
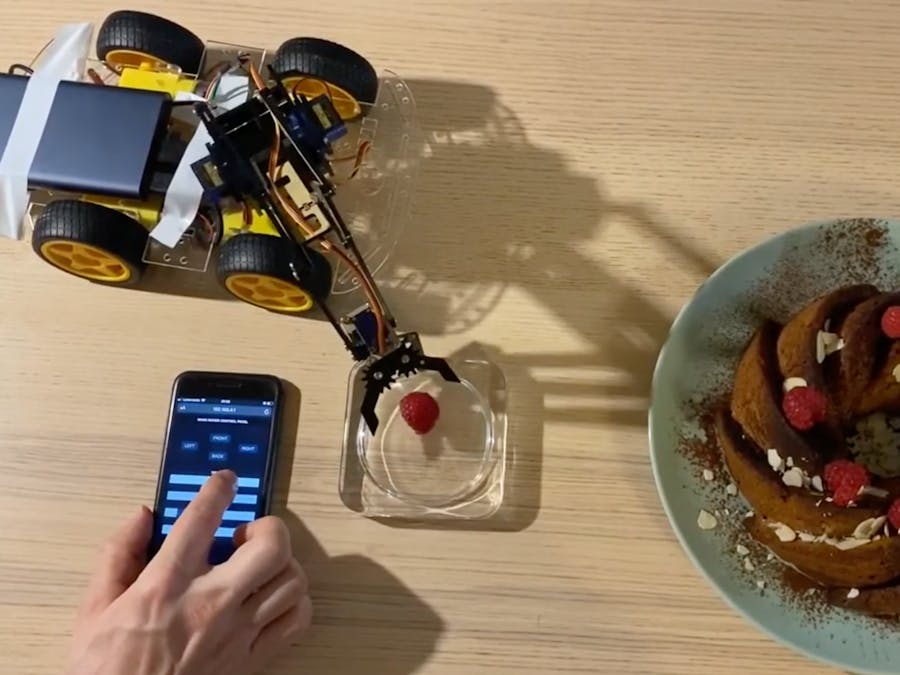
Finally, after a few months, I finished my Arduino course! For my final project, I put together a car chassis and a robotic arm I had from a previous project. The car has 4 wheels, the robotic arm has 4 servos and it can be controlled remotely via a html page using WebSocket.
To access the remote controller, you can use any smartphone, connect to the WiFi shared from the ESP32, open the website by accessing the ESP32 IP address (which you can see in Serial Monitor).
After I fought my way through working with WebSocket for sending commands from a Html page to ESP32, it was a lot of soldering to make it work together... way more than I expected :) but it was a lot of fun!
To all the beginners who would like to create something similar I would like to recommend an amazing course I followed: Arduino Programming and Hardware Fundamentals
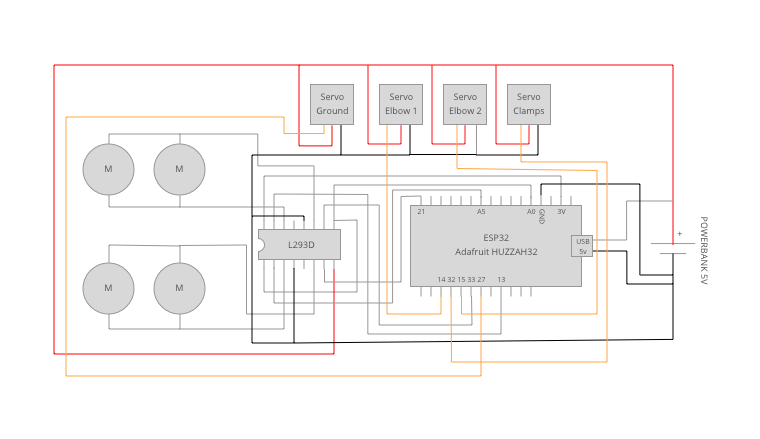
Wiring Scheme
Battery - a nice thing with this wiring is that you can use just a single 5V battery to power ESP32 as well as the motors. (Be careful if using a powerbank like I do. Many of them are set up not to supply power if the current draw is too small. I need to press the button on the powerbank for example)
Servos - get plugged to power and one of the logic pins on ESP32
Motors - to save pins and use only a single motor controller, the front left and back right motors are plugged together as well as front right with back left.
L-Bridge (L293D) - you can google the datasheet or wiring of L-bridge which is quite standard
IMPORTANT - I really don't remember (doing this scheme after a few months) why I plugged one side of the L-bridge to 3V from ESP32... but it works (somehow). I would recommend you to test plugging it to 5V battery which should be correct.


Comments