`
Bluetooth Connection
I had a hard time trying to decipher what was going on with the transmission of messages between my phone and the Arduino using the callbackEcho code until I used the serial monitor. I was then able to tell where how the buffer variable changed with respect to which button I pressed. Before starting to work, I soldered the pins onto the BLE module and I think I finally did a great job on my soldering work.
The Algorithm
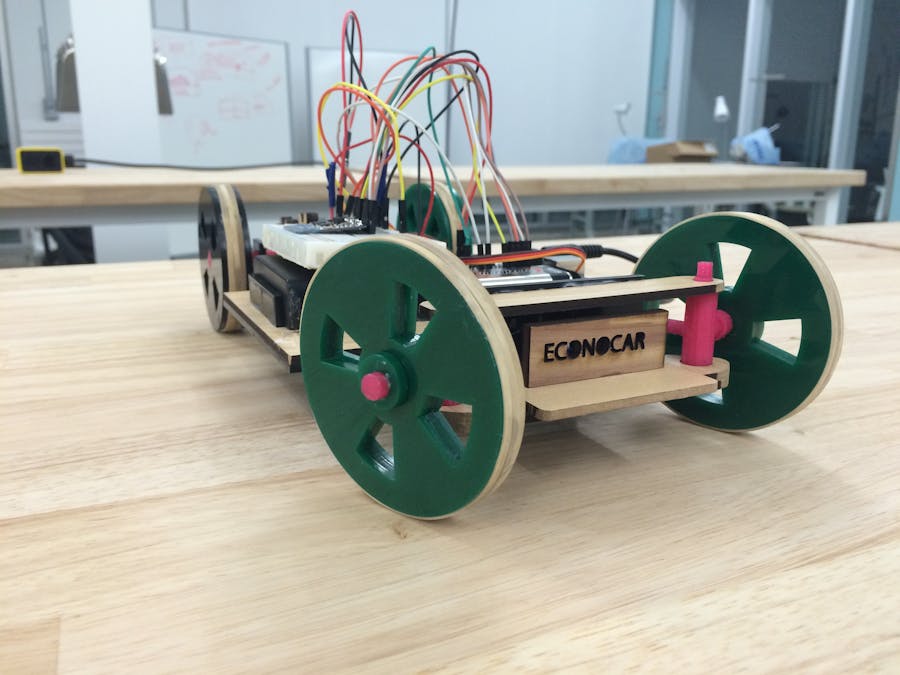
I decided to use the callbackEcho demo for the structure of my code and only edited what was necessary. I put a switch-case that would help the Arduino know what I want it to do from the signal sent from the iOS App on my iPhone. The app is easily found on the website. Once connected to the BLE module, a simple controller can be selected with a D-Pad of arrows( I used these to control the car). My code is at the bottom.
*********************************************************************/

// This version uses call-backs on the event and RX so there's no data handling in the main loop!

#include <SPI.h>
#include "Adafruit_BLE_UART.h"
#include <Servo.h>

Servo myDrive;
Servo mySteering;

int driveNeutral = 105;
int Steering = 90;

#define ADAFRUITBLE_REQ 10
#define ADAFRUITBLE_RDY 2
#define ADAFRUITBLE_RST 9

Adafruit_BLE_UART uart = Adafruit_BLE_UART(ADAFRUITBLE_REQ, ADAFRUITBLE_RDY, ADAFRUITBLE_RST);

/**************************************************************************/
/*!
    This function is called whenever select ACI events happen
*/
/**************************************************************************/
void aciCallback(aci_evt_opcode_t event)
{
  switch(event)
  {
    case ACI_EVT_DEVICE_STARTED:
      Serial.println(F("Advertising started"));
      break;
    case ACI_EVT_CONNECTED:
      Serial.println(F("Connected!"));
      break;
    case ACI_EVT_DISCONNECTED:
      Serial.println(F("Disconnected or advertising timed out"));
      break;
    default:
      break;
  }
}

/**************************************************************************/
/*!
    This function is called whenever data arrives on the RX channel
*/
/**************************************************************************/
void rxCallback(uint8_t *buffer, uint8_t len)
{
 // myDrive.write(driveNeutral);
 // mySteering.write(Steering);

  switch(buffer[2]) {
    case 53:
    Serial.println ( "up");
    driveNeutral=driveNeutral + 5;
    myDrive.write(driveNeutral);
    break;
    case 54:
    Serial.println( "down");
    driveNeutral=driveNeutral - 5;
    myDrive.write(driveNeutral);
    break;
    case 55:
    Serial.println( "left" );
    Steering= Steering + 8;
    mySteering.write(Steering);
    break;
    case 56:
    Serial.println( "right");
    Steering= Steering - 8;
    mySteering.write(Steering);
    break;

  }


  /* Echo the same data back! */
  uart.write(buffer, len);
}

/**************************************************************************/
/*!
    Configure the Arduino and start advertising with the radio
*/
/**************************************************************************/
void setup(void)
{
  Serial.begin(9600);
  while(!Serial); // Leonardo/Micro should wait for serial init
  Serial.println(F("Adafruit Bluefruit Low Energy nRF8001 Callback Echo demo"));

  uart.setRXcallback(rxCallback);
  uart.setACIcallback(aciCallback);
  // uart.setDeviceName("NEWNAME"); /* 7 characters max! */
  uart.begin();
  myDrive.attach(6);
  mySteering.attach(5);
  myDrive.write(105);
}

/**************************************************************************/
/*!
    Constantly checks for new events on the nRF8001
*/
/**************************************************************************/
void loop()
{
  uart.pollACI();


}
/*********************************************************************
This is the callbackEcho code modified for control of servos
*********************************************************************/

// This version uses call-backs on the event and RX so there's no data handling in the main loop!

#include <SPI.h>
#include "Adafruit_BLE_UART.h"
#include <Servo.h>

Servo myDrive;
Servo mySteering;

int driveNeutral = 105;
int Steering = 90;

#define ADAFRUITBLE_REQ 10
#define ADAFRUITBLE_RDY 2
#define ADAFRUITBLE_RST 9

Adafruit_BLE_UART uart = Adafruit_BLE_UART(ADAFRUITBLE_REQ, ADAFRUITBLE_RDY, ADAFRUITBLE_RST);

/**************************************************************************/
/*!
    This function is called whenever select ACI events happen
*/
/**************************************************************************/
void aciCallback(aci_evt_opcode_t event)
{
  switch(event)
  {
    case ACI_EVT_DEVICE_STARTED:
      Serial.println(F("Advertising started"));
      break;
    case ACI_EVT_CONNECTED:
      Serial.println(F("Connected!"));
      break;
    case ACI_EVT_DISCONNECTED:
      Serial.println(F("Disconnected or advertising timed out"));
      break;
    default:
      break;
  }
}

/**************************************************************************/
/*!
    This function is called whenever data arrives on the RX channel
*/
/**************************************************************************/
void rxCallback(uint8_t *buffer, uint8_t len)
{
 // myDrive.write(driveNeutral);
 // mySteering.write(Steering);
 // Each button on the D-Pad is used to control the movement of the car
 // The Char that is sent to the arduino is broken analyzed starting at the second character to distinguish
 // the what command is sent. This gives proper control of the RC vehicle's movement
  switch(buffer[2]) {
    case 53:
    Serial.println ( "up");
    driveNeutral=driveNeutral + 5; // best increment I found for drive
    myDrive.write(driveNeutral);
    break;
    case 54:
    Serial.println( "down");
    driveNeutral=driveNeutral - 5;
    myDrive.write(driveNeutral);
    break;
    case 55:
    Serial.println( "left" );
    Steering= Steering + 8; // This increment allows three taps for the maximum turn
    mySteering.write(Steering);
    break;
    case 56:
    Serial.println( "right");
    Steering= Steering - 8;
    mySteering.write(Steering);
    break;

  }


  /* Echo the same data back! */
  uart.write(buffer, len);
}

/**************************************************************************/
/*!
    Configure the Arduino and start advertising with the radio
*/
/**************************************************************************/
void setup(void)
{
  Serial.begin(9600);
  while(!Serial); // Leonardo/Micro should wait for serial init
  Serial.println(F("Adafruit Bluefruit Low Energy nRF8001 Callback Echo demo"));

  uart.setRXcallback(rxCallback);
  uart.setACIcallback(aciCallback);
  // uart.setDeviceName("NEWNAME"); /* 7 characters max! */
  uart.begin();
  myDrive.attach(6);
  mySteering.attach(5);
  myDrive.write(105);
}

/**************************************************************************/
/*!
    Constantly checks for new events on the nRF8001
*/
/**************************************************************************/
void loop()
{
  uart.pollACI();


}


Comments