

Hardware components | ||||||
 |
| × | 1 | |||
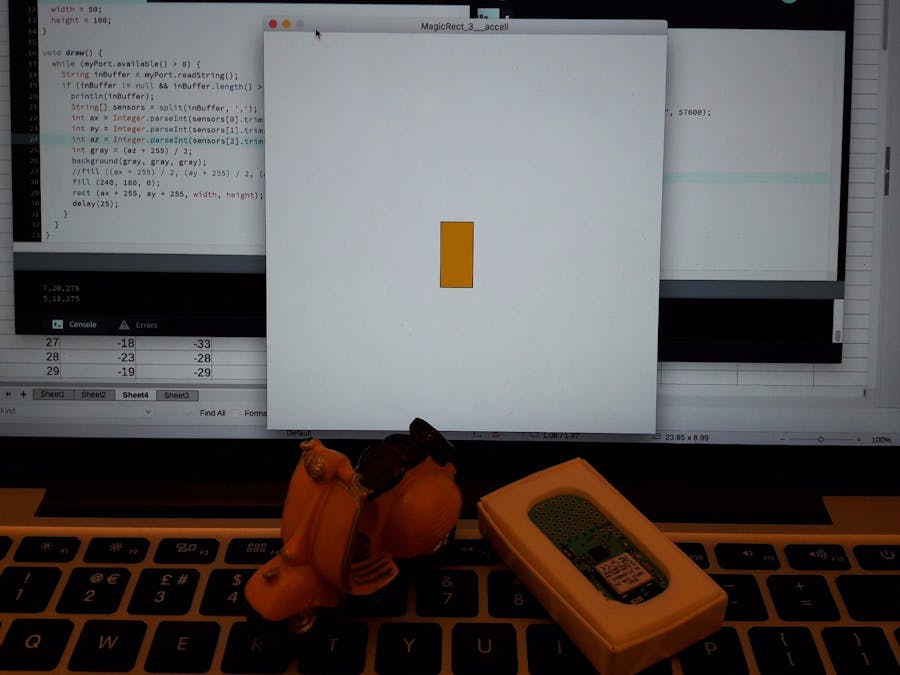
My first project controlling Processing 3 using a LightBlue Bean. As you move the board, the rectangle will move along (reading sensors X and Y) and will vary the background color (reading sensor Z).
This is a good start for people who want to learn how to read the accelerometers from inside Processing.Program the Bean
First step is to update your LightBlue Bean with the file AccelerometerToSerial.ino. This is a very basic sketch which sends data trough the Serial port every 10 milliseconds, in the following format:
-38,-7,226
-42,-5,236
-34,4,255
51,-9,260
113,-4,240
183,2,221
Which means X,Y,Z values from the accelerometer. The bean will compile all values as a single string, and we will split it back in Processing after read them, so each value can be used individually.
- Don't forget that in the Bean Loader you must right-click the bean and select Use for virtual Serial.
Open the Processing program and load the code from the file MoveRectLightBlueBean.pde. The source has plenty of comments for you to understand how it works.
Troubleshooting- to make sure you computer is receiving the bean data, in the terminal check your /dev and /tmp folders, looking for something named like cu.LightBlue-Bean and run the following command:
screen /dev/cu.LightBlue-Bean 57600
To quit do: Ctrl+a then Ctrl+\
Where /dev/cu.LightBlue-Bean is the port I found and 57600 is the baud rate. You must see data being populated.
Leave you questions in the comments and I will be happy to help and update the project and troubleshooting section.


Comments