


Hardware components | ||||||
 |
| × | 1 | |||
| × | 1 | ||||
| × | 1 | ||||
| × | 2 | ||||
Hand tools and fabrication machines | ||||||
 |
| |||||
The problem with living in an apartment, is that the lighting is not always the best. That is the case at least with my apartment, I have a light by my front door, and another in the hallway, but where I spend most of my time, in the living room, I have no large light. So I set out to fix that, by building a chandelier. I have two requirements for this, it has to look cool, and has to work with my current home automation system.
I have had this idea for a chandelier for a while. Online there are a lot of examples of LED chandeliers made of mason jars, and other such stuff, but nothing quite what I was looking for. They are good, but not quite there. So a while ago I was working to clean up an area, when I came across some old bottles and wood, and I had a EUREKA moment, this was it and all the pieces fell into place.
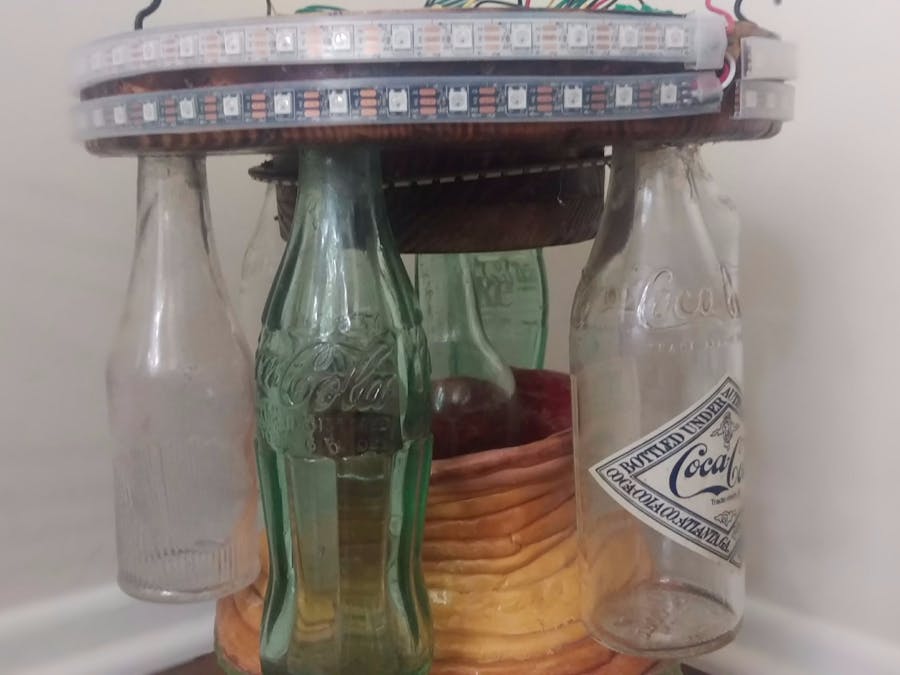
WALK THROUGHThe body of the chandelier is circular and consists of two parts. The main body part is about 12" diameter and has a solid base, which the bottles are connected to, and an open circle. This is to hide the electronics, and make it look complete. I have 6 pop bottles that are connected to this part placed around near the edge of the circle. Then in the center I have a smaller wooden platform, that is about 7" diameter. Again, this is two pieces of wood on top of each other, this time to give it a little more depth. In the center here I have another glass bottle, this serves as the center feature point.
I have to take a second to give a HUGE thanks and major credit to my friend Chester. I can honestly say that without his help, this project would not be here. I lack the tools and ability to cut wood, but this man graciously lent his time, tools, and expertise to help me realize my vision. If he did not, I would not have been able to cut or drill, which basically means I would have had no project.
Walk around description of the chandelier:
NeopixelThe lighting system is provided by Neopixels, and quit a few of them at that. There are about 190 pixels running around the chandelier. The top outside has two Neopixel strips running around, each about 60 pixels. Each bottle has it own pixel that lights them up. On the underside, a 60 pixel ring, runs around the center. Each bottle has its own individual Neopixel. The 6 at the top are in sequence so that they work as a full unit, while the center bottle has its own pixel. This creates quit a bright display on full brightness. When designing I had one question "how many pixels can I use, and still make it look good".
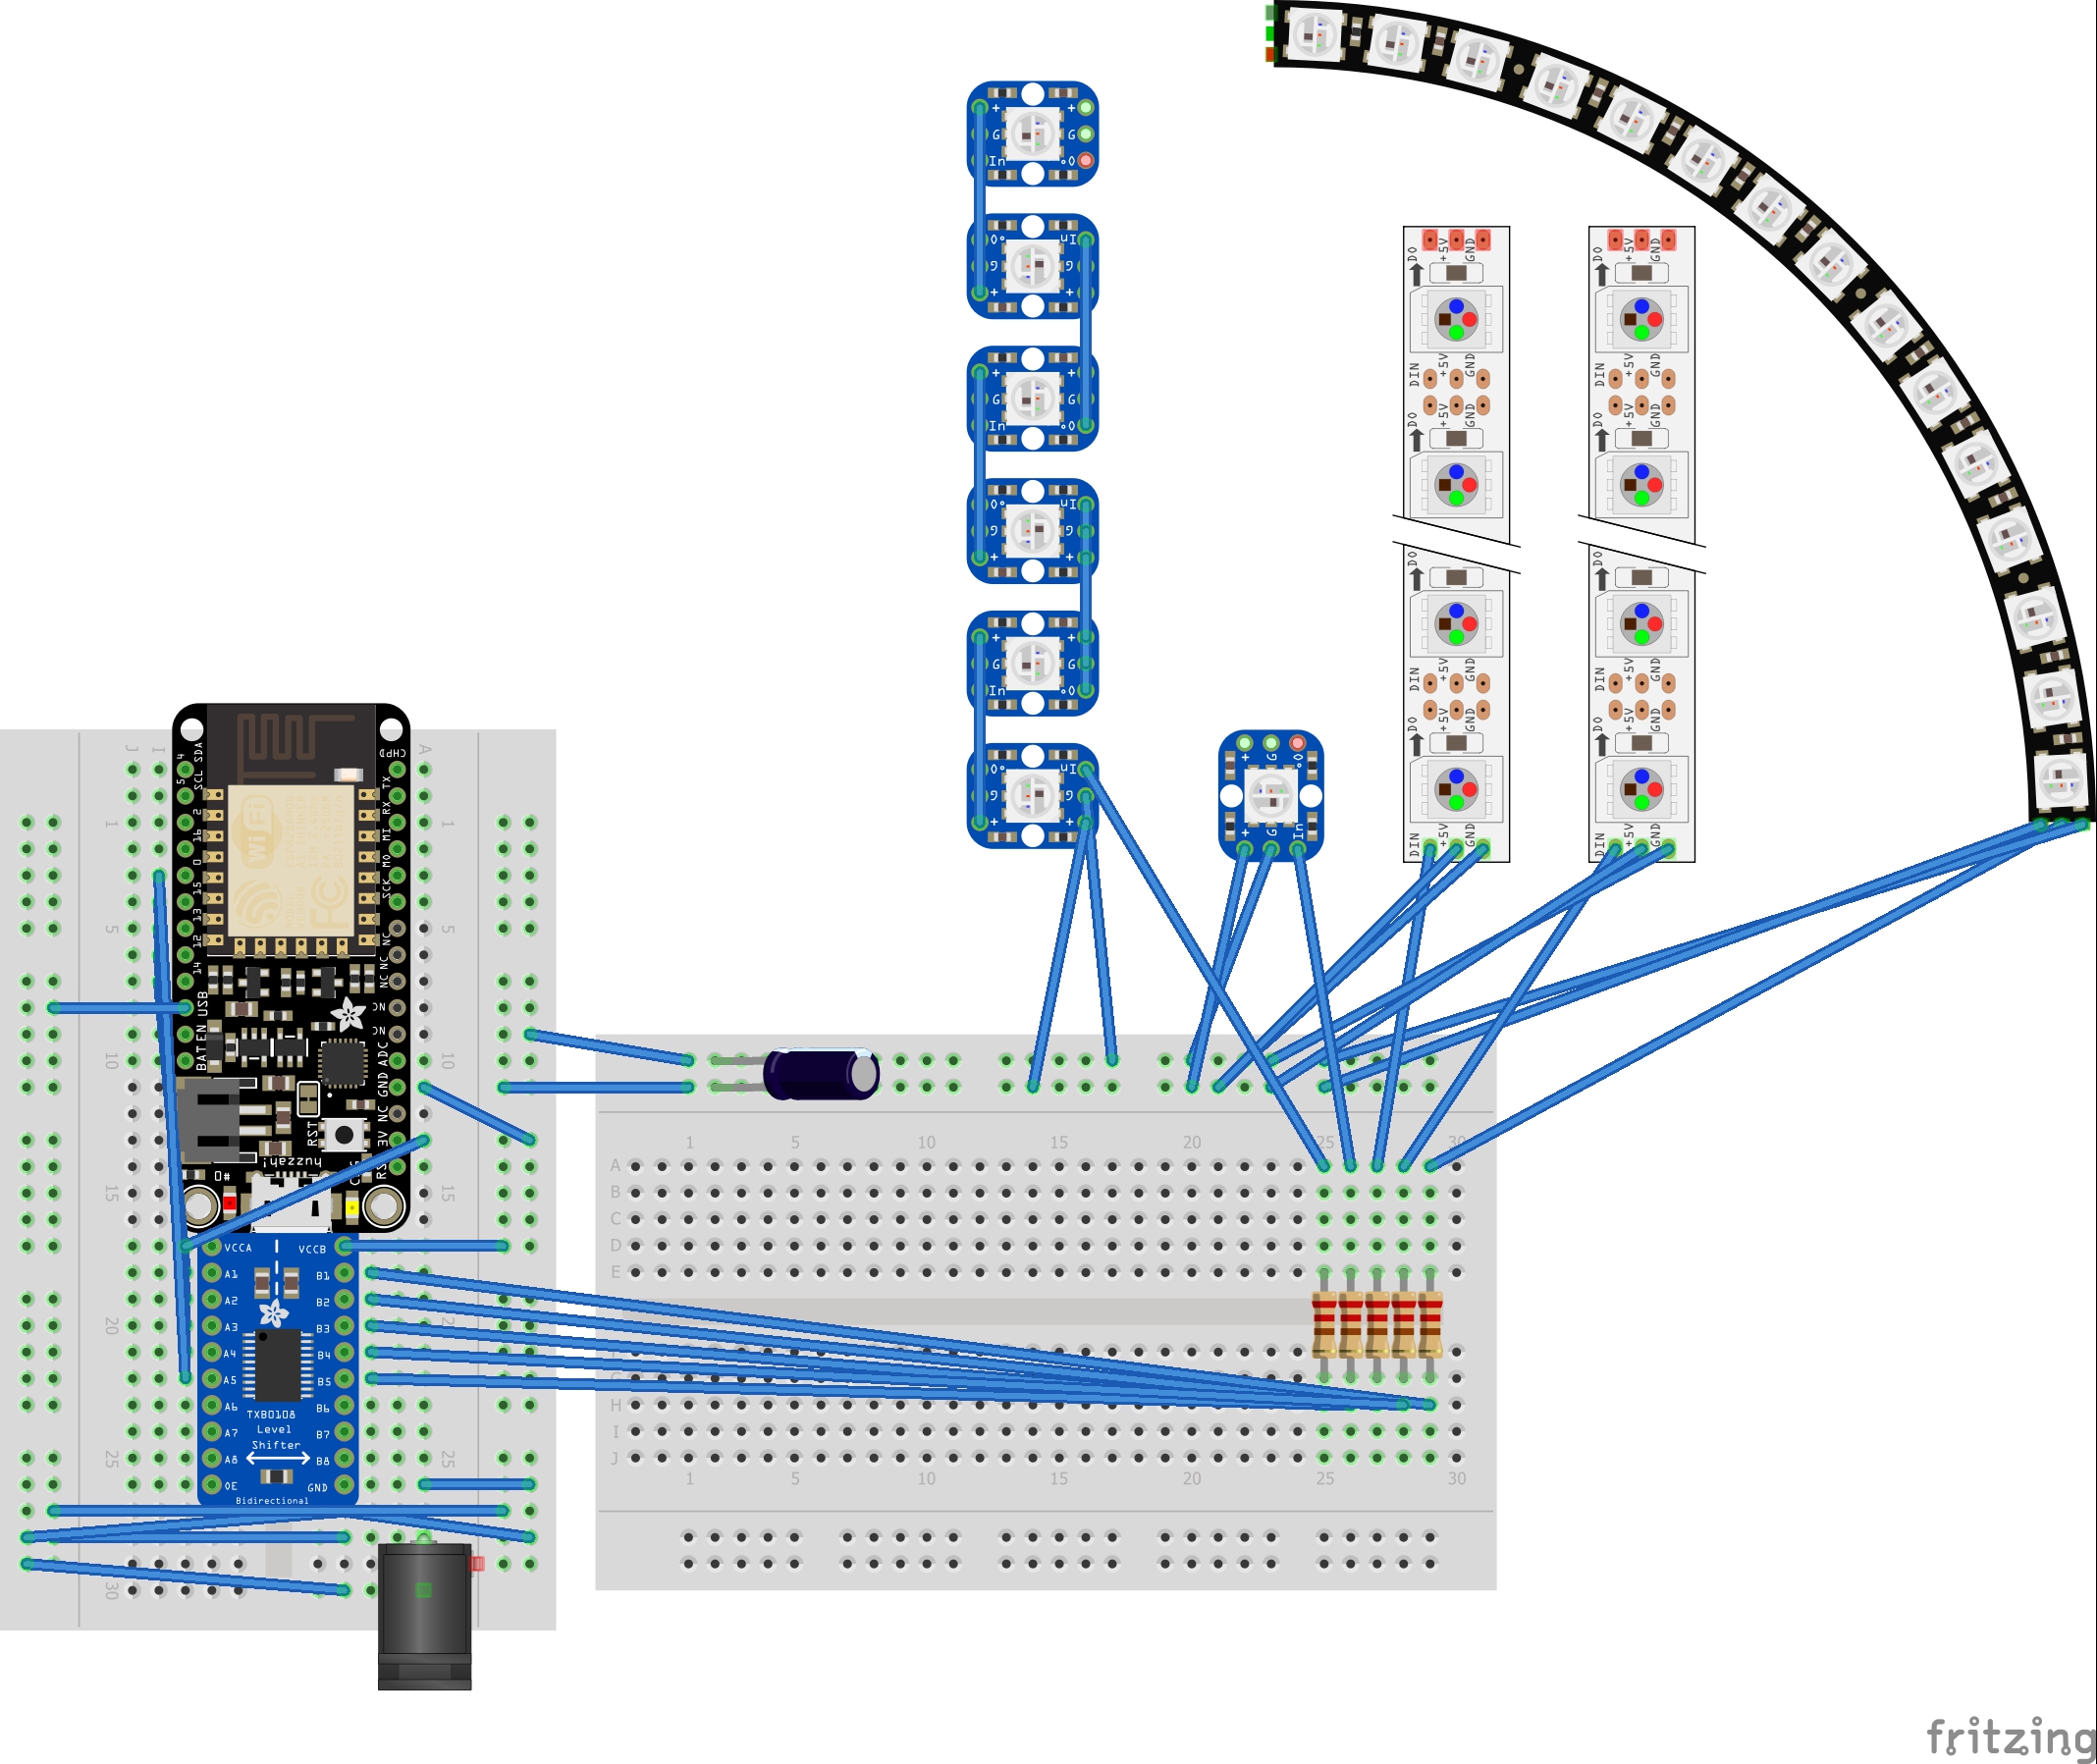
The whole thing is powered by a 5V 10A power supply. This powers everything from the feather to the pixels. This provides enough power to run all the pixels at full brightness without any issue.
A look at the wiring workings of the chandelier:
MQTTThe other aspect is that it needed to communicate with my home automation network. My other devices and rooms communicate through MQTT, so this must as well. The chandelier subscribes to a specific thread, and messages published to that thread determine what the chandelier will do. It will do everything from turning on/off and playing specific patterns.
***WARNING IF YOU BUILD THIS AS THE SCHEMATICS SHOW, YOU WILL BE TIEING A 5V TO THE USB PIN ON THE FEATHER. YOU MUST NOT CONNECT THE FEATHER TO THE COMPUTER WHILE IT IS CONNECTED TO THE 5V. THIS COULD WRECK YOUR FEATHER***
This is why I used female and male headers with the feather.
CODE EXAMPLETo start we need to create objects of our lights. We then put all of the objects into an array. The order that they go into the array, is how we control them using MQTT. So make sure, that you put them in an order, that means something to you, and is logical. In my case, I started with the bottom and worked my way up.
ChanLevels OutsideBottom(60, 15, NEO_GRB + NEO_KHZ800);
ChanLevels ChandelierArray[5]={BottomRing,Center,OutsideBottom,OutsideTop,TopRing};
Next we need to create an MQTT client. This will be a subscription only. The code is based of Adafruits MQTT library, which is easy to use and adjust. However, you can find many other great MQTT library out there as well.
#define WLAN_SSID   "FiOS-063ZO"
#define WLAN_PASS   "bag6355beat764gone"
#define MQTT_SERVER "192.168.1.155"
#define MQTT_PORT   1883
#define MQTT_USERNAME ""
#define MQTT_PASSWORD ""

WiFiClient client;
Adafruit_MQTT_Client mqtt(&client, MQTT_SERVER, MQTT_PORT, MQTT_USERNAME, MQTT_PASSWORD);
Adafruit_MQTT_Subscribe Control = Adafruit_MQTT_Subscribe(&mqtt, MQTT_USERNAME "/Apartment/LivingRoom/Chandelier");
Using an MQTT client or a console, you are then ready to send it commands on a specific thread.
 1)c:off:2
 2)a:set:2:255:255:255
The first line is used to turn on and off lights. The "c" stands for control, and is followed by either on, off, or set. This is then followed by either a number, or all. Currently the number refers to the array location of the specific light.
The second line is used to set and control colors and patterns. the "a" stands for action and is followed by a specific pattern short cut. Next comes a number again referencing a location in the array. Lastly, depending on what is being done, it could be a combination of between 1 or 6 numbers. In the above example I am using an GRB. All colors are separated in terms of GRB colors.
The whole thing runs in the main loop. The program uses .strtok() to strip apart the message. Then based on the previous results, it looks at different switch/control statements. Word of caution though, and it cost me a lot of time. You must place the following at the very end of your main loop, just before you close it. This is what updates the Neopixels. If you do not place it, or place it inside any other loop, it will cause your lights not to work, and you much frustration.
for(int i = 0; i<sze; ++i){
   ChandelierArray[i].Update();
 }
I also want to thank Adafruit for making great products and having easily accessible code, and example. Most of my code is based off of what they have done. The tutorials on their site, their Arduino IDE examples, and also their GitHub repository are easy to navigate and understand. I also would like than ajfisher from GitHub, who's project node-pixel, helped me out with the MQTT controls.


Comments