

Hardware components | ||||||
_ztBMuBhMHo.jpg?auto=compress%2Cformat&w=48&h=48&fit=fill&bg=ffffff) |
| × | 1 | |||
 |
| × | 12 | |||
 |
| × | 4 | |||
| × | 1 | ||||
| × | 1 | ||||
Software apps and online services | ||||||
| ||||||
Hand tools and fabrication machines | ||||||
| ||||||
At a recent MakerFaire, I acquired a SparkFun Badger where SparkFun was teaching people how to solder. Fortunately, the engineer who designed the Badger was standing right in front of me to assist and answer questions. I asked Shawn, "How did you get so many LEDs to illuminate individually with only eight pins?" He went on to explain charlieplexing. A few days later, I took the Badger and plugged it into my computer at work where it greatly reduces my productivity as I ponder the LEDs, microcontrollers, and other topics of electronics.
What is charlieplexing?https://en.wikipedia.org/wiki/Charlieplexing summarizes it this way:
Charlieplexing is a technique for driving a multiplexed display in which relatively few I/O pins on a microcontroller are used to drive an array of LEDs.
The combination of active pins and current direction determines which individual LED illuminates. The voltage drop of other LEDs in series prevents them from illuminating even though they are biased correctly.
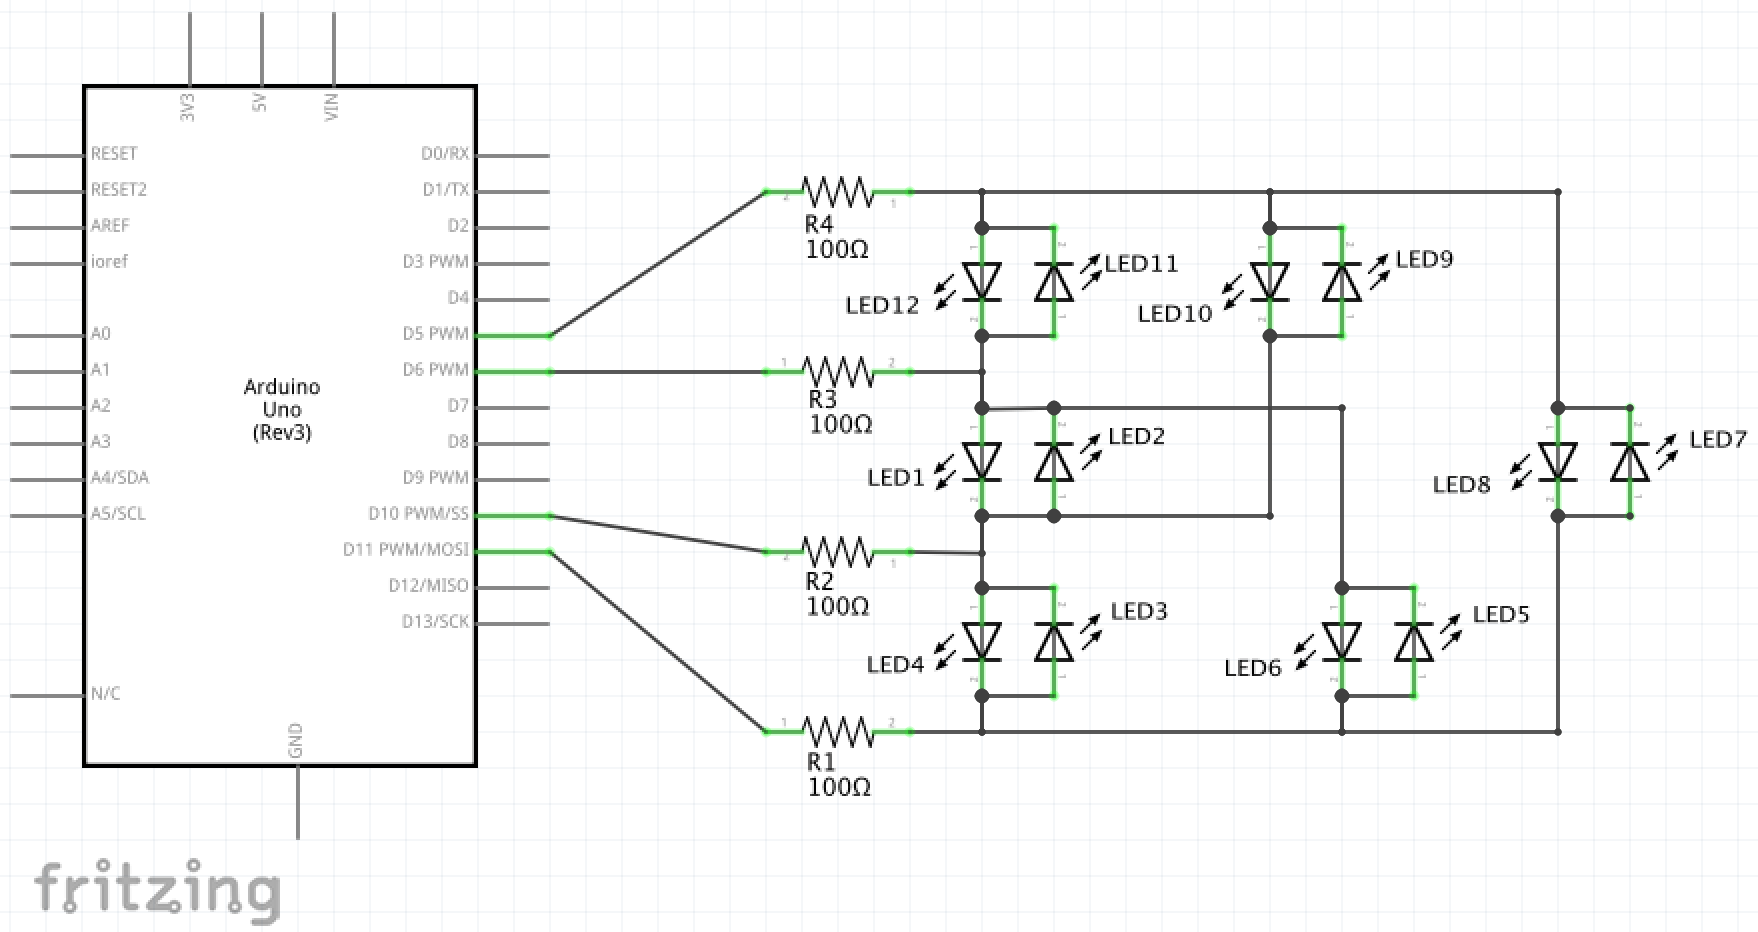
This diagram makes it easy to see:
If J1 pins 1 and 3 are connected to - and + of a current source respectively, then only LED 5 will illuminate. Even though LEDs 2 and 3 have the same orientation, their combined voltage drop will prevent illumination.
Where n is the number of pins: max number of LEDs = n² - n.
I'm keeping this short short because there are so many other explanations out there already.
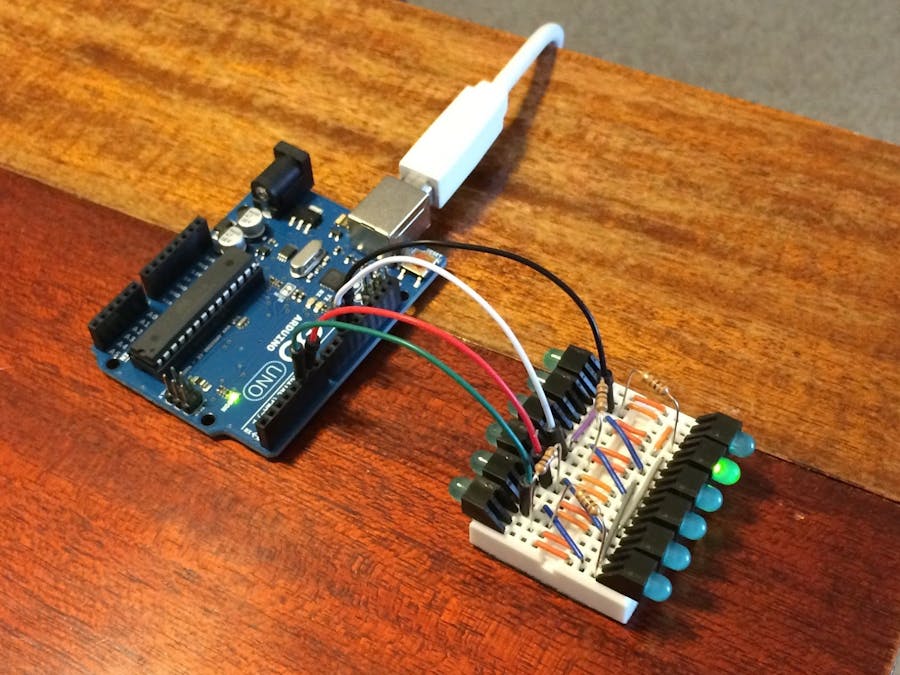
The Charlie ChaserOne morning I was digging through my LED box and noticed I have about 200 right-angle green LEDs. "Something must be done about this," I said to myself. Supplies combined with the inspiration of the Badger, it was clear that I must charlieplex something. The mini bread board holds 12 LEDs which just happens to be the maximum supported by four pins.
Each LED sat directly across the breadboard aisle from another with the poles reversed. Placing jumpers across to it's twin made this puzzle a bit easier to solve. At that point it was essentially multiplexing. Six more jumper wires to complete all connections, and it was ready for a sanity check. The multimeter revealed no shorts, so I pulled out a battery pack and manually tested every combination of inputs. Two or three mistakes were made, but they were nondestructive and easy to correct. With corrections made, I hooked it up to the Arduino Uno.
The Chase BeginsWith the hardware done, the coding began. I started by making a class for a pair of "across the aisle" LEDs. I called it "Charlie". Charlie objects handle all the pinMode(), digitalWrite(), and analogWrite() functions so the loop doesn't have to. Every Charlie function requires a boolean argument to specify which LED of the pair it will use. Looking back, software objects representing pairs of physical objects was probably inelegant, but hindsight is a fantastic teacher. Charlies are instantiated as global variables, and the loop calls functions to turn them on and off.
Several iterations of trial and error later, I have an array of LEDs chasing (hence the name) around the perimeter of the bread board. The duration of the flash vary with each loop. I really wanted to use the PWM pins of the Uno so I could dim the flash as well.


Comments