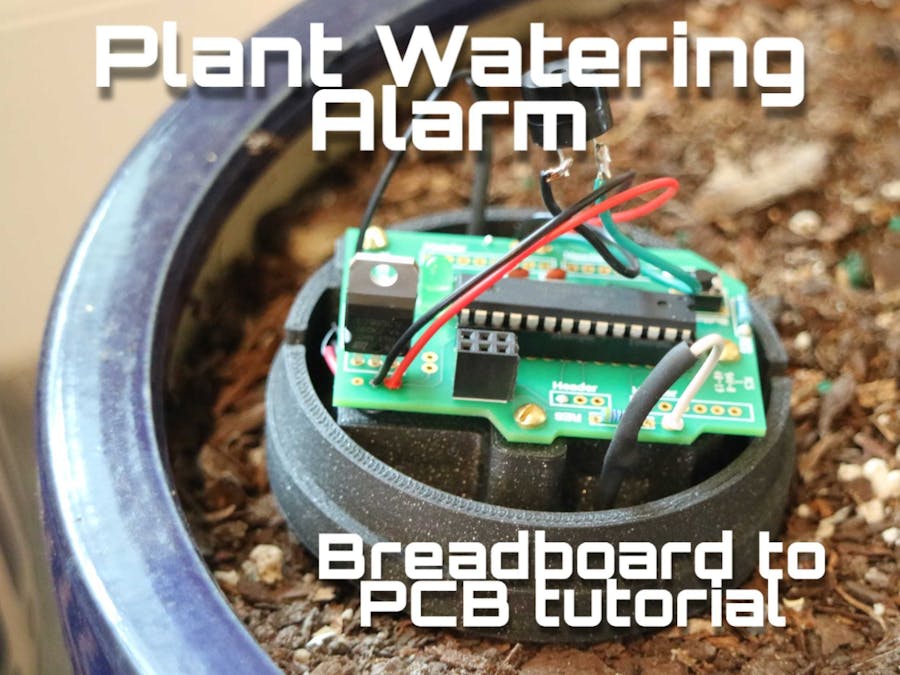
I’ve got to come clean — I am a horrible plant parent. It’s nice to get that one off my chest. I can’t figure it out, whether it’s hitting the photosynthesis a little too hard or going light on the old H2O. It seems nothing I do will keep these dudes alive! I love their company, the way they brighten up an otherwise bleak space, setting the mood in ways an Ikea painting just can’t. So I set out to change things for the better by building a device that helps all those quiet plant killers like me become proud plant purveyors.
Introducing the Thirsty Plant Detector, a device that speaks for your plants, telling you exactly when they are ready for a refill.
This project has been really exciting, using the Explorer Uno at its core, combined with a soil moisture sensor and piezo buzzer that produces a beautiful cricket “chirp” when the plant has run dry. Interesting fact about this buzzer — it uses a piezo element, which can both generate sound or detect vibrations such as a knock. The soil moisture sensor is dead simple. The two prongs or probes sit within the soil acting like a variable resistor, generating analog values between 0 and 1023, dependent on the amount of moisture in the soil. The more water in the soil means there will be better conductivity between the probes, resulting in a lower resistance.
Watch this video we put together to learn how to build it:
Or follow along below to build your own! Happy building!!
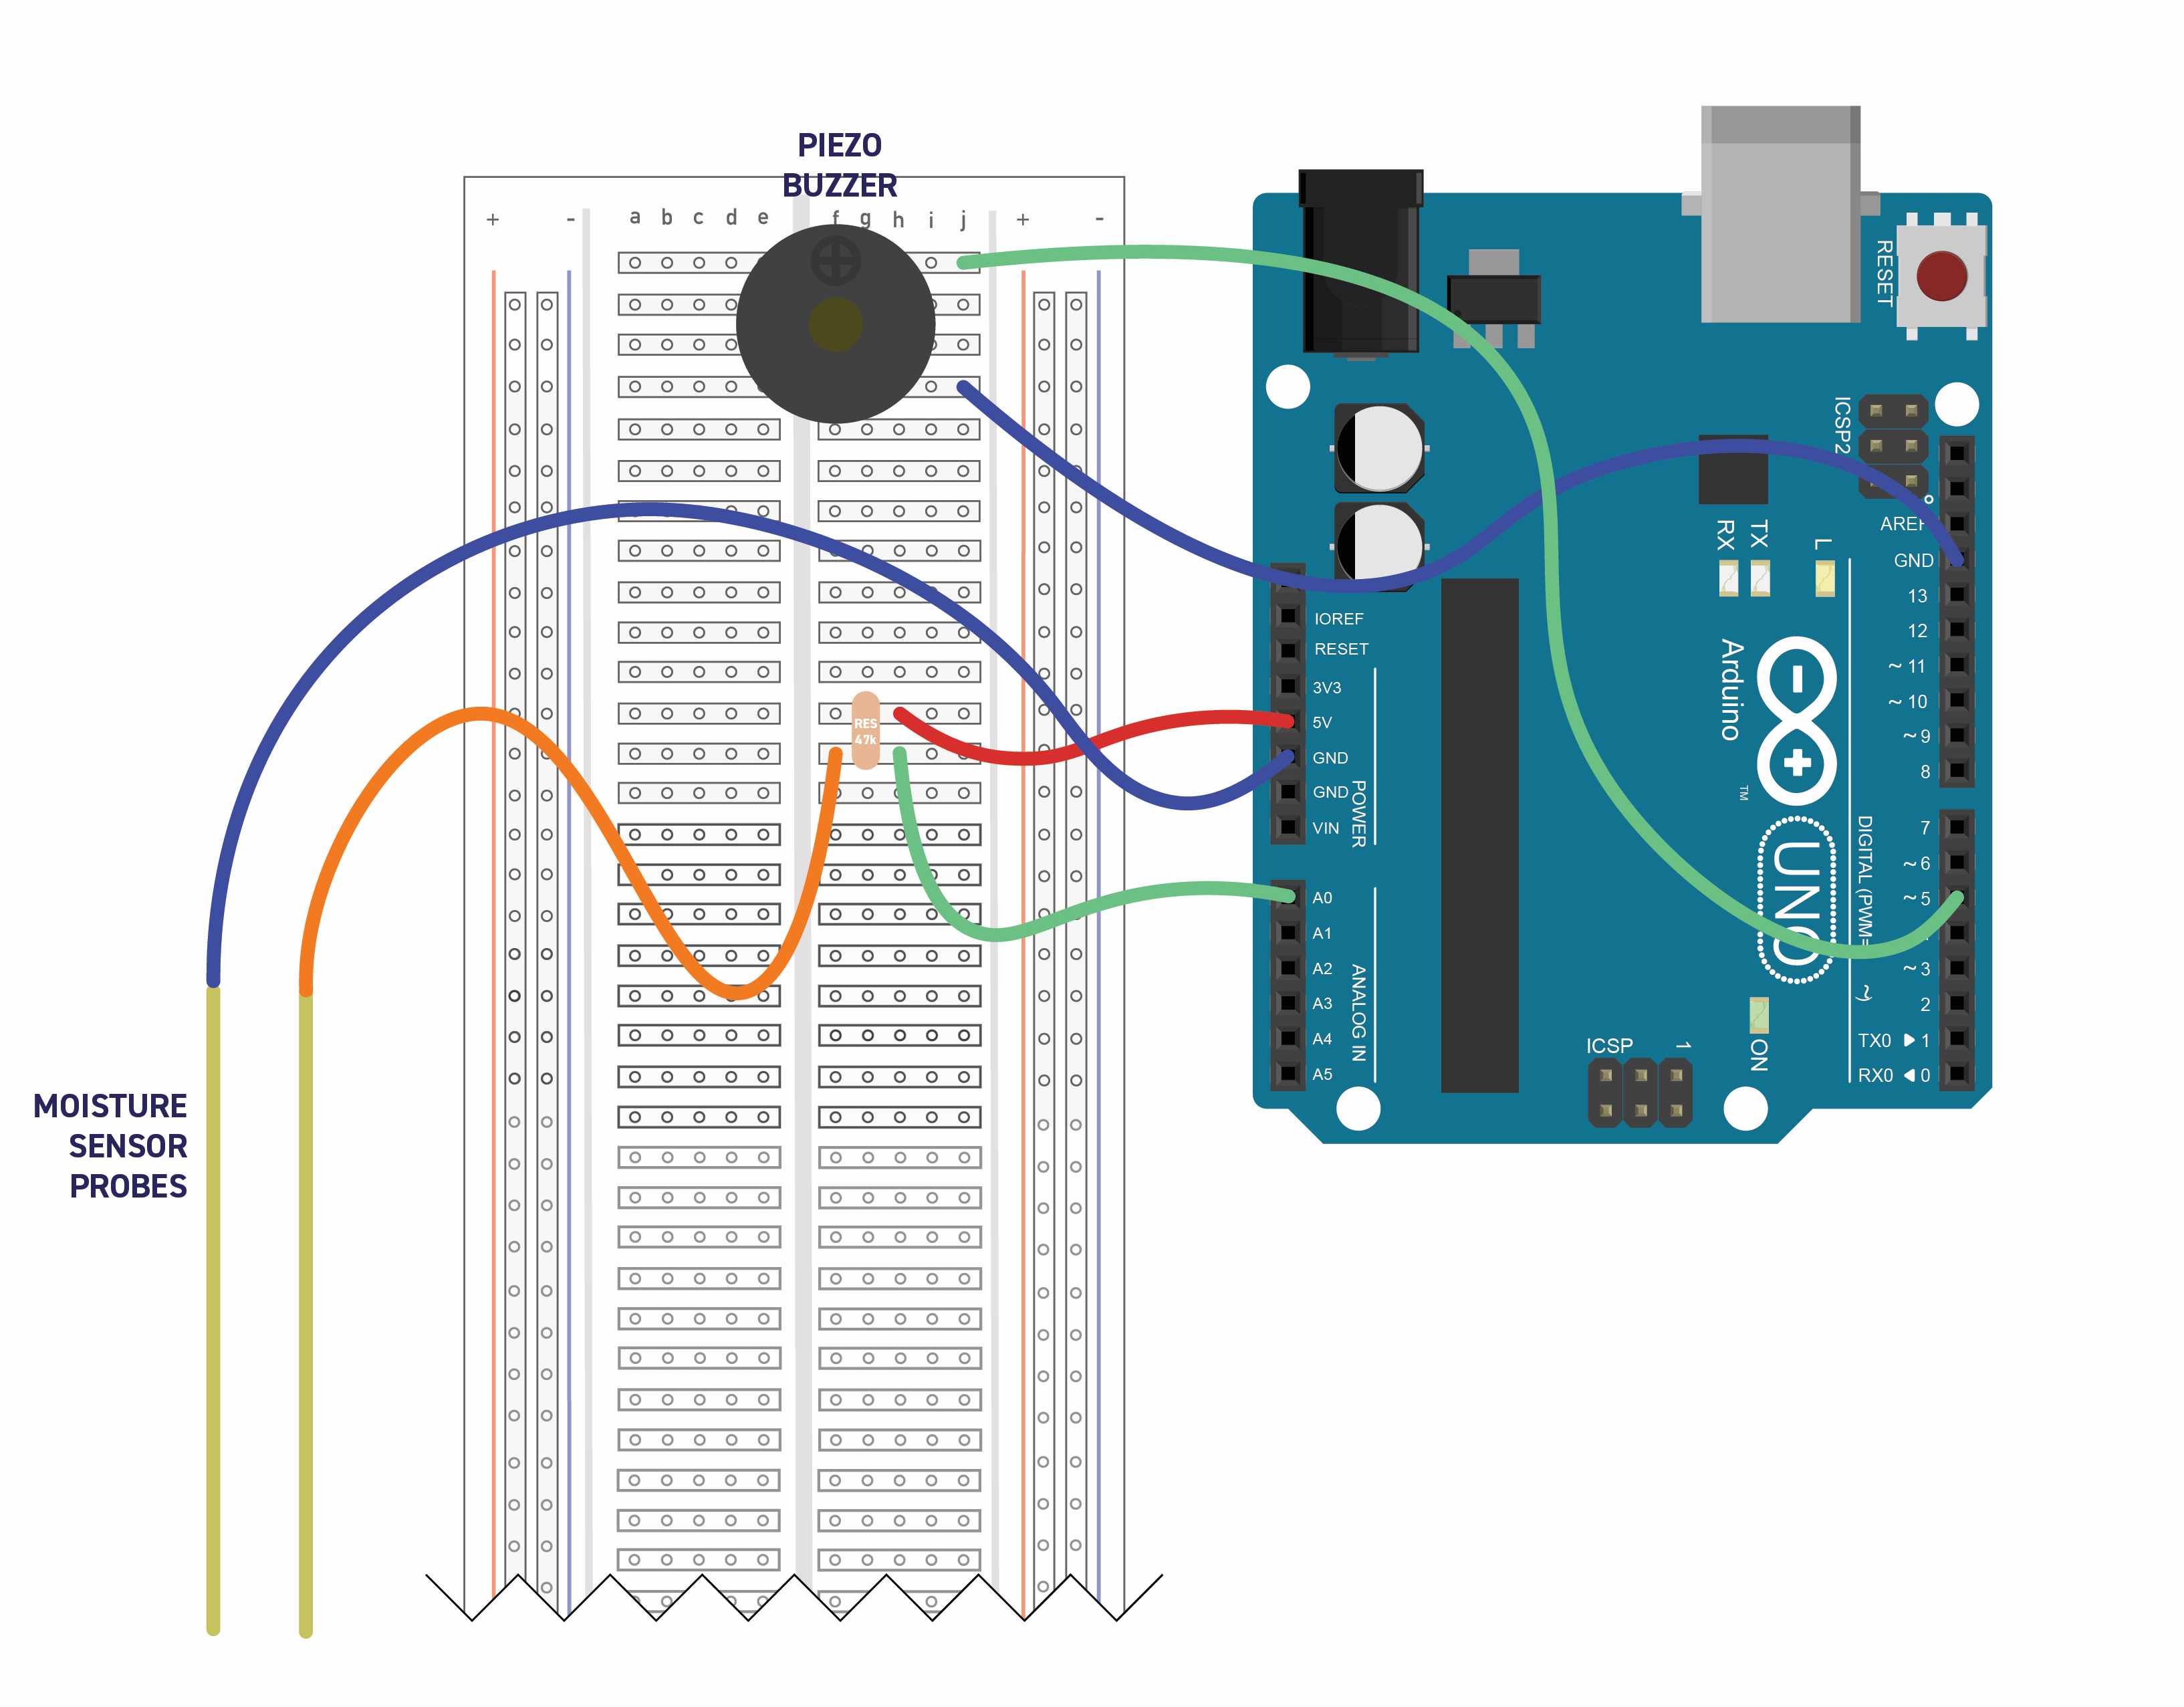
Let's Breadboard Out the Project:To get started, we are going to breadboard everything out to test the software before we design our PCB. I use an Arduino Uno to get everything up and running and, when ready, transfer the Atmega328 over into my PCB. I’ve included a diagram of how the components fit together to help build your own.
Note that we can use either an off-the-shelf moisture sensor (Sparkfun makes a great one) or simply build our own. If you choose to build your own, all you need are two metal “probes, ” some spare wire and a 47k ohm resistor. I used brass hobby rods. You can find them at any hobby store, usually next to the model car/train section.
Once you’ve got your breadboard put together, upload this code to your Arduino:
https://github.com/patchr-io/Thirst-Alert/blob/master/Thirst_Alert.ino
If all looks good, you should hear a cricket noise! Touch the probes to each other and the noise should stop.
It's PCB Design Time!1. First let’s log in to Patchr. If you haven’t created an account, go ahead and do that now. Here is a great 4 minute video to help you get started.
Check out these helpful keyboard shortcuts:
- Switch to top side of the PCB: Command + 1
- Switch to bottom side of the PCB: Command + 2
- Rotate a component: Command + R
- Toggle pad view vs component view: Command + P (removes all the components icons to reveal the component footprints)
- Show ghosted image of routes on the opposite side of the PCB: Command + H
2. We will be using our Explorer Uno template to skip the step of designing the Arduino. Select the project, give it a name, and we can start designing.
3. The first thing we should do is change the board footprint a bit to give us a larger area to place our moisture sensor and buzzer. Let’s do this by grabbing one of these points on the corner and dragging it out. We can always come back and change the shape to fit our enclosure and the components we have added to it.
4. Next, let’s place our resistor. Remember from the breadboard, one end of the resistor will go into the 5V side and the other end will go into A0. When in doubt, select the header and it will show you the pin name on the left rail. I've placed the 5V route on the bottom side of the board (shortcut: command + 2) in order to prevent a cross over with the GND line on the top side of the board. We will also place a single through hole and connect it to the resistor to solder the moisture probe to. Let’s place another through hole for the other probe and route it into one of the ground pins.
Let’s take a quick break, pour some coffee, stretch a bit… and do a little file+save. We don’t want to lose all the progress you’ve made.
5. Now it’s buzzer time! In looking at the breadboard, we notice that we need to connect two pins. One to GND and the other to digital pin 5.
6. This is your chance to double check your connections with your breadboard circuit. If it appears to be the same as what you’ve designed on your PCB, you are ready to export! I suggest using Patchr Manufacturing because you are guaranteed a high-quality PCB. Use our promo code “GoPatchr” to get 15% off your first order. You can also download the finished PCB file attached to the post below.
Designing the EnclosureWhile your PCB is off getting manufactured, let’s design the enclosure. Take note of the footprint dimensions on the right rail under the BRD tab — this will help ensure you have enough room for the PCB in your final design. If you would like to use the one I designed, you can download it here or on Thingiverse. As for CAD software, my favorite is Onshape for more advanced designs or TinkerCAD when you need to get something done fast. If you don't have a 3D printer there are a lot of great sites you can use to get your 3D object printed, you can also build an enclosure using materials found around your house.
Assembly!!!Have you ever just popped off your headphones, turned the volume to 11, pushed away from your desk and danced a little jig? Excited because your PCBs have just arrived and you can’t wait to start your favorite part of every project? Assembly!!!! Because it’s that time, my favorite time…soldering. To quote Bob Pease: “My favorite programming language is solder.” I could not agree with him more... So warm up your iron, put on your favorite beat and let’s do this thing!
Use your Patchr project as a resource and the circuit diagrams to help you as you put things together. A few things to note, I wanted the buzzer to exist towards the top of the enclosure I designed so I am soldering wires between the buzzer and the PCB. If you want to place the buzzer directly on the PCB, just make sure you have allowed enough room for the component during the design phase.
Let’s hope the only crispy, crunchy, dried-out plants in your life are the dehydrated kale chips you had for lunch yesterday, thanks to the Thirst Alert Plant Alarm. As usual, hit me in the comments below with questions, cool gifs, dad jokes, or your favorite soldering jams.
Check out the build video here. Share your Plant Alarm hacks here.
Annnnd from my workbench to yours…happy building!


_ztBMuBhMHo.jpg?auto=compress%2Cformat&w=48&h=48&fit=fill&bg=ffffff)


_3u05Tpwasz.png?auto=compress%2Cformat&w=40&h=40&fit=fillmax&bg=fff&dpr=2)
Comments