



Access to reliable power is essential, whether you are working outdoors, traveling off-grid, facing frequent power cuts, or preparing for emergencies. Commercial portable power stations are often expensive, closed-source, and difficult to repair or customize. This project was created to address those limitations with a DIY, open, and modular portable solar generator that anyone with basic electronics skills can build and understand.
I wanted a compact and practical solar generator that could:
- Charge directly from a solar panel
- Store energy safely in a battery pack
- Provide usable DC power for everyday devices
- Be easy to modify, repair, and upgrade
Instead of relying on proprietary systems, this design focuses on simplicity, transparency, and real-world usability, making it ideal for learning, experimentation, and deployment in remote or unreliable grid conditions.
How It Works
- Solar Power Generation
The solar panel converts sunlight into DC electrical energy. The output voltage varies with sunlight intensity, temperature, and load conditions.
- Battery Charging and Protection
The charge controller regulates the incoming power from the solar panel to ensure safe charging of the battery. It prevents overcharging, deep discharge, and reverse current flow, thereby extending battery life.
- Energy Storage
The battery pack stores the harvested solar energy, allowing the system to deliver power even when sunlight is unavailable. This makes the generator suitable for night-time use and emergency backup.
- Voltage Regulation and Output
The DC-DC converter conditions the battery voltage to a stable level required by the connected devices. This ensures reliable operation of sensitive electronics.
- Load Supply
Power is delivered through DC output ports and optional USB interfaces, making the system compatible with a wide range of low-power appliances and development boards.
- Safety and Reliability Considerations
Overcurrent and short-circuit protection are included to safeguard the system
Reverse polarity protection prevents accidental wiring damage
Proper enclosure and insulation ensure safe handling during operation
ApplicationsPortable off-grid power
Emergency backup during outages
Educational solar and battery experiments
Field electronics and IoT projects
This project demonstrates that reliable solar-powered energy systems do not have to be expensive or complex. With the right design approach, anyone can build a functional and scalable portable solar generator.
Step-by-Step Build InstructionsThis section explains how to assemble the portable solar generator in a clear and logical sequence. Even beginners can follow along, while experienced makers can adapt the design as needed.
Step 1: Prepare the Enclosure
Start by selecting a suitable enclosure that can comfortably house all components with adequate ventilation.
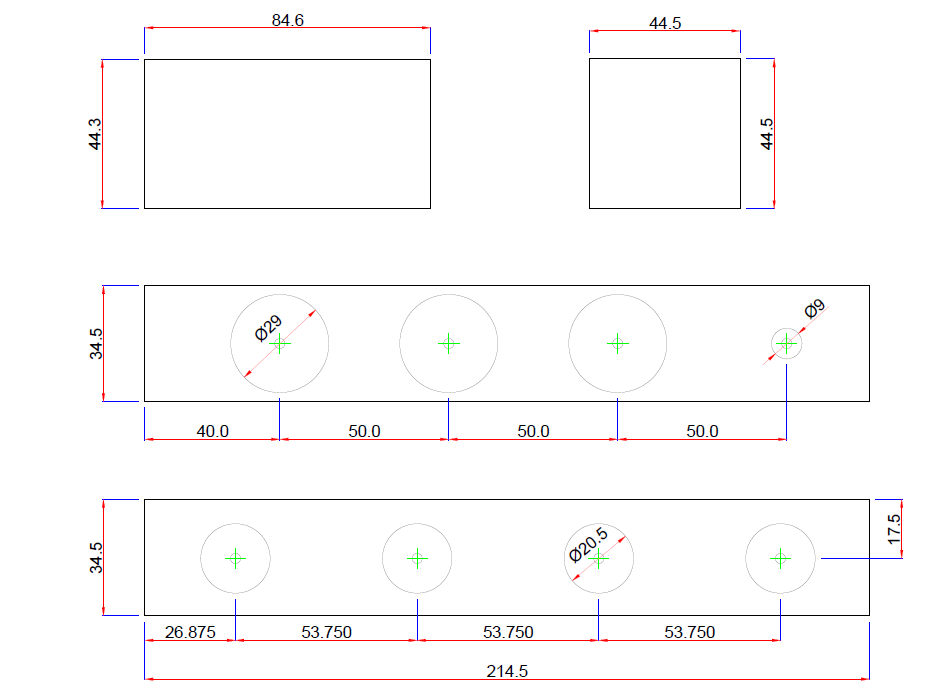
- Mark positions for the solar input, output ports, switch, and indicators
- Drill or cut openings carefully to match connector sizes
- Ensure enough clearance for wiring and airflow
Tip: Dry-fit all components before final mounting to avoid rework later.
Step 2: Mount the Major Components
- Secure the core components inside the enclosure.
- Fix the battery pack firmly using brackets or adhesive pads
- Mount the charge controller in an accessible position
- Install the DC-DC converter close to the output ports to minimize voltage drop
Ensure no conductive parts touch the enclosure walls.
Step 3: Wire the Solar Input
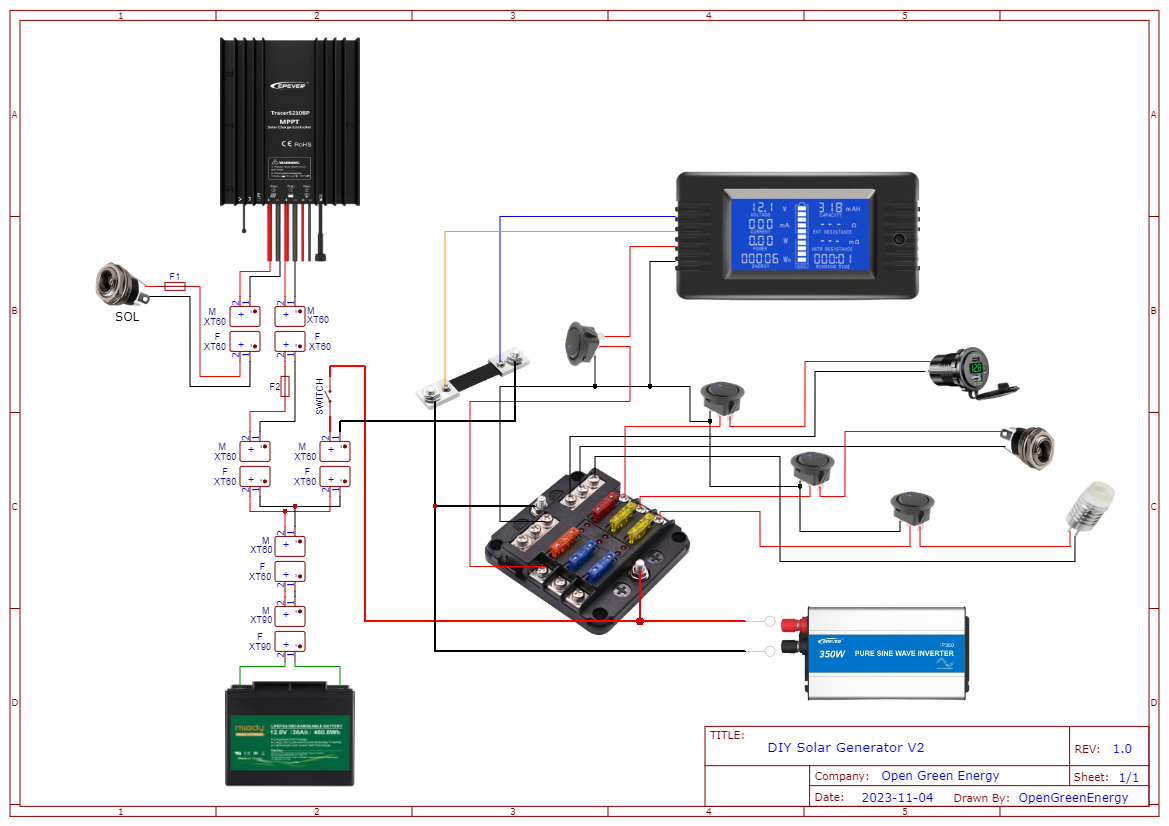
- Connect the solar panel positive and negative terminals to the charge controller input
- Add a fuse or protection element on the positive line
- Verify polarity carefully before powering the system
This step ensures safe and efficient energy transfer from the solar panel.
Step 4: Connect the Battery Pack
- Wire the battery pack to the charge controller battery terminals
- Double-check voltage compatibility between battery and controller
- Secure all connections using proper terminals or solder joints
Once connected, the charge controller should indicate battery presence.
Step 5: Configure the Output Stage
- Connect the battery output to the DC-DC converter input
- Adjust the converter output voltage before connecting any load
- Wire the output ports or USB module to the converter output
This step ensures stable and regulated power delivery.
Step 6: Install Switches and Indicators
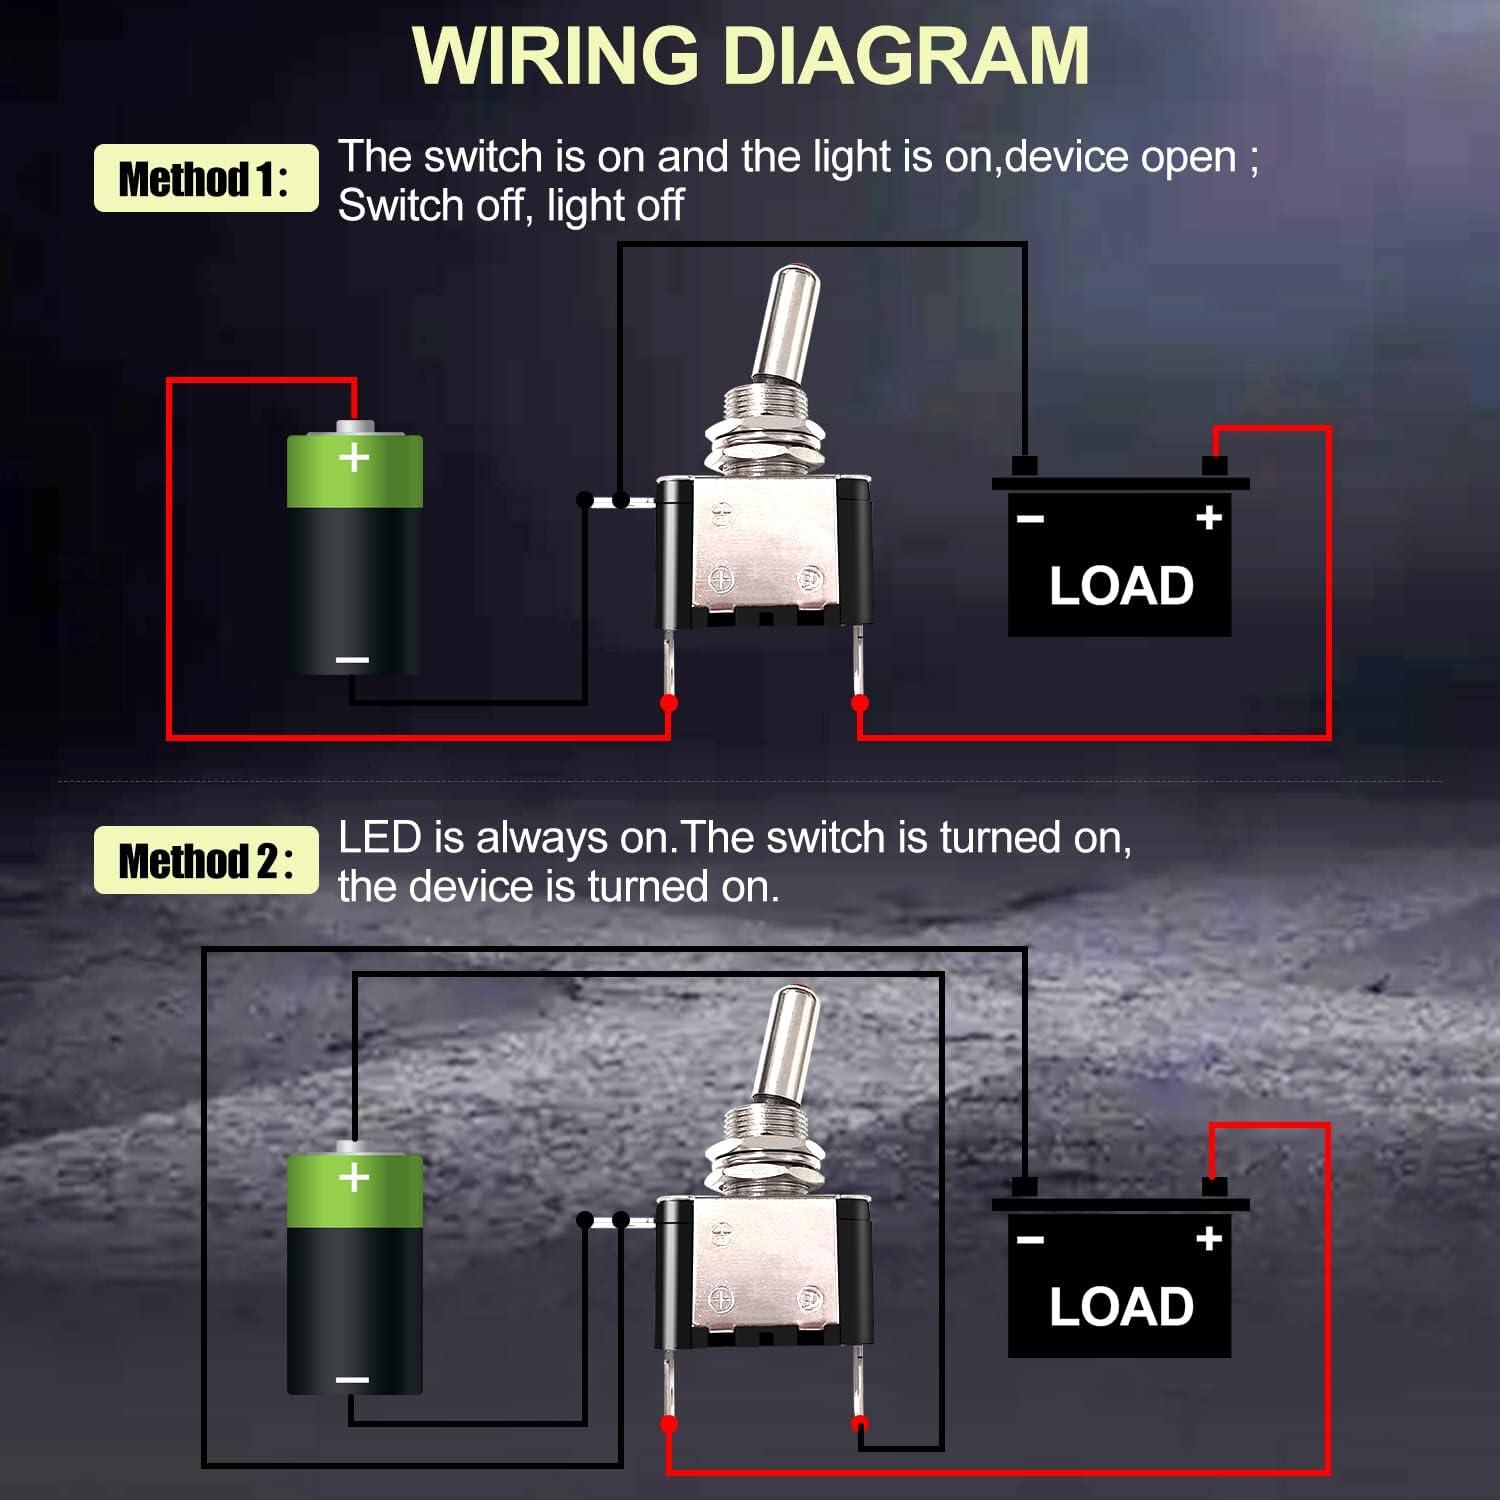
- Add a main switch between the battery and output stage
- Install voltage indicators or LEDs if used
- Route wires neatly to avoid interference or accidental shorts
Step 7: Final Assembly and Inspection
- Inspect all wiring for correct polarity and secure connections
- Add insulation or heat shrink where required
- Close the enclosure and tighten all screws
Before sealing completely, perform a quick functional test.


Comments