/*
This source code of graphical user interface
has been generated automatically by RemoteXY editor.
To compile this code using RemoteXY library 2.3.3 or later version
download by link http://remotexy.com/en/library/
To connect using RemoteXY mobile app by link http://remotexy.com/en/downloadr/
- for ANDROID 4.1.1 or later version;
- for iOS 1.2.1 or later version;
This source code is free software; you can redistribute it and/or
modify it under the terms of the GNU Lesser General Public
License as published by the Free Software Foundation; either
version 2.1 of the License, or (at your option) any later version.
*/
//////////////////////////////////////////////
// RemoteXY include library //
//////////////////////////////////////////////
// RemoteXY select connection mode and include library
#define REMOTEXY_MODE__SOFTSERIAL
#include <SoftwareSerial.h>
#include <RemoteXY.h>
// RemoteXY connection settings
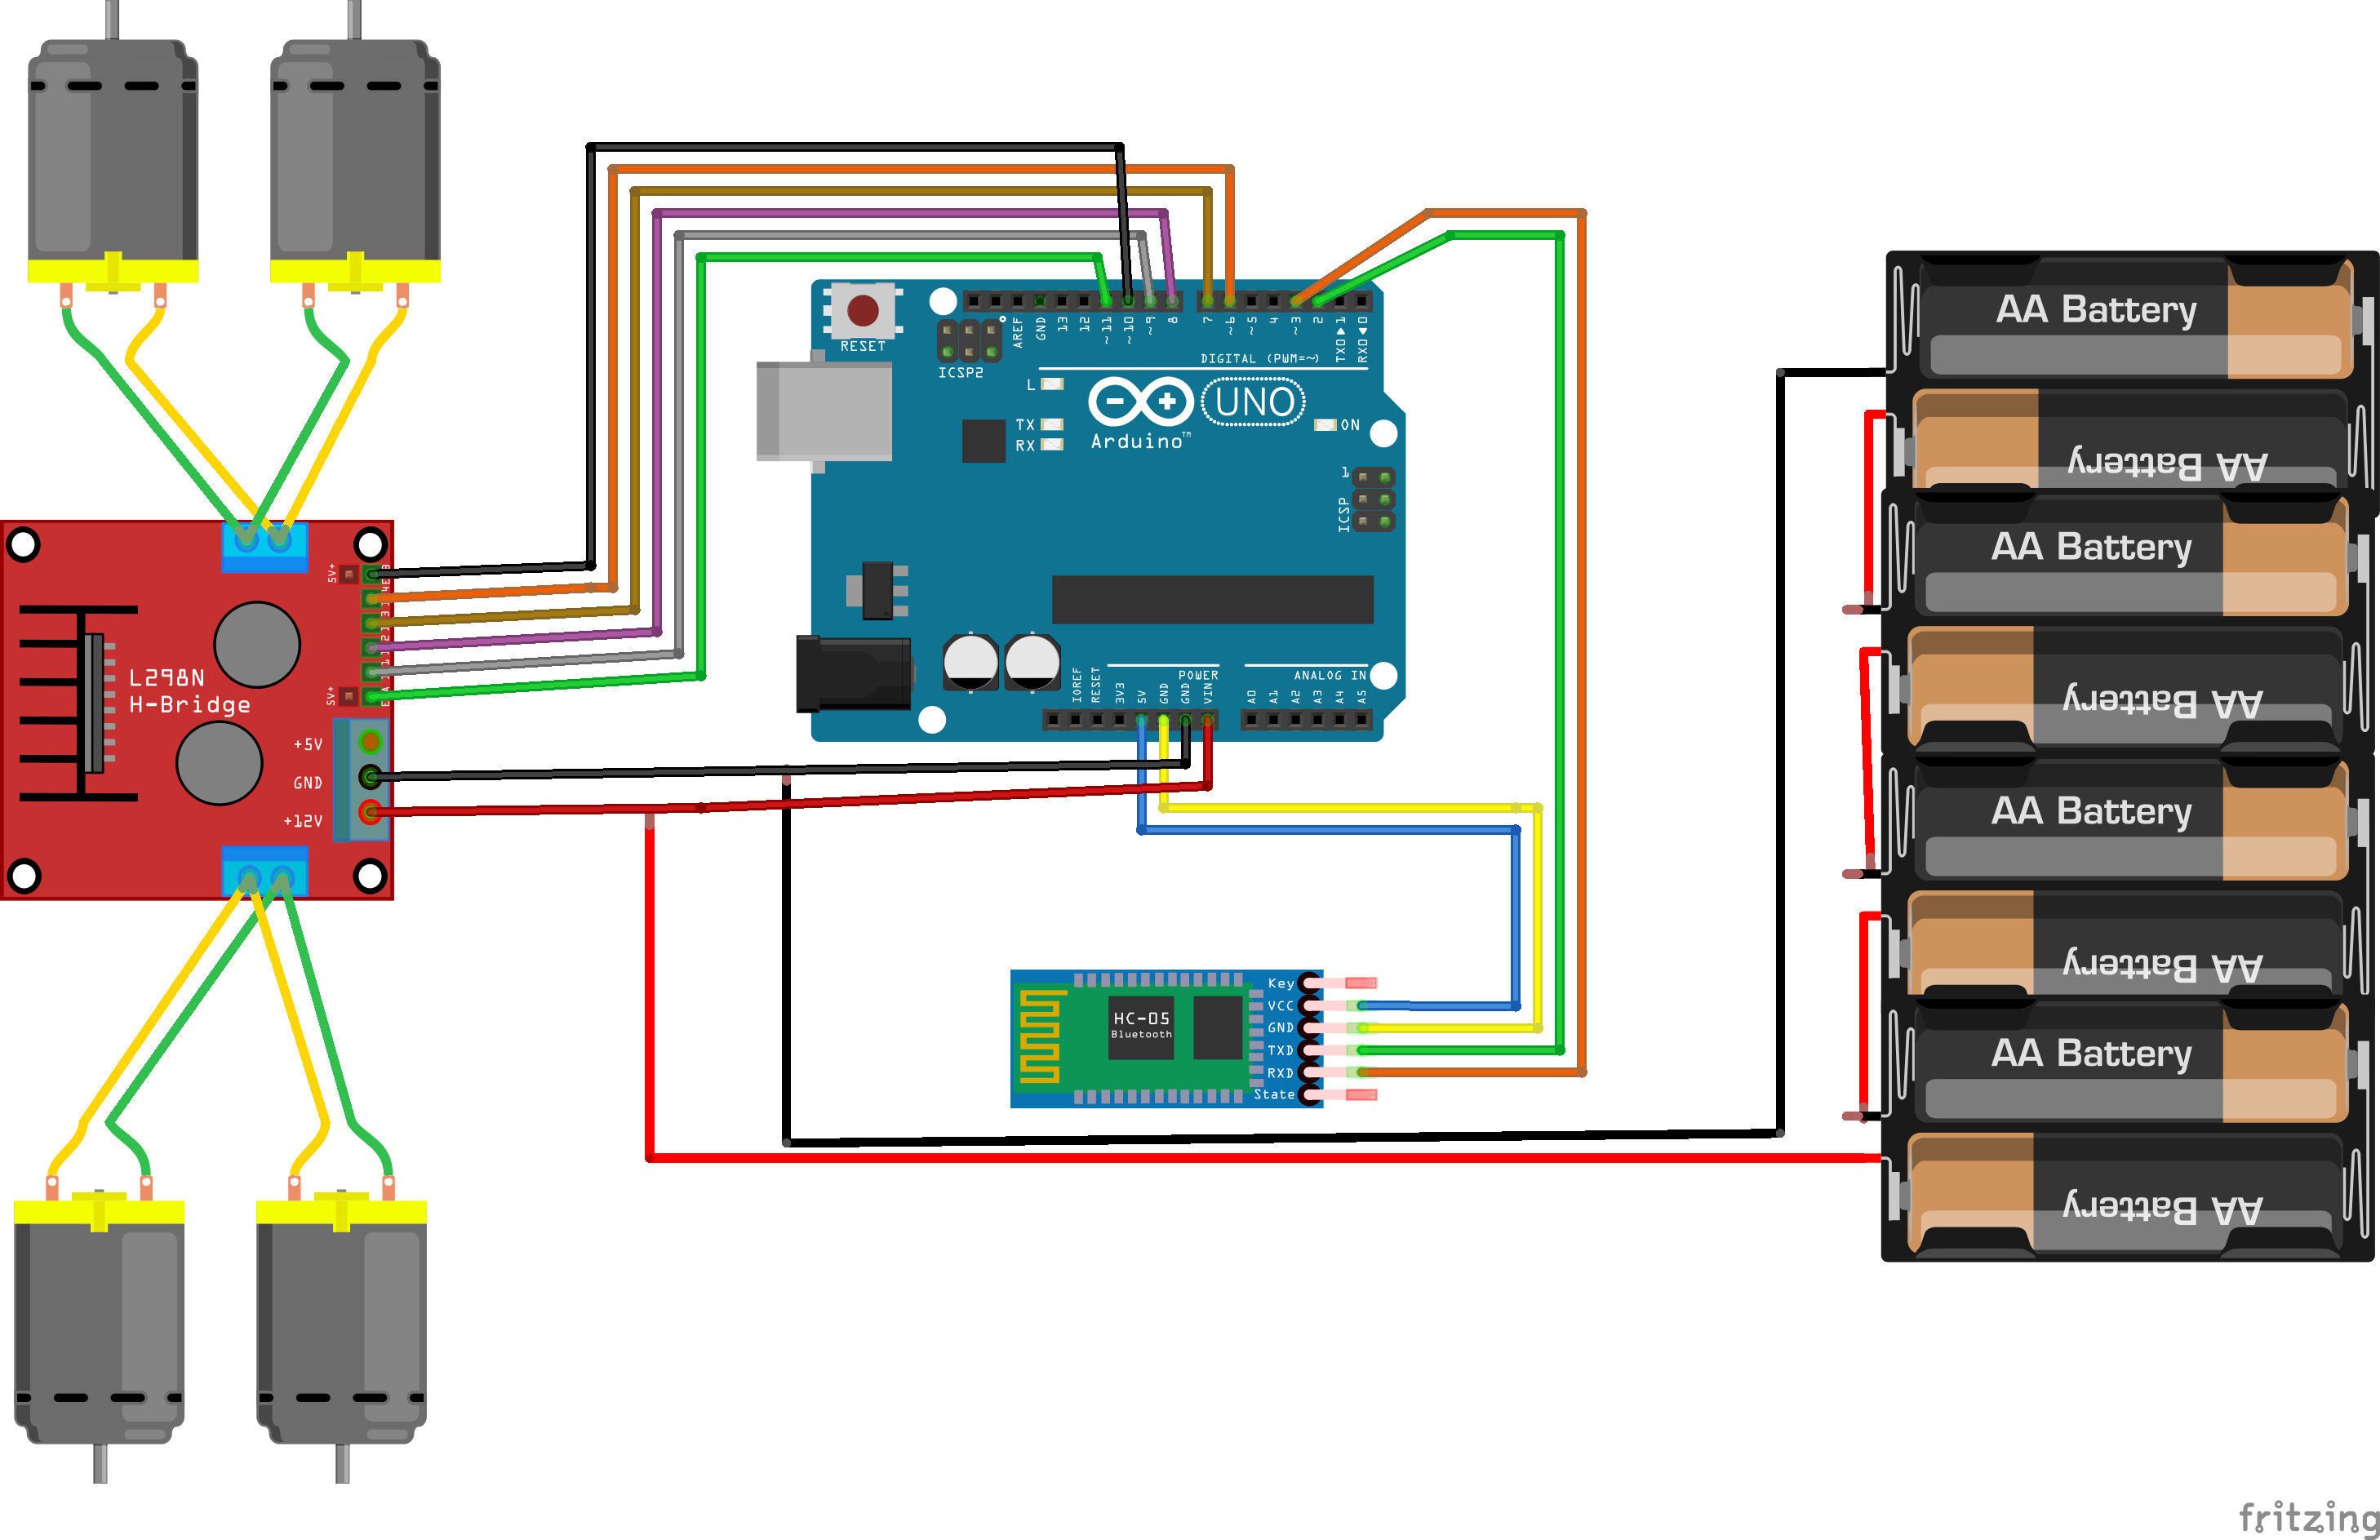
#define REMOTEXY_SERIAL_RX 2
#define REMOTEXY_SERIAL_TX 3
#define REMOTEXY_SERIAL_SPEED 9600
// RemoteXY configurate
#pragma pack(push, 1)
uint8_t RemoteXY_CONF[] =
{ 255,3,0,0,0,67,0,8,13,4,
5,48,60,14,30,30,0,2,26,31,
2,0,9,6,22,11,0,2,26,31,
31,79,78,0,79,70,70,0,131,1,
7,23,23,8,1,2,31,73,110,100,
105,97,110,0,131,0,14,31,33,8,
2,2,31,76,105,102,101,104,97,99,
107,101,114,0 };
// this structure defines all the variables of your control interface
struct {
// input variable
int8_t joystick_1_x; // =-100..100 x-coordinate joystick position
int8_t joystick_1_y; // =-100..100 y-coordinate joystick position
uint8_t switch_1; // =1 if switch ON and =0 if OFF
// other variable
uint8_t connect_flag; // =1 if wire connected, else =0
} RemoteXY;
#pragma pack(pop)
/////////////////////////////////////////////
// END RemoteXY include //
/////////////////////////////////////////////
#define PIN_SWITCH_1 13
//define right motor control pins
#define right_motor_A 8
#define right_motor_B 9
#define right_motor_speed 11 //enable pin
//define left motor control pins
#define left_motor_A 6
#define left_motor_B 7
#define left_motor_speed 10 //enable pin
//define two arrays with a list of pins for each motor
uint8_t RightMotor[3] = {right_motor_A, right_motor_B, right_motor_speed};
uint8_t LeftMotor[3] = {left_motor_A, left_motor_B, left_motor_speed};
//speed control of motors
void Wheel (uint8_t * motor, int v) // v = motor speed, motor = pointer to an array of pins
{
if (v > 100) v=100;
if (v < -100) v=-100;
if (v > 0){
digitalWrite (motor [0], HIGH);
digitalWrite (motor [1], LOW);
analogWrite (motor [2], v * 2.55);
}
else if ( v<0 ){
digitalWrite (motor [0], LOW);
digitalWrite (motor [1], HIGH);
analogWrite (motor [2], (-v) * 2.55);
}
else{
digitalWrite (motor [0], LOW);
digitalWrite (motor [1], LOW);
analogWrite (motor [2], 0);
}
}
void setup()
{
RemoteXY_Init ();
pinMode (PIN_SWITCH_1, OUTPUT);
//initialization pins
pinMode (right_motor_A, OUTPUT);
pinMode (right_motor_B, OUTPUT);
pinMode (left_motor_A, OUTPUT);
pinMode (left_motor_B, OUTPUT);
}
void loop()
{
RemoteXY_Handler ();
digitalWrite(PIN_SWITCH_1, (RemoteXY.switch_1==0)?LOW:HIGH);
//manage the right motor
Wheel (RightMotor, RemoteXY.joystick_1_y - RemoteXY.joystick_1_x);
Wheel (LeftMotor, RemoteXY.joystick_1_y + RemoteXY.joystick_1_x);
}


_ztBMuBhMHo.jpg?auto=compress%2Cformat&w=48&h=48&fit=fill&bg=ffffff)


_3u05Tpwasz.png?auto=compress%2Cformat&w=40&h=40&fit=fillmax&bg=fff&dpr=2)
Comments