


Hardware components | ||||||
 |
| × | 1 | |||
 |
| × | 1 | |||
| × | 1 | ||||
 |
| × | 4 | |||
 |
| × | 2 | |||
 |
| × | 1 | |||
 |
| × | 1 | |||
During middle school, I decided to play the trumpet, which marked the start of my musical journey. Ever since playing the trumpet, music and sound have fascinated me. I finally started seeing how beautiful music is, and how even more beautiful it is when you create it. For this project, I decided to create a system that would listen to sounds and output the most dominant frequency, because who wouldn't want to analyze a sound?
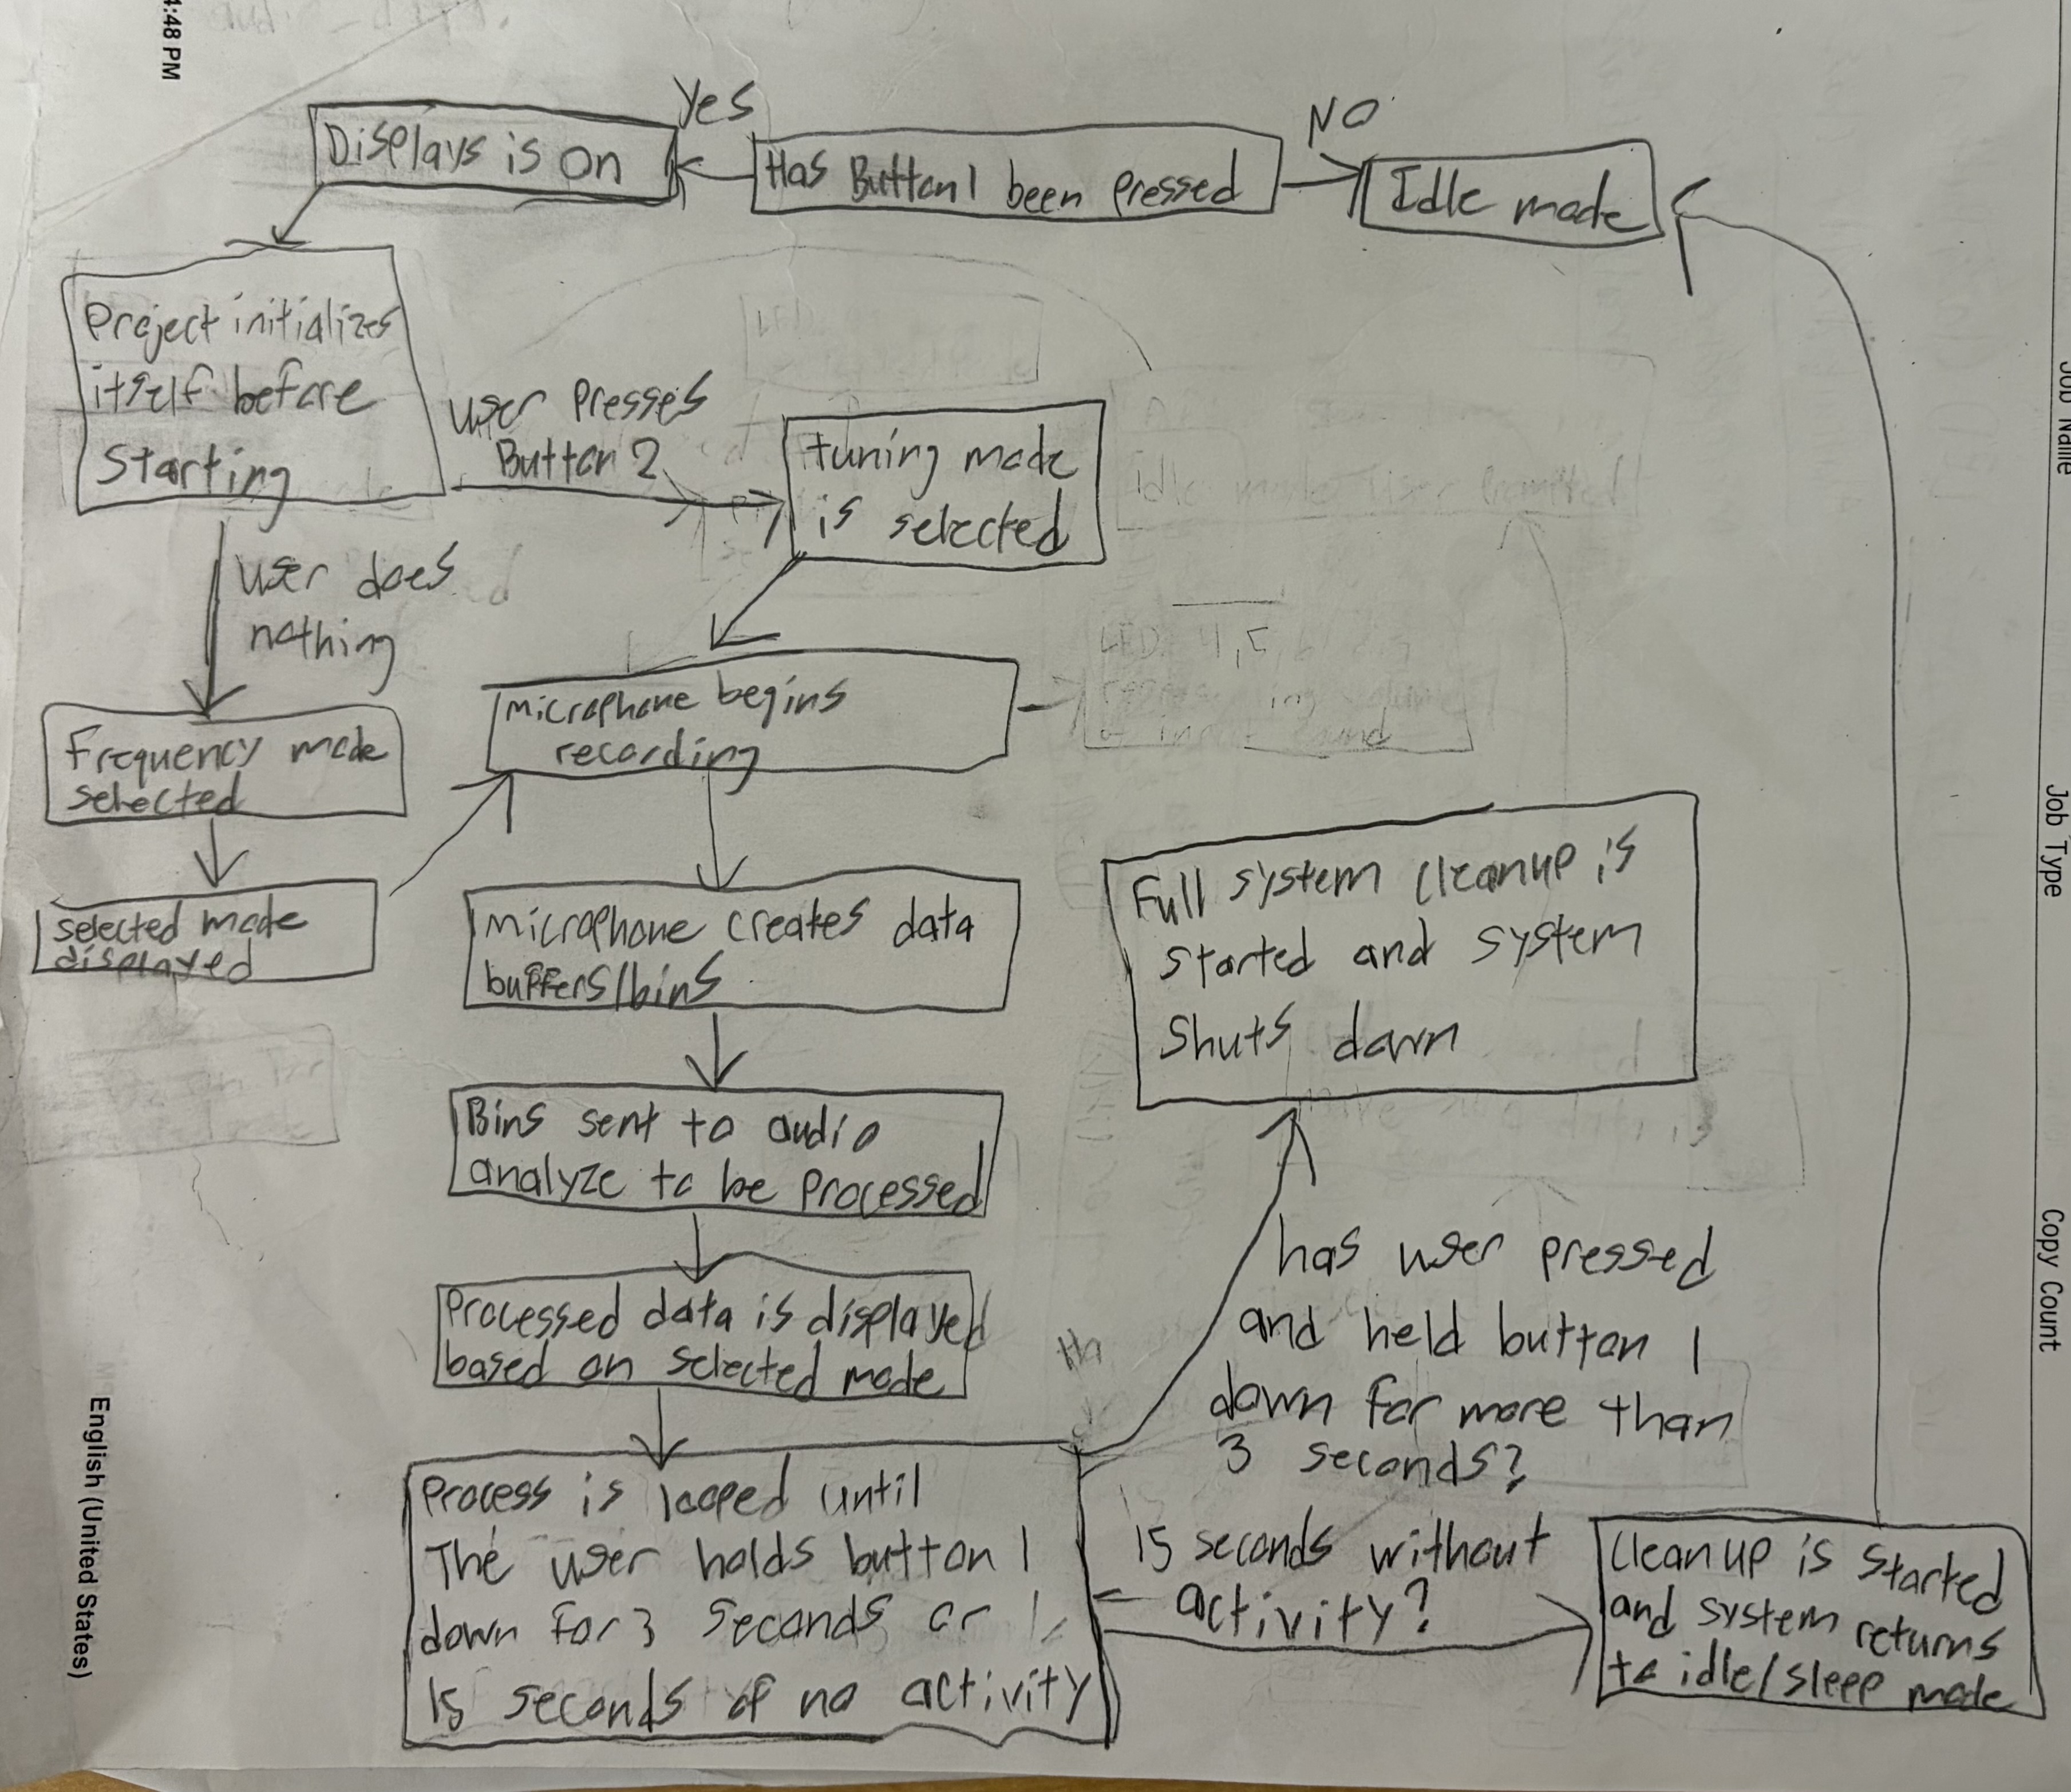
How It Works and Build Instructions:The main idea for this project was to create a simple yet intriguing system that would listen to sound input from the USB microphone and report the dominant frequency and pitch associated with that frequency with one button, and another button would allow the user to see if the pitch is in tune or not.
As soon as the user presses either button, the microphone audio stream opens and it starts collecting raw sound data in chunks. These chunks are then processed using the NumPy FFT to compute the one dimensional Discrete Fourier Transformation (DFT). The returned bins of frequencies are then analyzed to make sure they meet a certain adjustable magnitude so to prevent noise interference. Once a peak has been identified, this frequency is then returned as the dominant frequency. The pitch is then calculated using the standard equal‑tempered tuning system by comparing the observed dominant frequency to 440hz (which is 4th octave 4 or A4).
Once you have gathered all of your parts, there are a couple of steps you must take before you can get started with your build!
Here is the pin layout of the PocketBeagle for Reference!
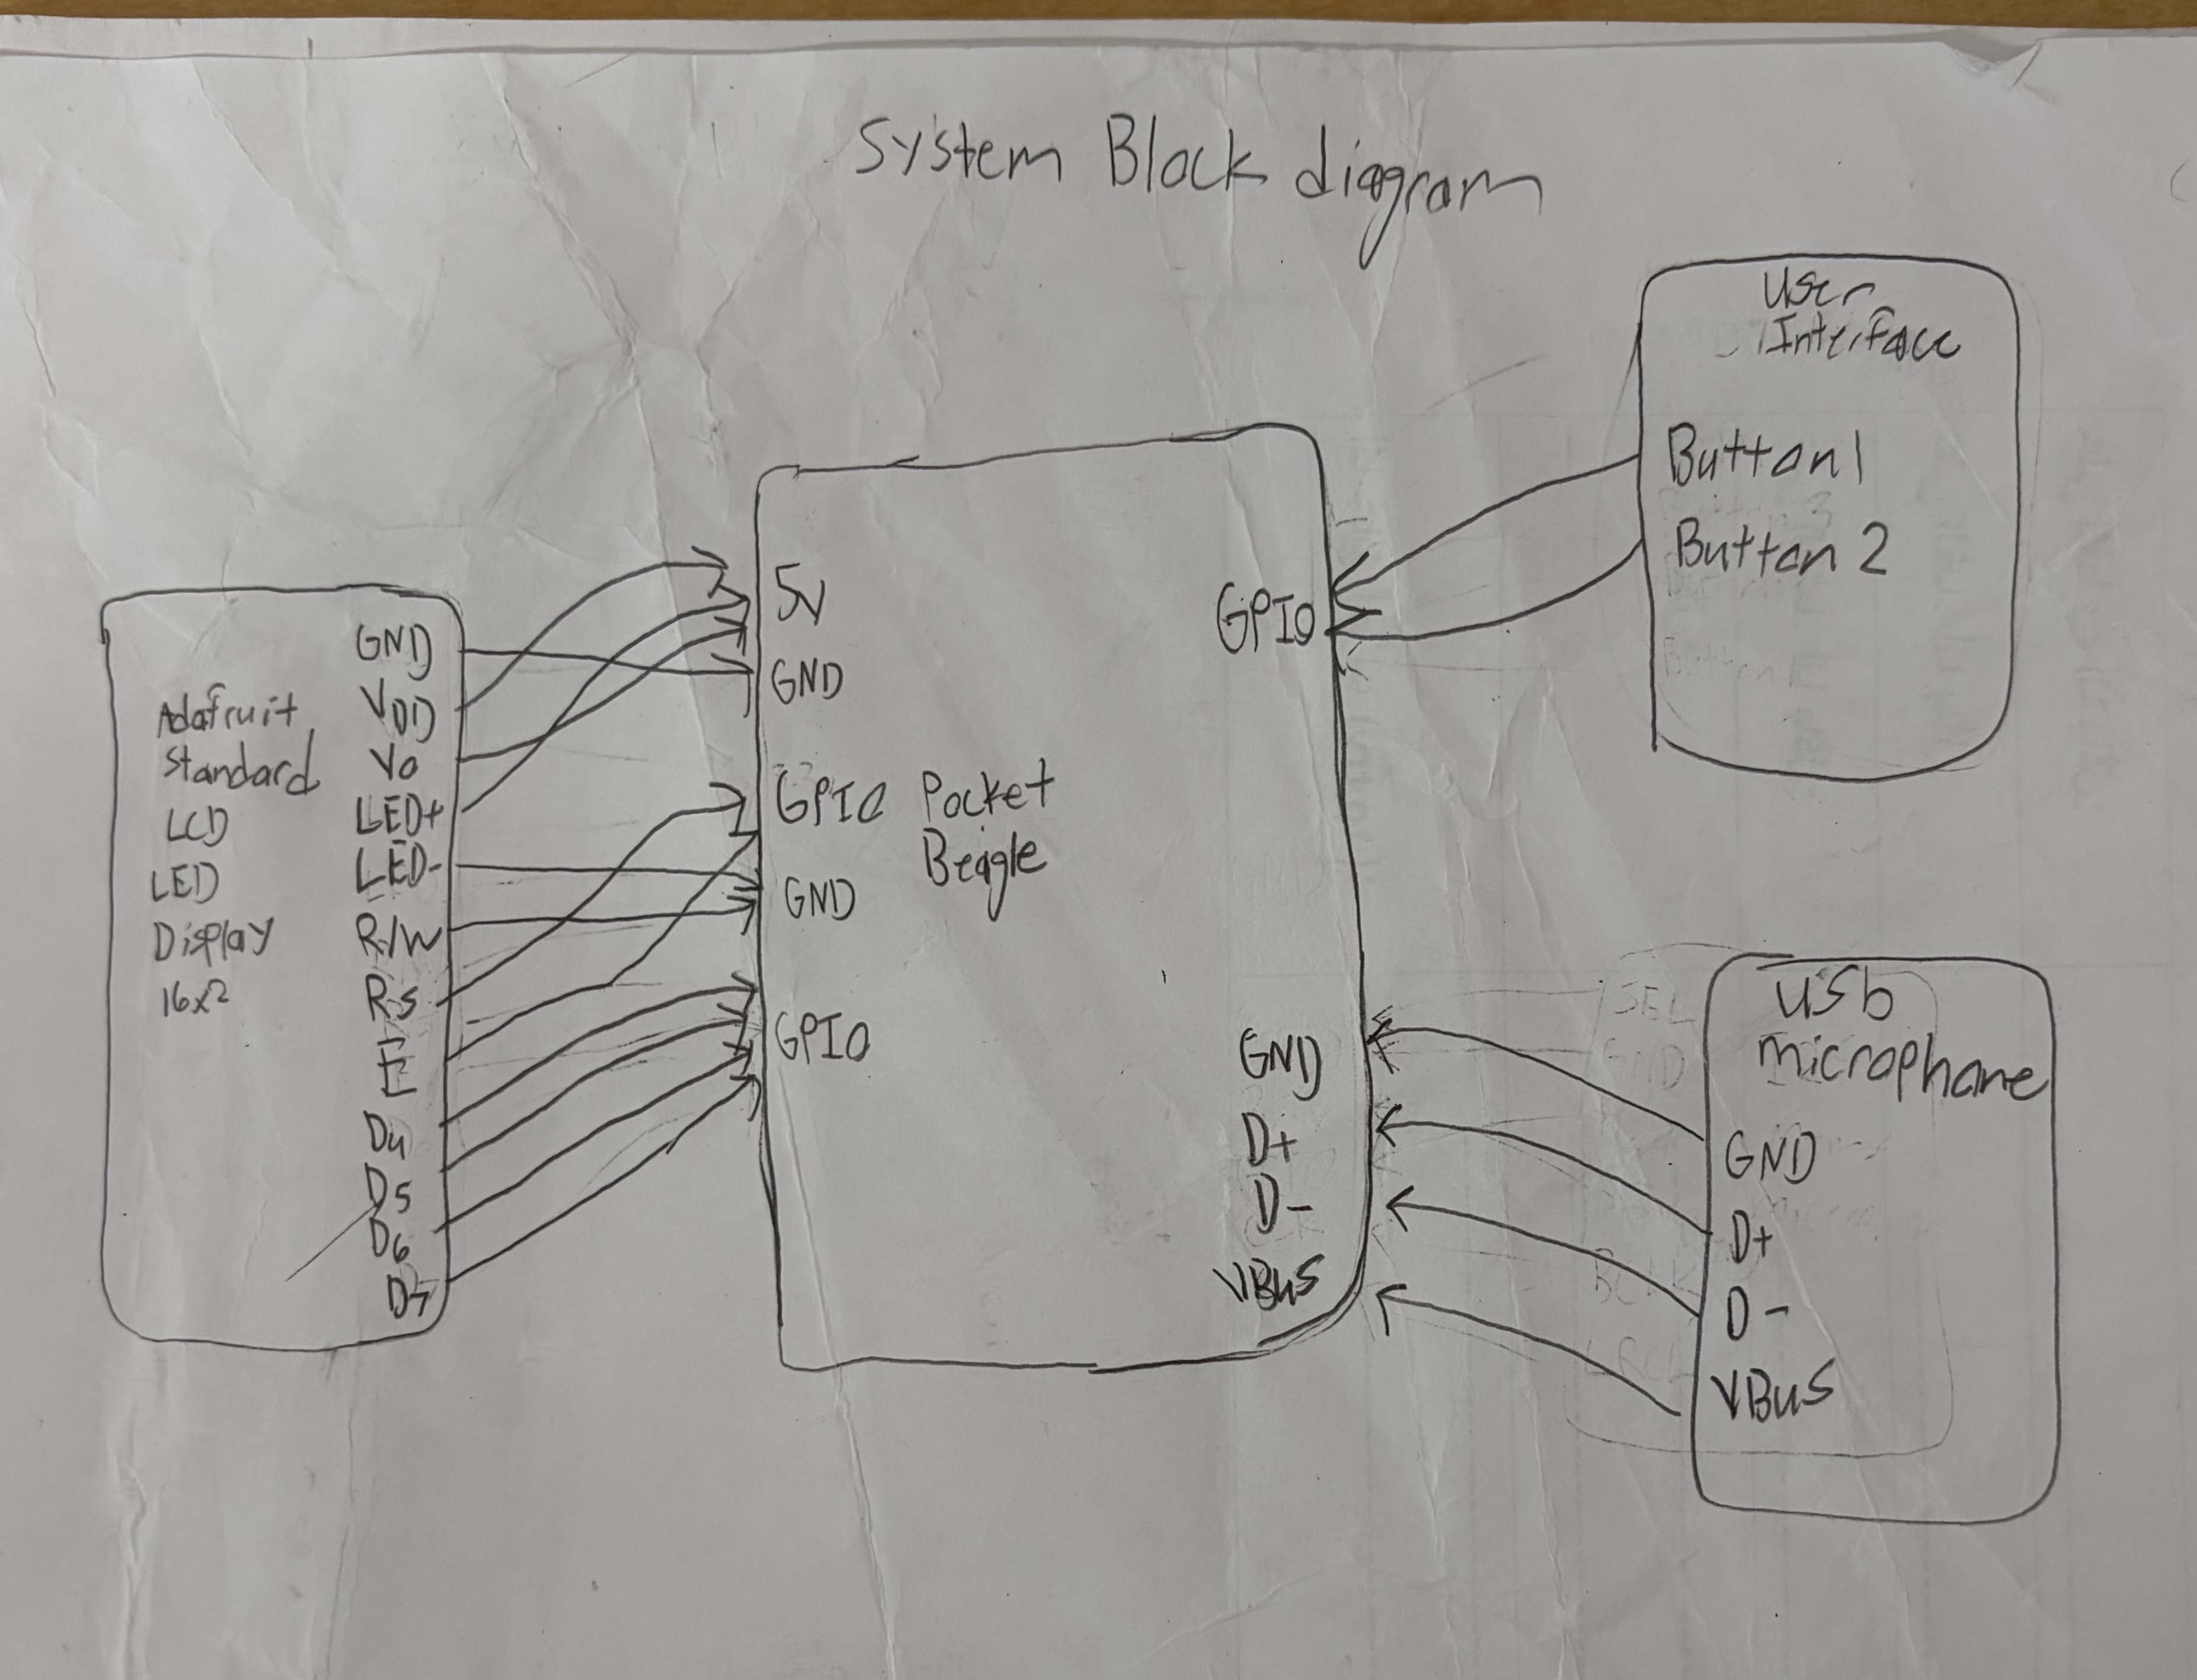
1. Before you can place your pocketbeagle on your solderless breadboard, you need to make sure that pins P1_05 and P1_07 are soldered together and pins P1_13 and P1_15 are soldered together.
2. Make sure to place your Pocketbeagle near the edge of your solderless breadboard in order to ensure that you have enough room for every component. You could also have an additional breadboard to make your EPIC Audio Analyzer more organized! Once you place your pocket beagle, you can go ahead and place you USB microphone of your breadboard as well.
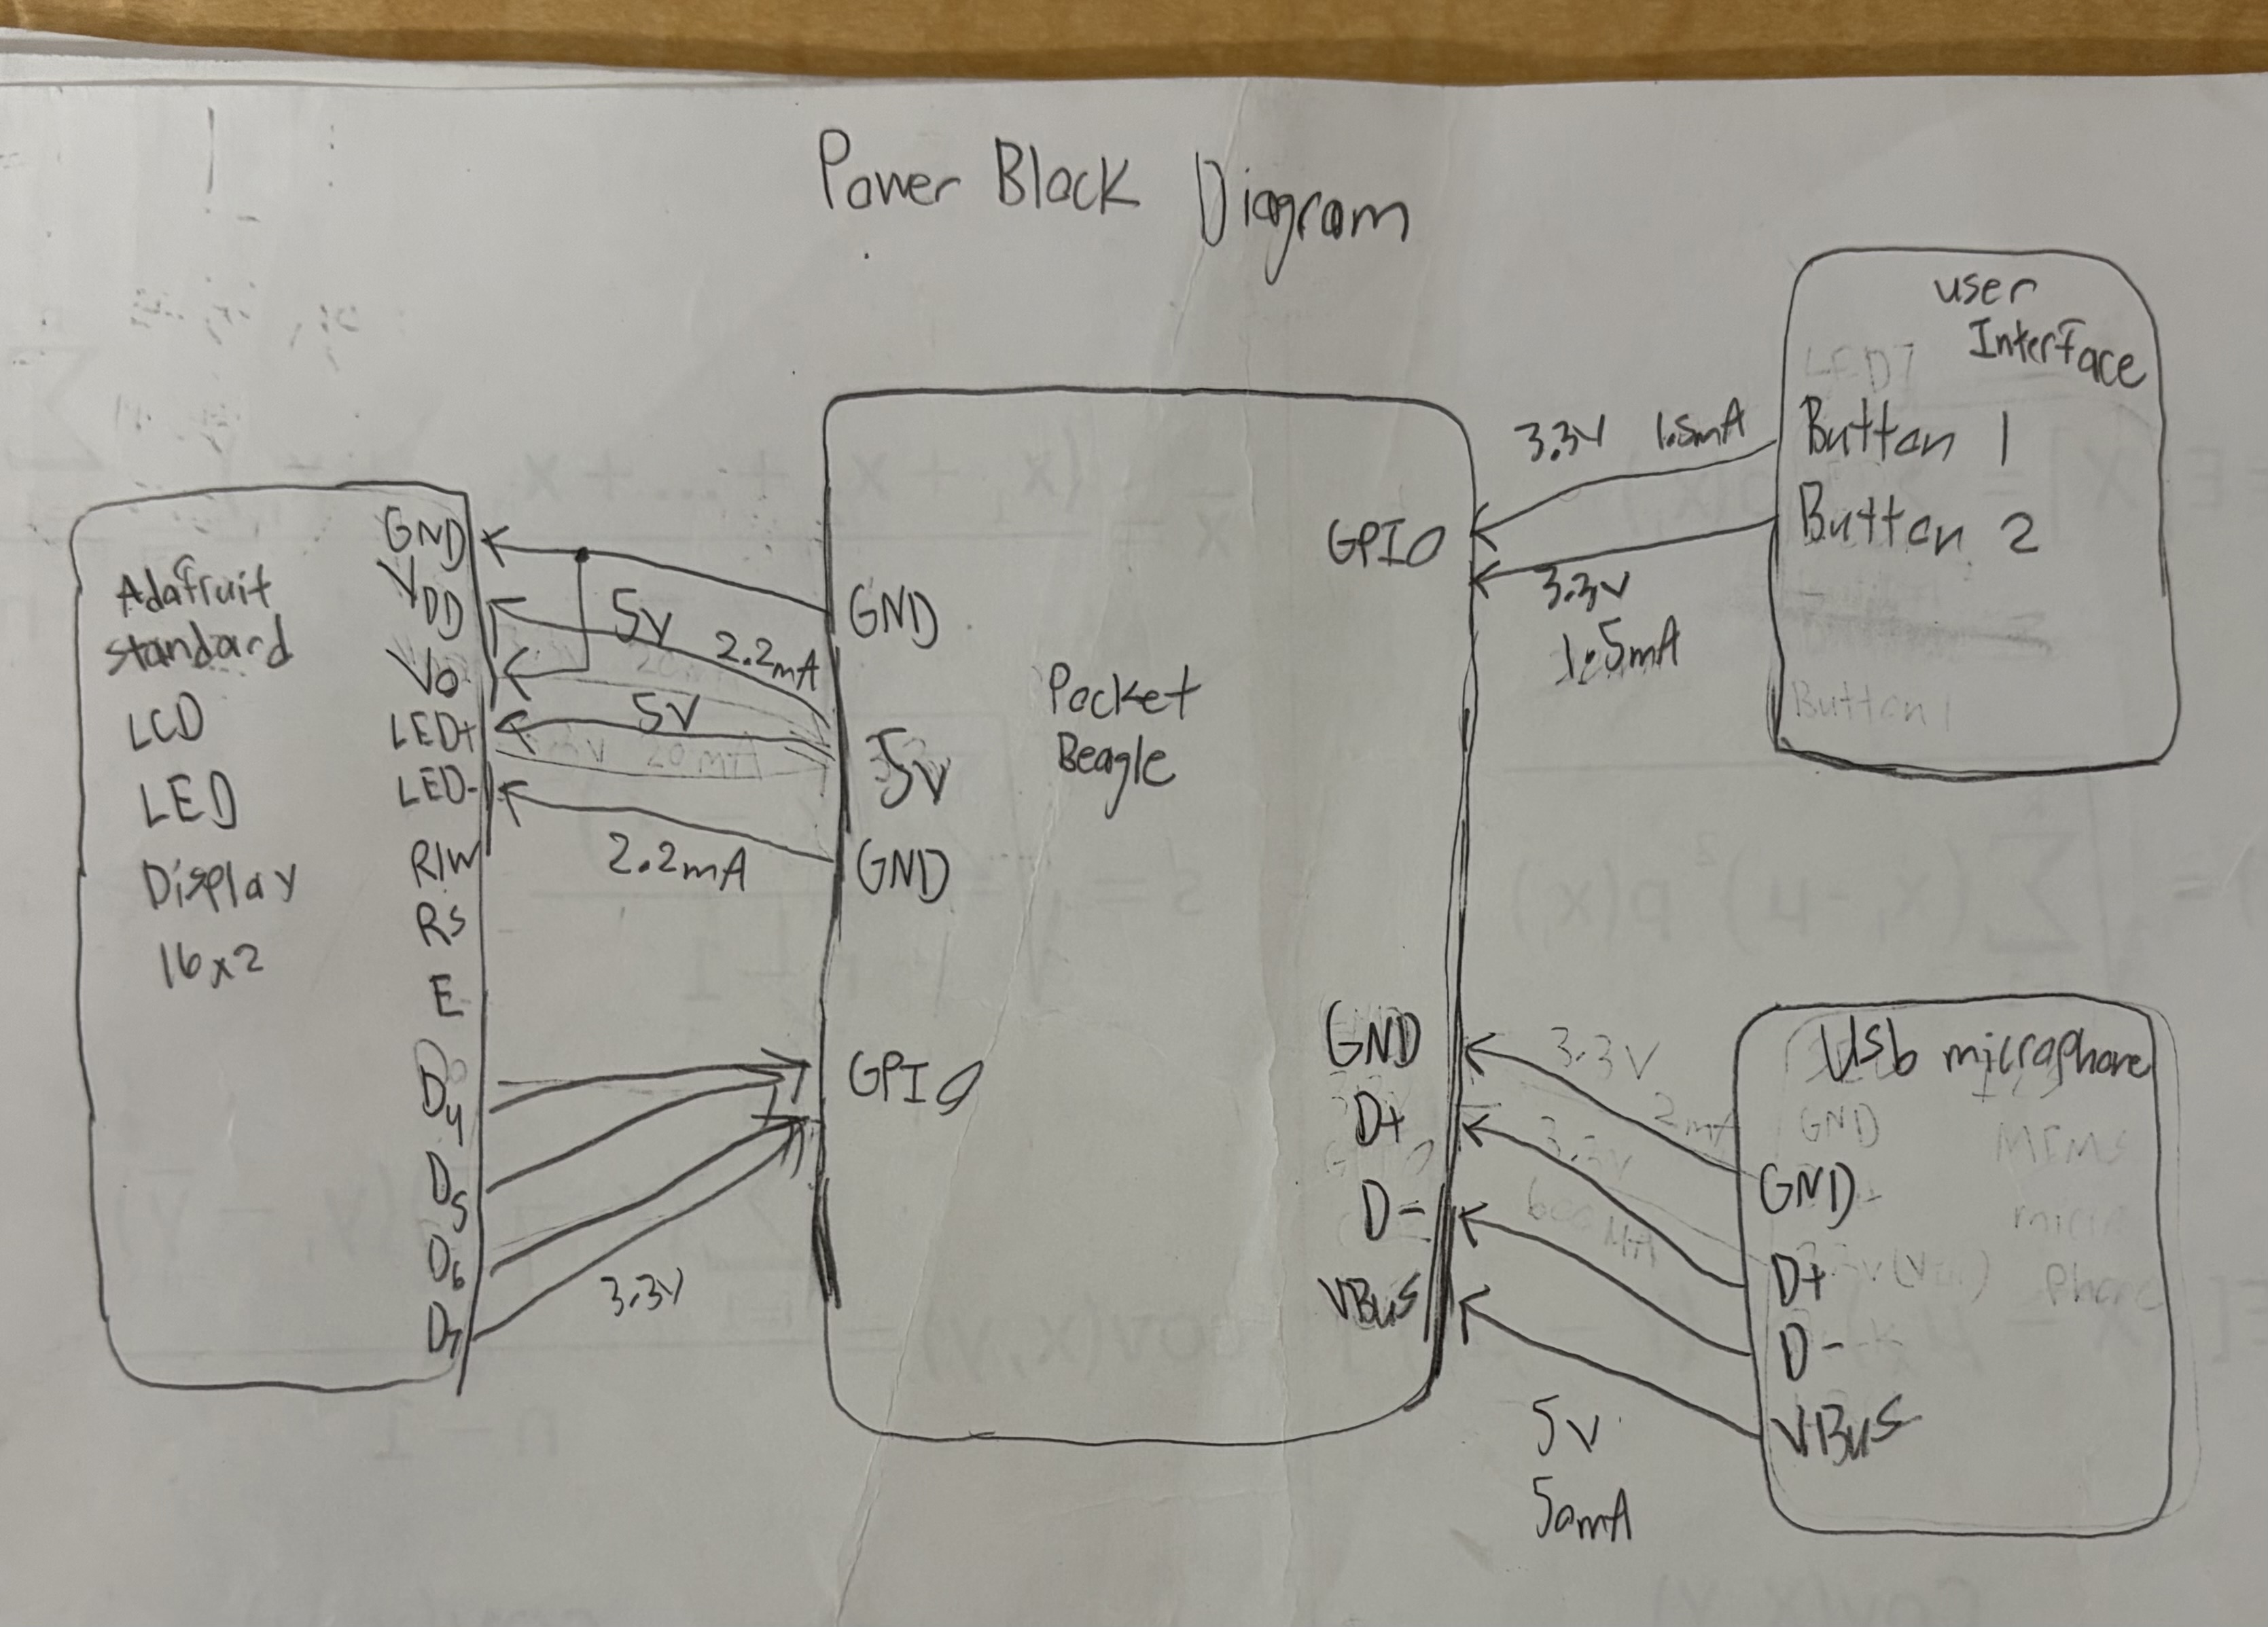
At the end of the section, I will provide a layout of the pocket beagle and the respective pins placements. Make sure, though, that the power rail for your USB and LCD is connected to VBUS, or VIN, since it's soldered, so that they both receive 5V.
After placing the microphone, you can go ahead and grab your Adafruit 16 x 2 standard LCD and place it on your solderless pocket beagle.
For the LCD screen, make sure that you place a 2.2k resistor between VO and GND, and also a 2.2k resistor between BLA and BLK. Since the LCD is receiving 5V its important to add a resistor to limit current flow.
Next, you can go ahead and add your buttons to your solderless breadboard, each with a 2.2k pull-up resistor to ensure the Pocketbeagle detects the GPIO.
Here is a drawn-out diagram with the specific pin connections for every component. I will also include a Pocketbeagle pin reference photo!
Once you have ensured that all of your components have been correctly wired up, you can go to my Github in order to download the necessary software files in order to run your EPIC Audio Analyzer!
Here are a couple videos displaying it in action!
For the test video I decided to play a piano piece to test both features. One key difference between the first video and the second video is that I changed the update rate for the LCD display, leading to a faster response time, which is why the LCD updates much faster in the second videos.
Unfortunately, one of the biggest problems I ran into while creating this project was distinguishing scalar multiples of frequencies. When you have a certain frequency which is dominant, it can be very difficult for FFT to choose the correct dominant frequency since that dominant frequency can contain scalar multiples of itself with the sound. So as a result, the screen sometimes incorrectly outputs a scalar multiple of the true dominant frequency of the sound.
Some things I would like to try in the future are to experiment with different microphone types to see if I can get extended range and more accurate audio streams. I would also like to expand the project in the future to be able to guess if a sound was human-like or if it was ambient noise.


Comments