

Hardware components | ||||||
 |
| × | 1 | |||
| × | 1 | ||||
| × | 1 | ||||
| × | 2 | ||||
 |
| × | 1 | |||
 |
| × | 1 | |||
| × | 1 | ||||
| × | 1 | ||||
| × | 1 | ||||
| × | 1 | ||||
Software apps and online services | ||||||
 |
| |||||
Last year, I rigged up a system to keep my mint plants watered in the hot Texas sun. I had some cheap solar panels in series totaling 6V driving a 12V water pump to some irrigation drippers. The sun dictated how much water the plants may get, and would often over-water on a long, sunny day. And if the water tank ran out mid-day, it would run the pump dry
This summer, I went all out. Quality solar panels with a rechargeable battery to run the 12V spec of the pump, a water level sensor so that the pump doesn't run if there's no water, a moisture sensor to only water if needed, and a Particle Photon to control it all and send data to Ubidots
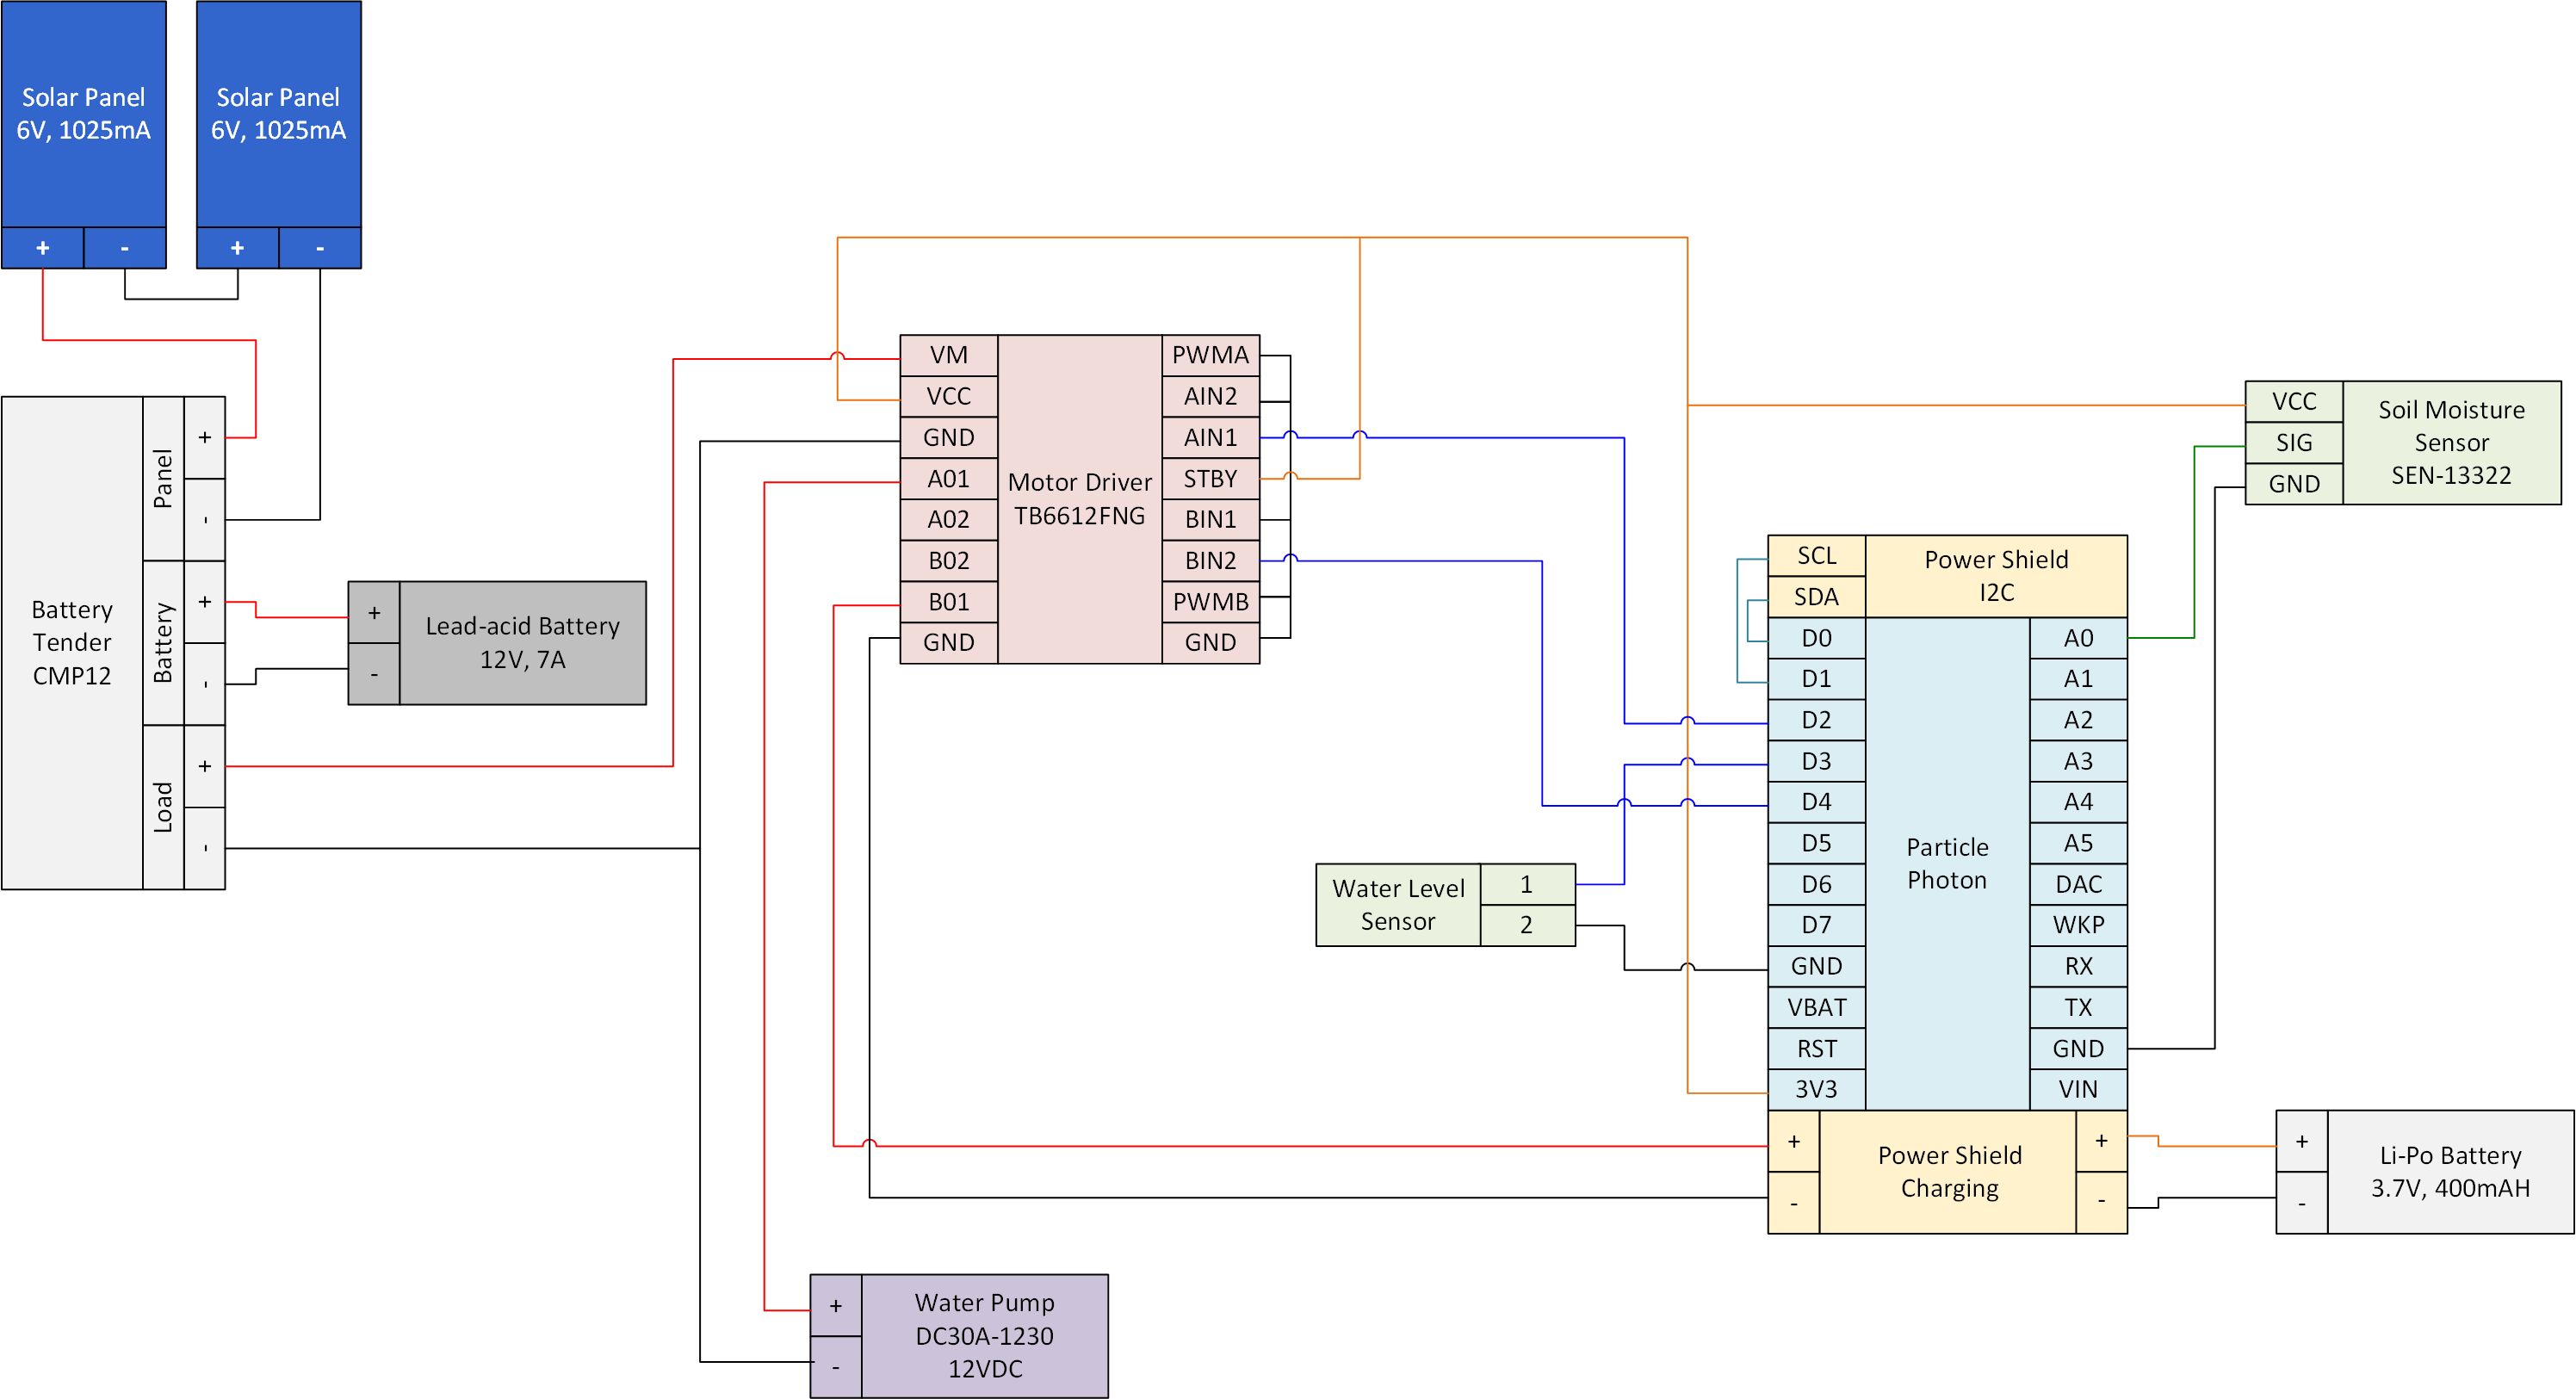
PowerThe power system uses two 6V solar panels in series to charge a lead acid battery. That battery is routed to either the 12V water pump or the DC input of the Particle Power Shield.
The power from the solar panel is switched using a dual H-bridge to either the solar pump or the Power Shield. The Power Shield is designed to use 7V-20V, so the original plan to was have the solar panels hooked directly to the H-bridge, and if the system was not watering the plants, it would be charging the Particle battery via the Power Shield. However, when I finally started assembling and deploying the components, it was a cloudy month in Austin, so I revised the power system to charge a larger 12V battery so that it can keep the system alive on cloudy days or at night
H-bridges are normally used for motors, so that low voltage signals can dictate how a higher voltage power supply is routed. The H-bridge can run the power in either polarity to run a motor in forward or reverse, and use PWM to change speeds. I find it easier to work with than a relay, so I used it for power routing in this project. Because we are only going to run it in forward direction with no speed change, many of the pins are grounded.
SensorsThe sensor system uses a simple float switch in the water tank, and a soil moisture sensor from Spark Fun.
The float switch is wired to a pullup pin and ground, so it is active low. Before the system tries to water the plant, it will first check that pin. If the pin is low, we don't have any water, so it won't run the pump. It will update Ubidots, which will send me a text so I can refill the tank.
The soil moisture sensor is essential a pair of long conductors. The more water in the soil, the more conductivity between them and thus lower resitance. The sensor will then spit out an anlog value, higher for more moisture. To calibrate the sensor, I hooked up the full system, but before deploying code, I used Particle's Tinker app. Tinker lets you do basic I/O operations, so I could manually turn on the water and read the moisture sensor. For my soil and sensor placement, I found that 3200 was a well watered level, and 2900 needed watering. My system activates the water pump if the sensor reads less than 3050. I used the Tinker app for several days to get to this value.
The only physical actuator in the system is a 12VDC submerisble water pump. I picked a couple up for a completly unrelated project for which I found a better solution. When the soil moisture is below the threshold, I turn on the pump for 5 minutes. The pump runs to two adjustable irrigation drippers, one for each mint plant root.
As for other actuators, data is sent to Ubidots at every check-in and monitored as graphs and guages. Ubidots has also been setup to text me when the water is empty.
ControlThe system is controlled by a Particle Photon. I chose the Photon as it is currenlty my favorite microcontroller. I can update the code from a browser, it has WiFi ready to roll, easily integrates with cloud services like IFTTT and Ubidots, and is inexpensive.
The main loop is pretty straightforward. It reads the battery level via I2C, checks the water level, checks the moisture level, and reports to Ubidots. If the Power Shield battery is low, it will mark it as "needs charging". If the moisture level is low and we have sufficient water, it will turn on the water. If it doesn't need water, it will turn off the water and route power to the Power Shield if necessary. The loop runs every 5 or 15 minutes, 5 minutes if the water is running, 15 if it is not.
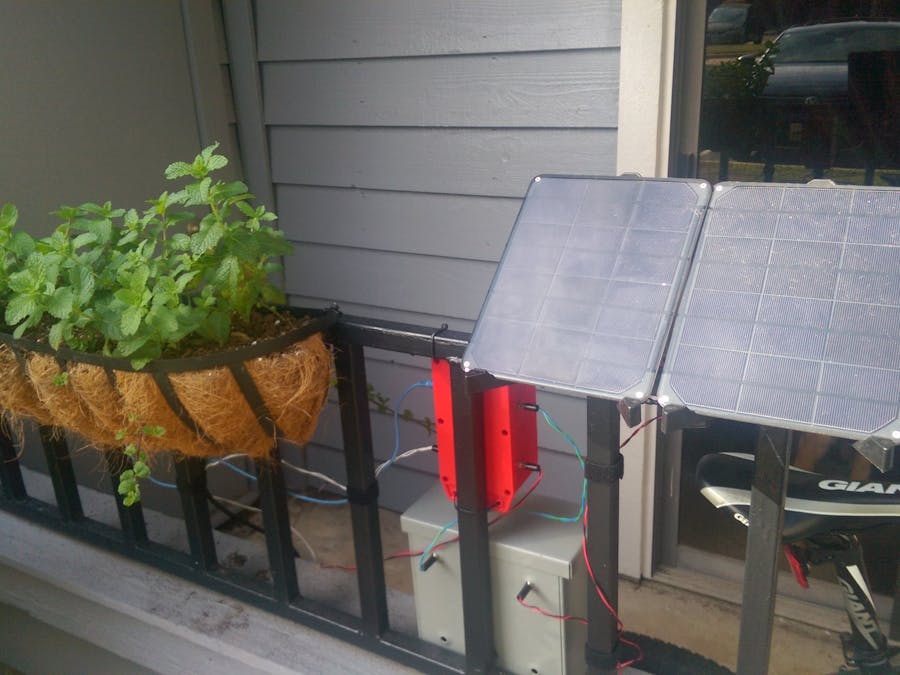
The core electronics are housed in Spark Fun's Big Red Box. I'm using two-pin DC jacks for the power input, power output to the pump, and water level sensor. I cut a pair of wires and soldered on DC barrels as required. I'm using a 3.5mm jack to connect to the soil moisture sensor. For that, I cut regular audio cable in half and soldered one end directly to the soil sensor. I also added an external duck antenna for improved WiFi connectivity.
The Power Shield with Photon and H-bridge are attached to protoboard designed for the Big Red Box. They are mounted at the "bottom" of the box. At the top of the box, I screwed a zip tie into the board mounts to keep the Power Shield's battery in place. The Big Red Box is zip tied to my porch railing.
As these solar panels are very nice and a pretty penny, I super glued a couple rope loops to the back so that I could run a chain through and lock them to the railing. I don't think anyone would try to steal them, and if they really wanted to it's a small chain and lock that certainly aren't the most secure, but it should be enough to deter anyone who might be passing by and want to yoink them. I bought a couple adjustable tablet stands to hold them at about 45 degrees. These are also zip tied to the railing.
The lead acid battey and battery tender are in a NEMA-3R enclosure. I have a couple DC jacks in the mounting holes to pass power from the solar panels through the battery tender to the Big Red Box.
The water tank is a cheeseball container with a hole at the bottom for water to get to the pump. The tank level sensor was the perfect height for the container, and is attached to the lid.
There are certainly a handful of ways to improve the project.
- A "Plant" class to make the project more scalable
- Add a photocell to track the sunlight and adjust the moisture threshold
- Collect temperature and humidity data to make more informed decisions on water requirement
- Monitor the 12V battery's charge


_3u05Tpwasz.png?auto=compress%2Cformat&w=40&h=40&fit=fillmax&bg=fff&dpr=2)


Comments