

Hardware components | ||||||
 |
| × | 1 | |||
 |
| × | 1 | |||
 |
| × | 1 | |||
 |
| × | 1 | |||
 |
| × | 1 | |||
Software apps and online services | ||||||
 |
| |||||
 |
| |||||
I was cleaning out a drawer in my kitchen when I noticed a ton of Box Tops for Education (BT4E) coupons. I noticed that many of these were expired which was upsetting. This got me thinking of a few things: my daughter will be going to school in a few years so I should be more proactive in donating, these are preferred to be donated in lots of 50 so how can we make this easier on the coordinator, and how can we make it easier to track the impact we've made in our communities. This resulted in Box Bot. Box Bot is a very simple, DIY hardware project meant to encourage parents and kids (and even classrooms) to build a simple device together that helps them keep track of collected BT4E coupons. It's integrated with Amazon Alexa so families can know how much they and their schools are collecting at any time. This is part of my submission for the "Amazon Alexa Tech For Good" challenge in hopes of making an impact in local communities.
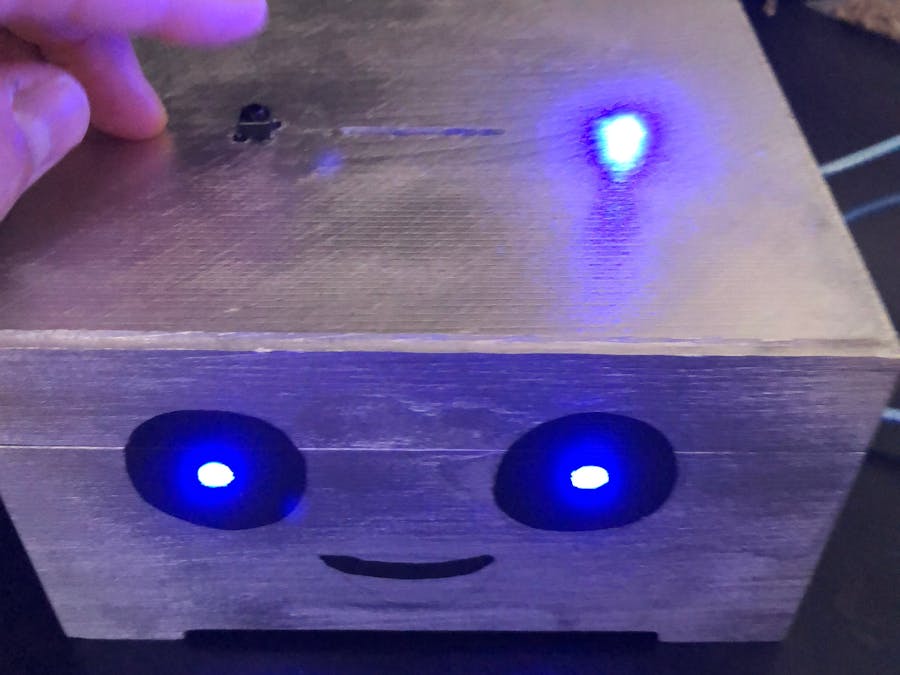
How It WorksBox Bot has three LEDs and a button built into the wooden box. Each time a box top is deposited, push the button and it will send a request to AWS to let it know one was added. The LEDs will stay on for second letting you know it was successful. After 50 tops have been deposited, Box Bot will blink for a while letting you know it is time to donate the tops.
The ComponentsAside from the listed components, you'll need the items below. You can build this for about $20:
- A small wooden box. I got mine for $3 box at Hobby Lobby but you can find these at any craft store or build your own.
- A power drill
- Hobby saw or box cutter
- Spray paint and/or acrylic paint (depending on your design)
- A micro USB cable (Dollar Tree)
- A USB Port to Electrical Outlet (Dollar Tree)
- A snack size Ziploc bag
- Build the box
- Paint the box
- Wire everything and secure in place
- Enable the Alexa app
- Import the code into Arduino and change the necessary variables
- Flash the ESP8266 board
The first thing we'll want to do is remove the clasp that the box comes with if purchasing the same box. I also had to loosen the hinge screws just a bit so it would close completely
Next, we can cut two thin slits about the size of an 1/8 drill bit to fit our ESP8266 board.
Next, we can put a slit in the middle of the box. This will be the opening to for box tops to go. I used a box cutter to make a small slit about 2 inches wide.
Now that we've done that, we can drill four holes to the left of the opening for our push button that will signal that we've put a box top into Box Bot. We can use a 7/64 drill bit for the larger holes to accommodate our female jumper wires and 1/16 drill bit for two of the legs that will not be used.
To the right of the opening, we can drill a 3/16 hole for our top LED. It's a tight squeeze and it will say in place.
Our last part with the drill will involve drilling two 3/16 holes for the eyes of Box Bot like our previous step. When we're done with the drilling, we can spray paint Box Bot then paint the eyes and mouth. You don't have to do a robot. Be creative! Make a video game character or Frankenstein for Halloween!
Our final step is to wire everything.
We'll have a few wires running across the inside of the box so we'll want to make sure they're secure and out of the way. A Fritzing diagram is provided below.
You can enable the Alexa skill by using the Alexa app. The skill is called "Box Bot: A Box Tops for Education counter". Once it's enabled, simply say "Alexa, tell box bot to send me an api token." You will be sent all of the necessary information to connect to the AWS/Box Bot API. You'll need to put this in your code before flashing to the ESP8266.
The BoardI used a NodeMCU ESP 8266 board because of the price point and wireless capabilities. You can certainly use something else like an Arduino board with a wireless add-on.
The CodeThe code is short and simple and can be found below. I've included comments throughout in hopes that it is easy to follow along. Connect the micro USB cable to the ESP8266 board and a computer. Bring up Arduino IDE (if you don't have it installed, you can get it here). In order to flash the ESP8266, you'll need install the right libraries in the Arduino IDE. This takes less than a minute to do with this guide.
Box Bot has two main operations. The first is to send a request to AWS once we push the button to tell that we've put a coupon into box bot. The lights will come on briefly and disappear. The second is to notify us that we've reached 50 coupons. Box Bot will blink 10 times to tell us to it's time to donate!
You'll need to change lines 4, 5, 8, 9, 10 in the code. When you've made the changes, you're ready to compile and upload.


_3u05Tpwasz.png?auto=compress%2Cformat&w=40&h=40&fit=fillmax&bg=fff&dpr=2)
Comments