


Hardware components | ||||||
| × | 1 | ||||
Software apps and online services | ||||||
 |
| |||||
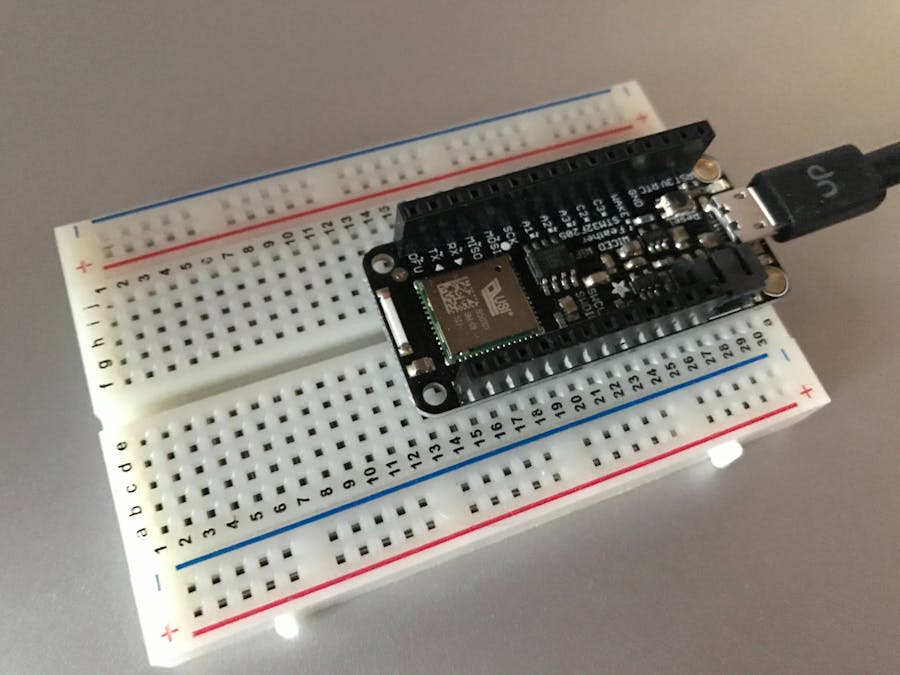
I will show you how to connect the Adafruit WICED Feather to AWS IoT. The WICED Feather is based on Cypress WICED (Wireless Internet Connectivity for Embedded Devices) platform and ARM Cortex M3 processor.
Connecting a Raspberry Pi might be easier, and with the new Zero W even less expensive. But the Raspberry Pi is a full-blown computer, not a thing in the sense of IoT (imho).
I found quickly that it is not easy to find a thing to connect to AWS IoT. One reason is the security layer of AWS IoT (Source: Adafruit):
"One of the key aspects that makes AWS IoT stand out compared to other MQTT solutions is the security layer. In addition to validating the remote MQTT server with a certificate (similar to how HTTPS works), the individual sensor nodes are also verfied via a second device-side certificate. What this means is that there is a very high level of certainty that the device pushing the data out to the MQTT broker or subscribing to data from it is exclusively the device you think it is."
Another reason is that the AWS IoT Kits offered by Amazon are not easily available in Germany, expensive (particularly if you include shipping costs) and not up-to-date. I discovered the Adafruit WICED Feather and a Tutorial for connecting it to AWS IoT. But I quickly learned that the Tutorial is outdated and the given Git repository doesn't exist anymore.
Therefore I decided to update the tutorial with the instructions given here. I hope you have fun and it will help you in your projects. The following instructions assume you use Mac OS X or Linux.
Setup Adafruit WICED FeatherFollow the instructions provided here. Please note that you need Python 2.7 on your machine.
AWS IoTLog into your AWS account and select AWS IoT, click on "Connect" and then on "Configuring a device"/"Getting Started":
Then choose a platform and a SDK. I chose Linux/OSX and Node.js - for this project it doesn't matter which SDK you choose Continue till you can register a thing. Enter a name and continue. I chose "feather-two". Download the connection kit. The kit contains:
- the private key (to be copied in your sketch file)
- the public key (to be moved in your sketch folder)
- a certificate (to be converted with pycert.py)
- a start script (you don't need this here)
Finish the dialogue till you are back on the AWS IoT dashboard.
Arduino IDEOpen the example called "aws" in the folder "Adafruit WICED Examples"/"MQTT" according to the figure.
Save the sketch to your sketch folder. Copy the files from the AWS IoT connection kit to this folder. Insert the SSID credentials of your WiFi network in your copy of the sketch:
#define WLAN_SSID         "yourSSID"
#define WLAN_PASS         "yourPass"
Replace the host below with the host you find in the AWS IoT UI in the "Test" pane above the box with the subscriptions.
#define AWS_IOT_MQTT_HOST "A1B0KY2Z6UVZ7R.iot.us-west-2.amazonaws.com"
Open the dropdown menu and click on "View endpoint" according to the figure:
Replace client id and thing name.
#define AWS_IOT_MQTT_CLIENT_ID         "feather-two"
#define AWS_IOT_MY_THING_NAME          "feather-two"
Now you have to convert the certificate with a Python tool provided by Adafruit which is part of the code installed with the WICED Feather setup.
python ~/Library/Arduino15/packages/adafruit/hardware/wiced/0.6.2/tools/pycert/pycert.py convert -c local_cert -l LOCAL_CERT_LEN feather-two.cert.pem
Please note that my certificate is named feather-two.cert.pem. Change the name if you used another name for your device. You should see
Loaded certificate feather-two.cert.pem
Wrote certificates.h
Now open a text editor and load the private key (feather-two.private.key). Place quotes before and after each line, and also add an '\n' newline character after each line! You'll end up with something like this:
const char aws_private_key[] =
"-----BEGIN RSA PRIVATE KEY-----\n"
"xxxxxxxxxxxxxxxxxxxxxxxxxxxxxxxxxxxxxxxxxxxxxxxxxxxxxxxxxxxxxxxx\n"
"xxxxxxxxxxxxxxxxxxxxxxxxxxxxxxxxxxxxxxxxxxxxxxxxxxxxxxxxxxxxxxxx\n"
"xxxxxxxxxxxxxxxxxxxxxxxxxxxxxxxxxxxxxxxxxxxxxxxxxxxxxxxxxxxxxxxx\n"
"xxxxxxxxxxxxxxxxxxxxxxxxxxxxxxxxxxxxxxxxxxxxxxxxxxxxxxxxxxxxxxxx\n"
"xxxxxxxxxxxxxxxxxxxxxxxxxxxxxxxxxxxxxxxxxxxxxxxxxxxxxxxxxxxxxxxx\n"
"xxxxxxxxxxxxxxxxxxxxxxxxxxxxxxxxxxxxxxxxxxxxxxxxxxxxxxxxxxxxxxxx\n"
"xxxxxxxxxxxxxxxxxxxxxxxxxxxxxxxxxxxxxxxxxxxxxxxxxxxxxxxxxxxxxxxx\n"
"xxxxxxxxxxxxxxxxxxxxxxxxxxxxxxxxxxxxxxxxxxxxxxxxxxxxxxxxxxxxxxxx\n"
"xxxxxxxxxxxxxxxxxxxxxxxxxxxxxxxxxxxxxxxxxxxxxxxxxxxxxxxxxxxxxxxx\n"
"xxxxxxxxxxxxxxxxxxxxxxxxxxxxxxxxxxxxxxxxxxxxxxxxxxxxxxxxxxxxxxxx\n"
"xxxxxxxxxxxxxxxxxxxxxxxxxxxxxxxxxxxxxxxxxxxxxxxxxxxxxxxxxxxxxxxx\n"
"xxxxxxxxxxxxxxxxxxxxxxxxxxxxxxxxxxxxxxxxxxxxxxxxxxxxxxxxxxxxxxxx\n"
"xxxxxxxxxxxxxxxxxxxxxxxxxxxxxxxxxxxxxxxxxxxxxxxxxxxxxxxxxxxxxxxx\n"
"xxxxxxxxxxxxxxxxxxxxxxxxxxxxxxxxxxxxxxxxxxxxxxxxxxxxxxxxxxxxxxxx\n"
"xxxxxxxxxxxxxxxxxxxxxxxxxxxxxxxxxxxxxxxxxxxxxxxxxxxxxxxxxxxxxxxx\n"
"xxxxxxxxxxxxxxxxxxxxxxxxxxxxxxxxxxxxxxxxxxxxxxxxxxxxxxxxxxxxxxxx\n"
"xxxxxxxxxxxxxxxxxxxxxxxxxxxxxxxxxxxxxxxxxxxxxxxxxxxxxxxxxxxxxxxx\n"
"xxxxxxxxxxxxxxxxxxxxxxxxxxxxxxxxxxxxxxxxxxxxxxxxxxxxxxxxxxxxxxxx\n"
"xxxxxxxxxxxxxxxxxxxxxxxxxxxxxxxxxxxxxxxxxxxxxxxxxxxxxxxxxxxxxxxx\n"
"xxxxxxxxxxxxxxxxxxxxxxxxxxxxxxxxxxxxxxxxxxxxxxxxxxxxxxxxxxxxxxxx\n"
"xxxxxxxxxxxxxxxxxxxxxxxxxxxxxxxxxxxxxxxxxxxxxxxxxxxxxxxxxxxxxxxx\n"
"xxxxxxxxxxxxxxxxxxxxxxxxxxxxxxxxxxxxxxxxxxxxxxxxxxxxxxxxxxxxxxxx\n"
"xxxxxxxxxxxxxxxxxxxxxxxxxxxxxxxxxxxxxxxxxxxxxxxxxxxxxxxxxxxxxxxx\n"
"xxxxxxxxxxxxxxxxxxxxxxxxxxxxxxxxxxxxxxxxxxxxxxxxxxxxxxxxxxxxxxxx\n"
"xxxxxxxxxxxxxxxxxxxxxxxxxxxxxxxxxxxxxxxxxxxxxxxxxxxx\n"
"-----END RSA PRIVATE KEY-----";
Replace the lines with your private key.
"-----BEGIN RSA PRIVATE KEY-----\n"
"Your Key contents line 1 with newline and quoted\n"
"Quote each of your key's lines like this example\n"
"-----END RSA PRIVATE KEY-----";
Now upload the sketch to your WICED Feather and open the serial monitor with a click on the button in the upper right corner of the Arduino IDE. Select 115200 baud in the lower right corner of the serial monitor window.
Note: I have some problems with the serial console. I solved this by clicking again on the menu with the 115200 baud entry.
Subscribe to a topicSwitch to the AWS IoT console. In the IoT console click on "Test" and then on "subscribe to a topic".
Now enter:
$aws/things/feather-two/shadow/update/accepted
as the name for the topic. This is the name from the sketch:
#define AWS_IOT_MQTT_TOPIC "$aws/things/" AWS_IOT_MY_THING_NAME "/shadow/update"
with "/accepted" added.
Return to the Arduino IDE and generate some data to be published by entering 0's or 1's in the input field of the serial monitor and pressing return. Switch again to the AWS IoT console. You should now see entries of the form:
The entries are generated by the following code in your sketch.
   //Serial.print("Publishing to " AWS_IOT_MQTT_TOPIC " ... ");
   if ( c == '0' )
   {
     mqtt.publish(AWS_IOT_MQTT_TOPIC, SHADOW_PUBLISH_STATE_OFF, MQTT_QOS_AT_LEAST_ONCE); // Will halted if an error occurs
   }else if ( c == '1' )
   {
     mqtt.publish(AWS_IOT_MQTT_TOPIC, SHADOW_PUBLISH_STATE_ON, MQTT_QOS_AT_LEAST_ONCE); // Will halted if an error occurs
   }
That's it. I hope it worked for you.


Comments