

Hardware components | ||||||
_ztBMuBhMHo.jpg?auto=compress%2Cformat&w=48&h=48&fit=fill&bg=ffffff) |
| × | 1 | |||
| × | 1 | ||||
| × | 1 | ||||
 |
| × | 1 | |||
 |
| × | 1 | |||
 |
| × | 1 | |||
 |
| × | 1 | |||
Software apps and online services | ||||||
 |
| |||||
One of the most interesting ways to control many applications is by using an IR remote control. You can find this medium of control used with TVs, DVRs, air conditioners, and more.
In this tutorial, I would like to show you how to control any AC device and control it using an IR remote control and the Arduino. We will divide this experiment into:
- Control an AC device as an ON - OFF switch.
- Control an AC output voltage using a "dimmer" application.
But first, let's see what we want. The components we need for this experiment are:
- Arduino Board (I used the UNO)
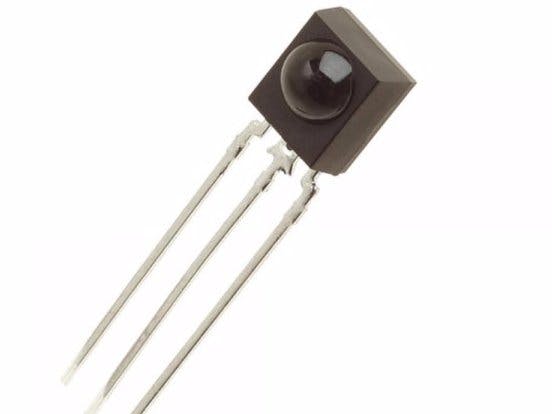
- IR Rx TSOP3848
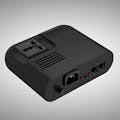
- Sugar device (to control the AC device)
- RJ12 Cable & RJ Breakout
- AC lamp and Lamp socket
- LED
- 510R resistor
- Breadboard
- Solderless jumper
Let's test the IR RX and see what code that your remote sends to Arduino.
The IR receiver sensor has 3 pins: VCC, GND, OUT. Be careful when you connect the IR RX.
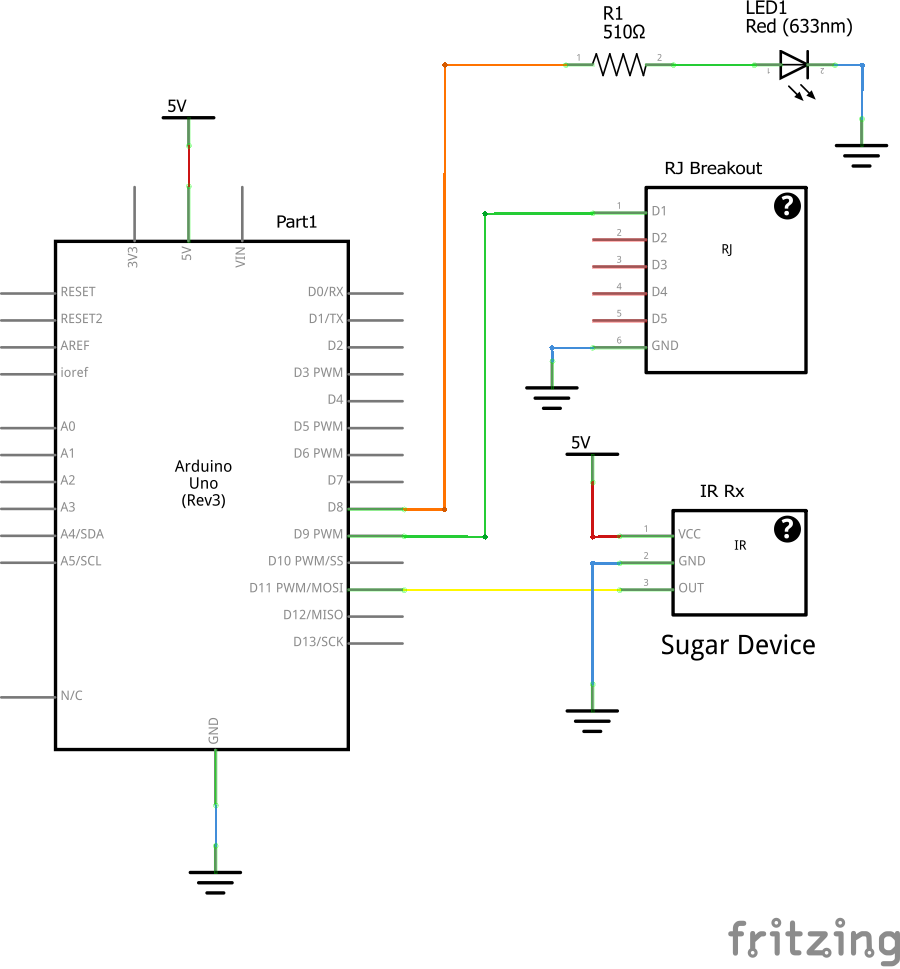
WiringFirst we need to build the circuit in like this:
First upload this library, then upload this (test IR code) and open the serial. Then, once you press the IR remote control, you can detect the code for each button as you see here:
In my case:
- Power on:
0xFB38C7
- Increase:
0xFBE01F
- Decrease:
0xFBE21D
Why 0x
in the beginning? Because the code is in hex format.
For the dimmer application, we will use the Volume Up and Volume Down button to increase and decrease the brightness.
If you like the Sugar device idea and application, why you don't support us on indiegogo and become our backer today. We will offer the dimmer code and many more applications exclusively for our backers.

Comments