ThingspeakSet-up
- thingspeak.com is an IoT analytics platform service that allows you to aggregate, visualize, and analyze live data streams in the cloud. You can send data to ThingSpeak from your devices, create instant visualization of live data, and send alerts.
- First, register an account in thingspeak. https://thingspeak.com/
- Once successfully created the account, create a new channel by click the New Channel button on top left.
- Then key in required information.
- Once created, then you can get your API Key by click "API Keys".
- Copy your link in "Write a Channel Feed". For example....
GET https://api.thingspeak.com/update?api_key=XXXXXXXXXXXXX&field1=0
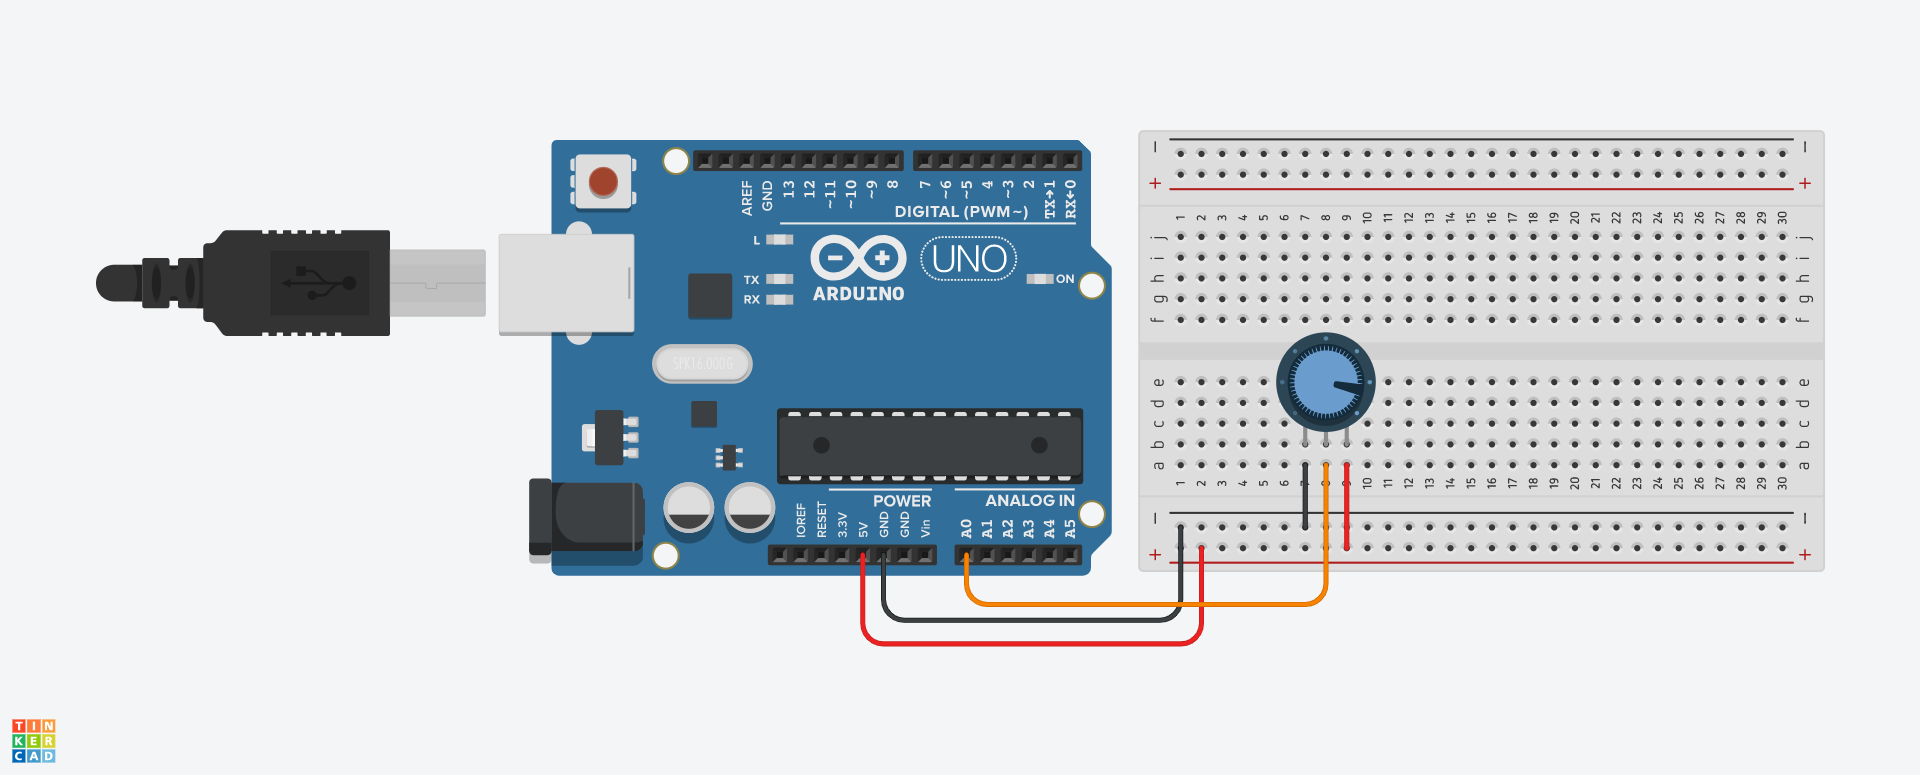
Arduino Set-up- Connect potentiometer (10K) to the Arduino Analogue Input (A0) as shown in figure 1.
- Write / copy code1. Run the code
- Display the potentiometer reading in Serial Monitor
- Adjust the potentiometer using screw drive and monitor the changes in Potentiometer reading.
- In this program we just use ADC value which give 1023 at highest resistance and 0 at lowest resistance.
ConnectESP8266
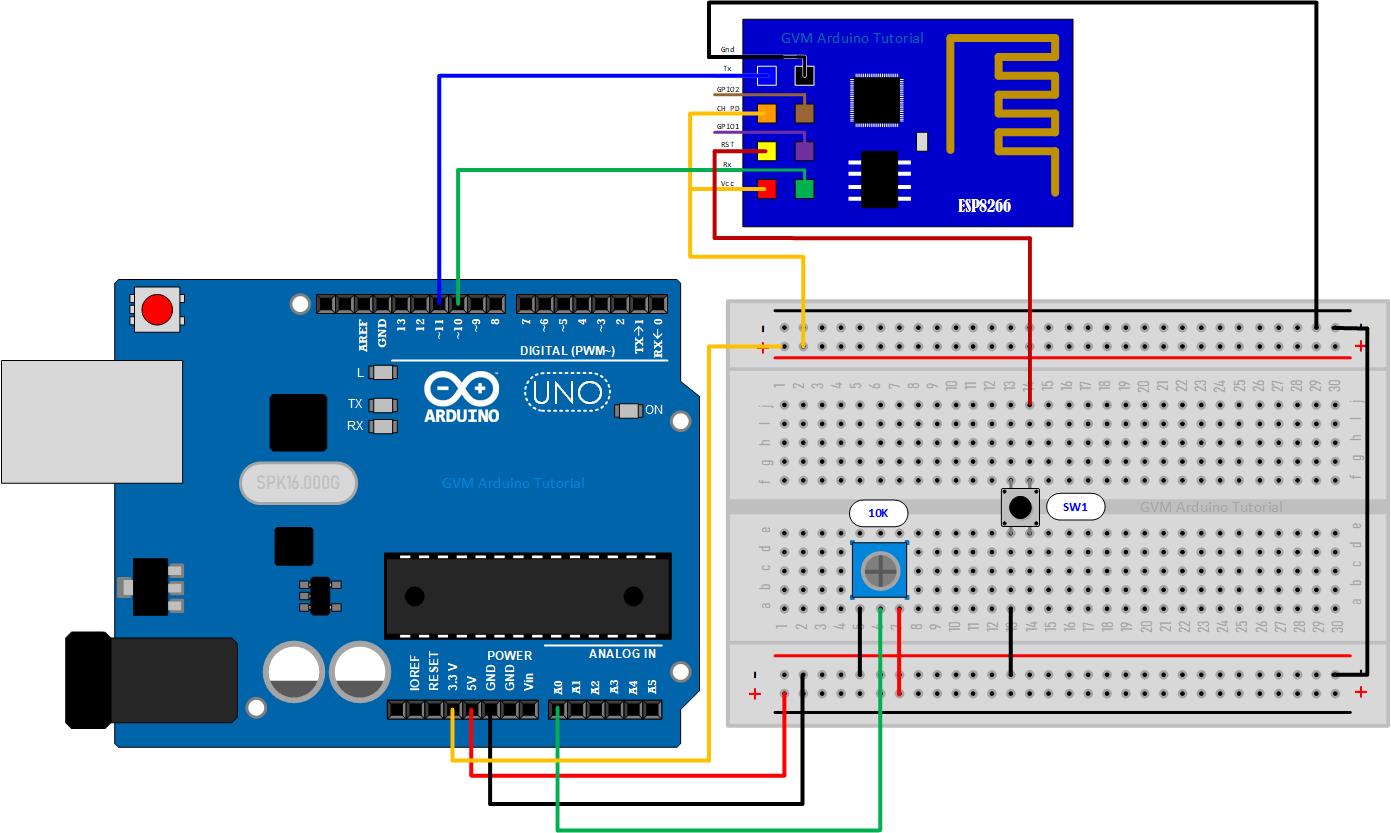
- Now connect WIFI module ESP8266 to the existing circuit as shown in figure 2.
- Connect CH_PD and Vcc to 3.3V (or 5.0V).
- Connect Rx to Pin 10, Tx to Pin 11, Gnd to Gnd and RSTtoSwitch1.
Please refer to my previous lesson if you wants to do ESP8266 setup. Watch
out there is some differences in the circuit diagram.

https://create.arduino.cc/projecthub/mkganesan1975/wifi-module-esp8266-initializing-d62f11?ref=user&ref_id=2304769&offset=1

Once the ESP8266 setup is successful, then rearrange the circuit as in
figure2.
Write code- Now write code as shown in Code2
- In this code, I make a separate header file for my secrete values. You can just directly write your secret value in the same program (if not good in creating header file).
String AP = "gvm2.4GHz"; //your wifi Access Point Name
String PASS = "mypass"; //your AP password
String API = "ASKAJDBSADU56161"; //This code you get from thinkspeak
String HOST = "api.thingspeak.com";
String PORT = "80";
- If ThingSpeak library is not available then download it:
At the top of Arduino IDE
- Go to Tools > Manage Libraries ....
- Type thingspeak at search box
- Select ThinkSpeak by MathWork


_ztBMuBhMHo.jpg?auto=compress%2Cformat&w=48&h=48&fit=fill&bg=ffffff)


Comments