I did this project as an extra credit opportunity for the instrumentation course that I am taking. Our instruction was to build something involving the IOT. In class we discussed how powerful the Particle Photon was and its ease of use. I have had no experience in projects of this nature. Due to limited hardware I was only able to use the photon and what came with it in the box. For the most part I used the Particle App to control the photon's LED and take readings from the photoresistor.
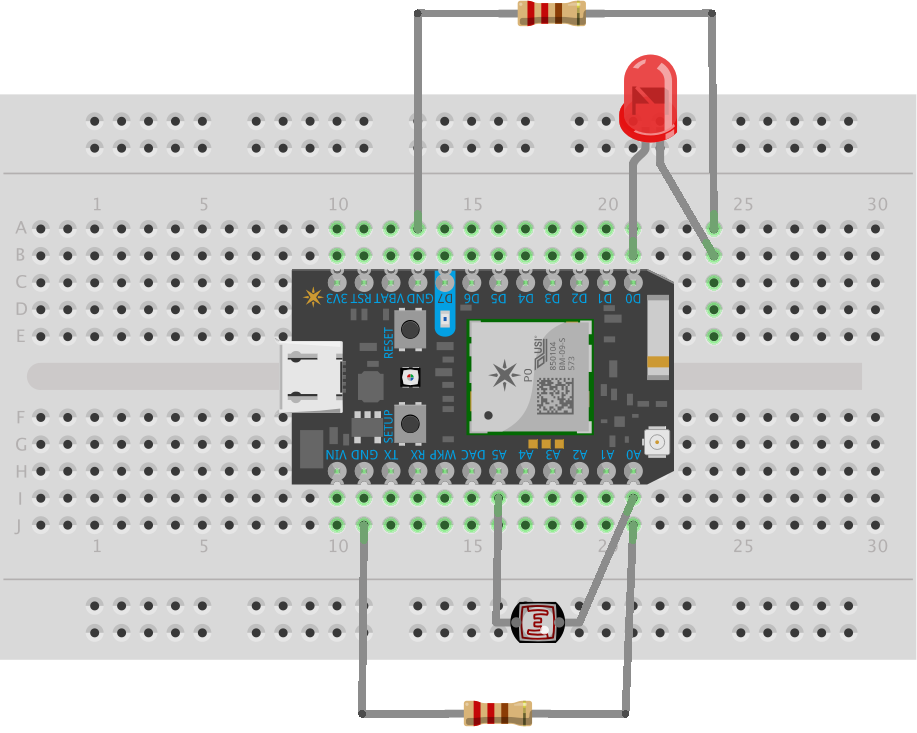
First StepsThe photon comes with 2 resistors, a LED, and a photoresistor. All of the connection diagrams I used were provided on the particle website, www.particle.io/start. The instructions on this page were by far the easiest to follow. There are several ways of connecting the photon to the internet, using the app (easiest) and through a USB cable (provided with photon). I spent several hours attempting to use the app with no success. By far the most difficult part of the project was to connect the photon to wifi trough the USB. However the steps outlined on https://docs.particle.io/guide/getting-started/connect/photon/ made this process much easier. It is done through the command prompt of the computer. Some device drivers will have to be installed but this is outlined in the process online. Once the device is connected to the internet it's LED will begin to pulse blue.
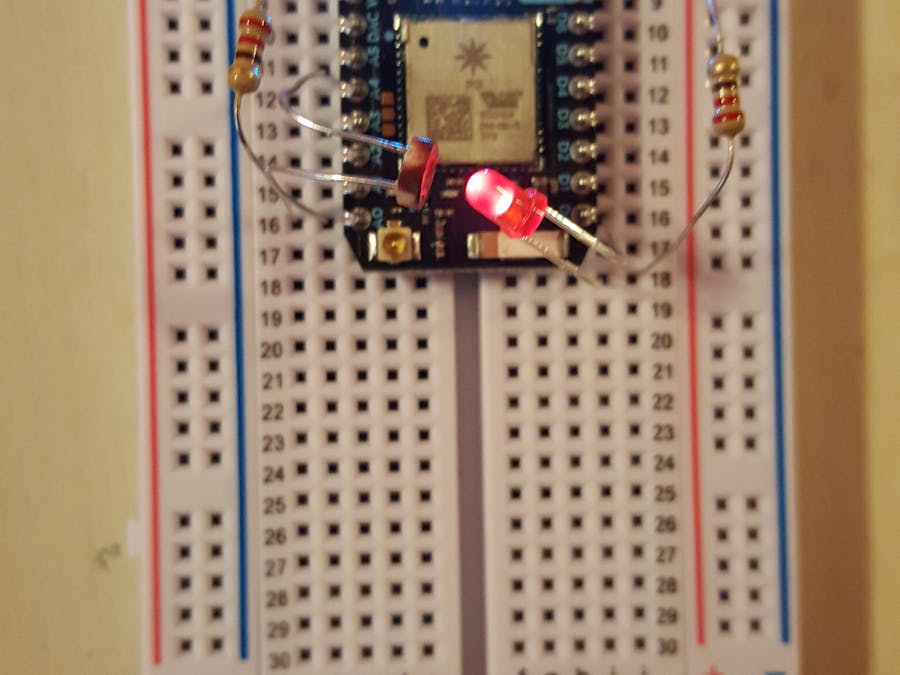
Particle AppOn the Particle app there is a dashboard where from your mobile device the pins of the Photon can be controlled. You can either read or write with each pin. For what I was doing, D0 controlled the power to the LED, A5 controlled the power to the photoresistor and A0 was the readout of the photoresistor. D0 and A5 were both digital writes with A0 being an analog read. The initial value shown in the picture below is the photoresistor output with just ambient light.
The A5 value is high so that the there is power going through the photoresistor. D0 is low indicating that there is no power going through the LED. Next I turned the LED so that it was pointing at the photoresistor. When the LED is turned on and the analog read is reset the difference in the output value is the brightness of the LED.
Next StepsOnce connected to the internet the photon can upload data that can be stored and reviewed later. For future steps I want to add more sensors to the photon and create a small weather station. This would include learning how to code the photon to upload the data it is reading to the internet.


Comments