This project uses 4pcs. cheap SSG 90 servo motors that are powered by the Arduino board. You can download.stl files for 3D printing from the link given below, or directly to Thingiverse web,
https://www.thingiverse.com/thing:1015238
where you can find more detailed instructions for making of this robotic arm.
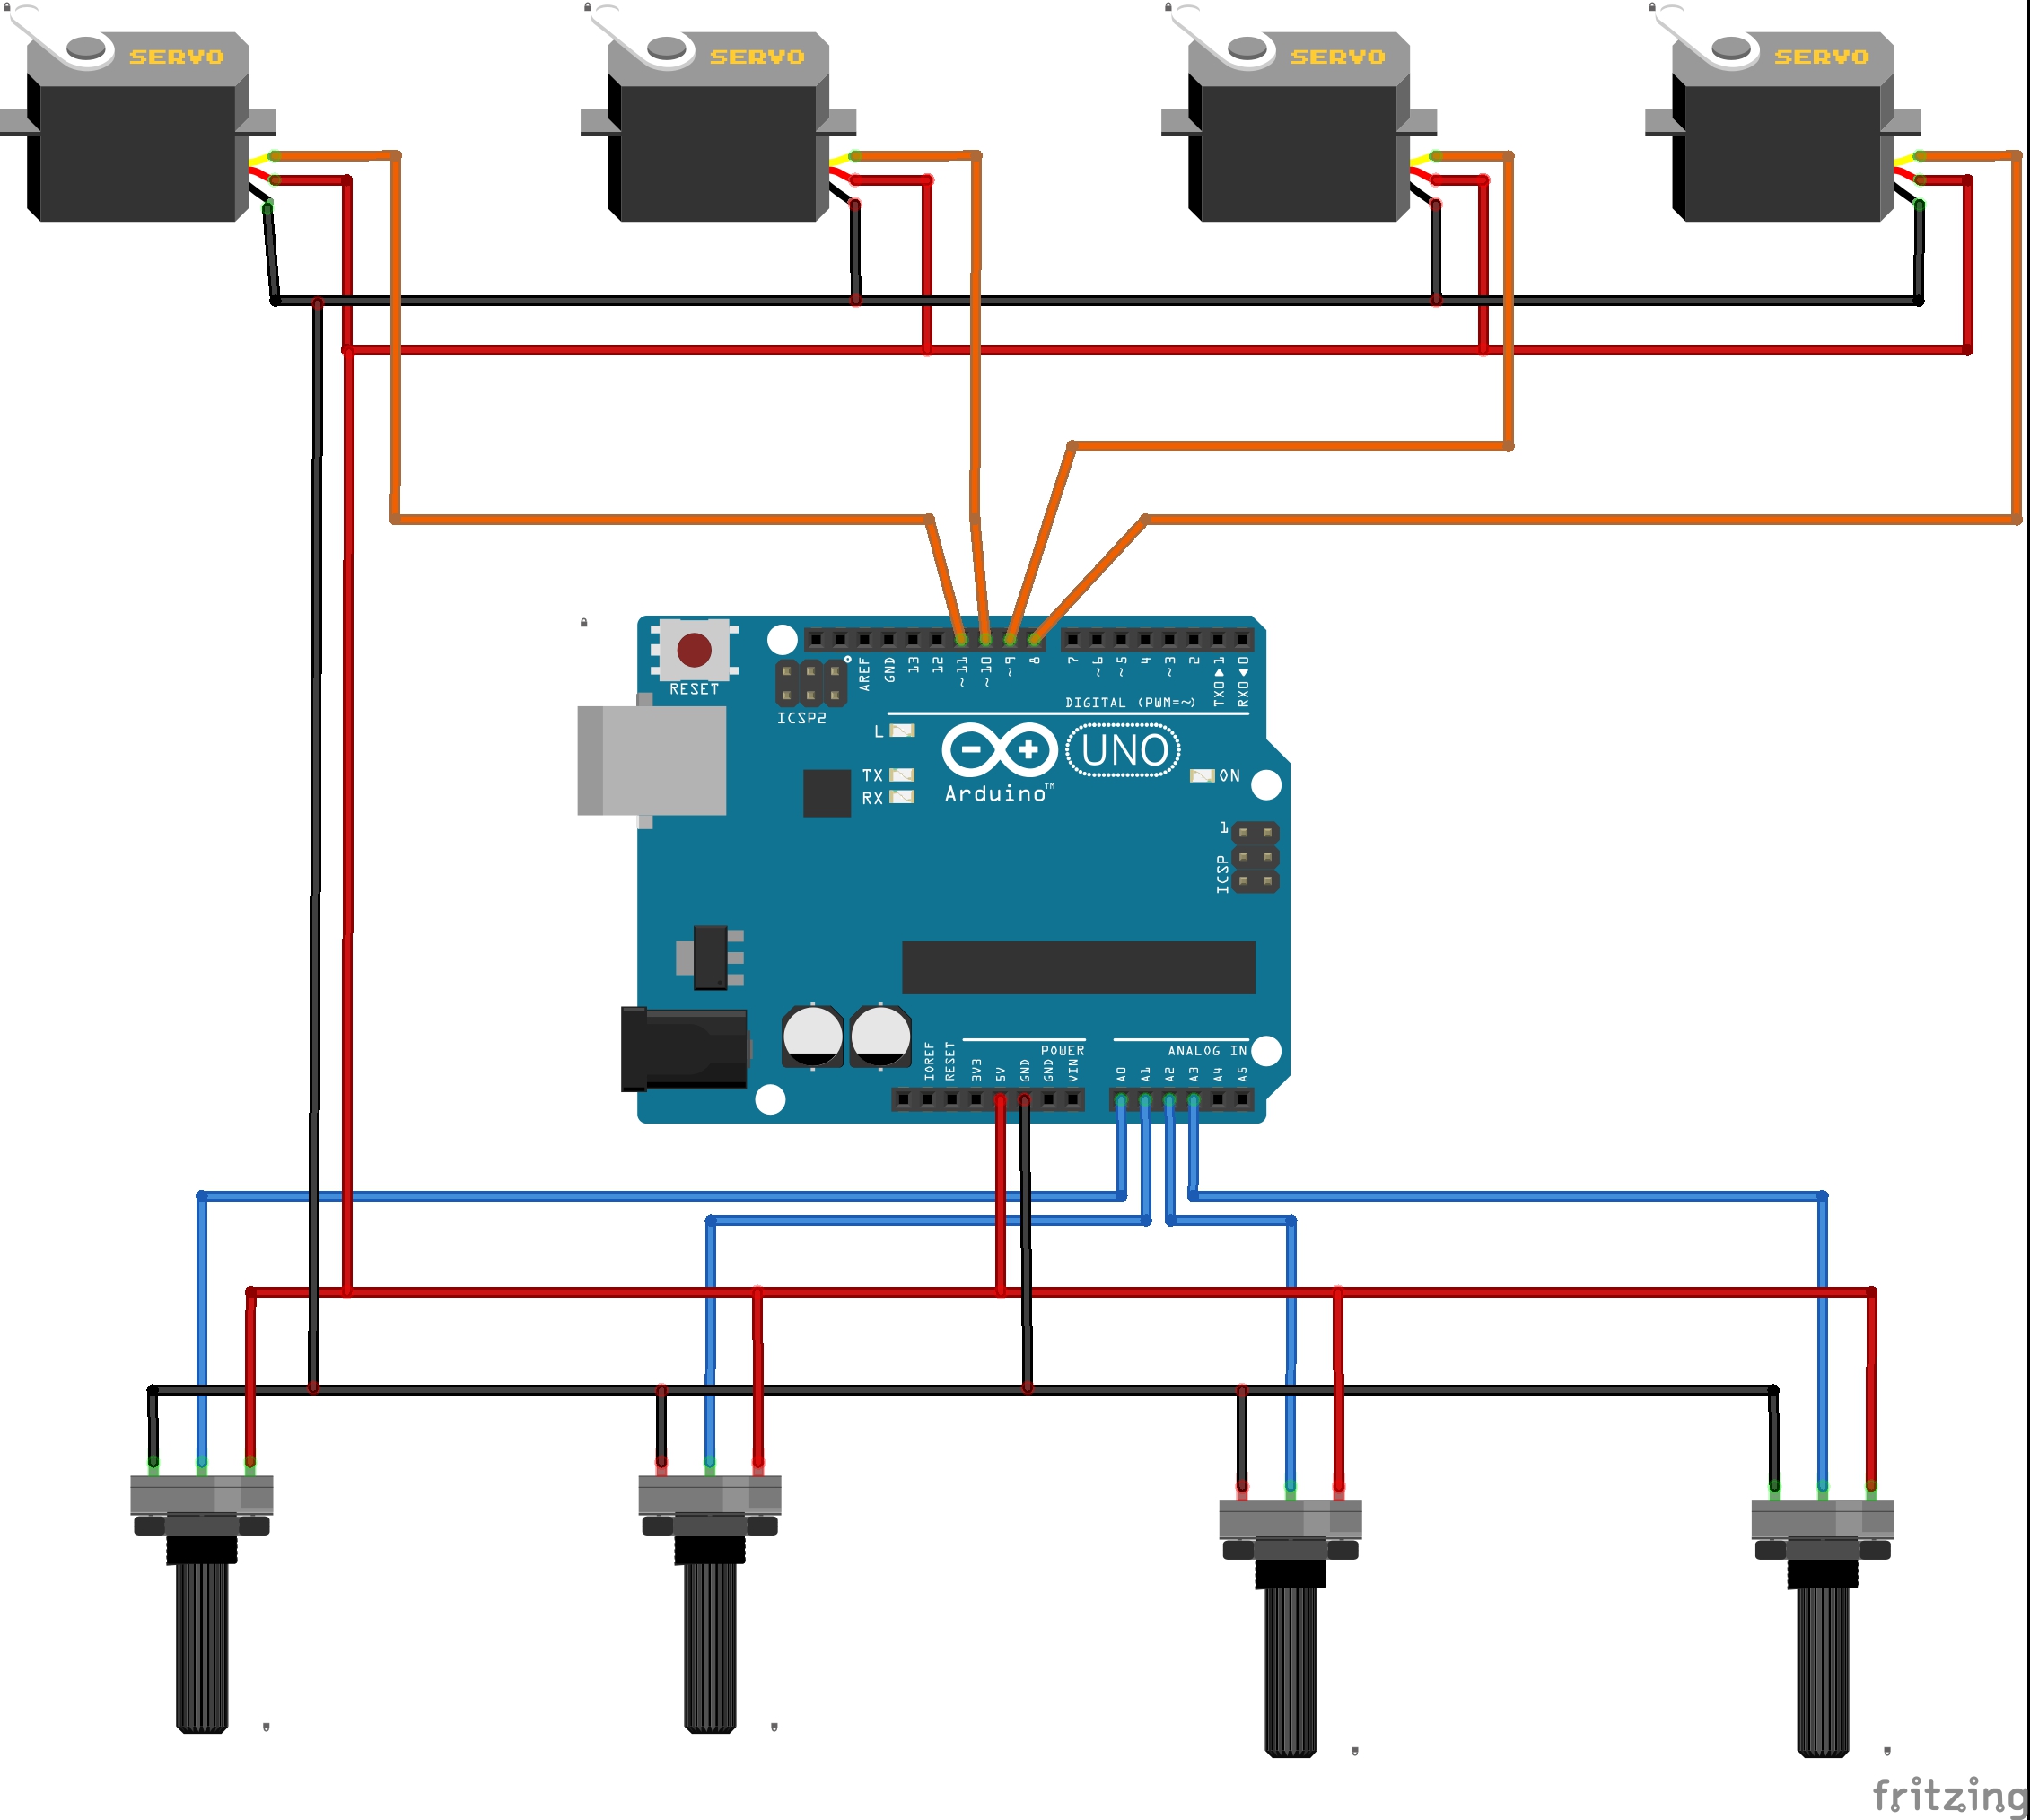
As mentioned earlier, the servo motors are driven from the Arduino board. For this purpose I also wrote a simple code so that each servo is controlled by a suitable potentiometer. After a small exercise, handling using potentiometers becomes very easy and interesting as can be seen on the video.
In the future, I will try to expand the code with the option to capture and automatically perform certain movements of servo motors which would get a complete industrial robot.
The schematics can be seen in the picture below.


_ztBMuBhMHo.jpg?auto=compress%2Cformat&w=48&h=48&fit=fill&bg=ffffff)


Comments