


Hardware components | ||||||
| × | 1 | ||||
 |
| × | 1 | |||
 |
| × | 1 | |||
| × | 1 | ||||
| × | 1 | ||||
| × | 1 | ||||
| × | 1 | ||||
| × | 1 | ||||
Software Resources
Build Steps and Notes
1. Set Up OS on Rasberry Pi- Install Raspbian Wheezy on the 4GB or greater card and insert into Raspberry Pi
- Run Raspi-Config if it does not boot into configuration
- Expand File System to entire card
- Enable SSH
- Enable Camera
- Set your localization options
2. Build and Install Touch Screen - You need to set up and calibrate your touch screen according to your manufactures guidelines
- I used Adafruit's PiTFT Mini Kit
3. Install Python and Camera Software on Raspberry Pi- Install Python library for the Raspberry Pi camerasudo apt-get install python-pip
sudo pip install picamera==0.8
3. GIT Python camera application and unzip it- https://github.com/adafruit/adafruit-pi-cam/archive/master.zip- unzip master.zip
4. Run the command to get UI on displaycd adafruit-pi-cam-master
sudo python cam.py
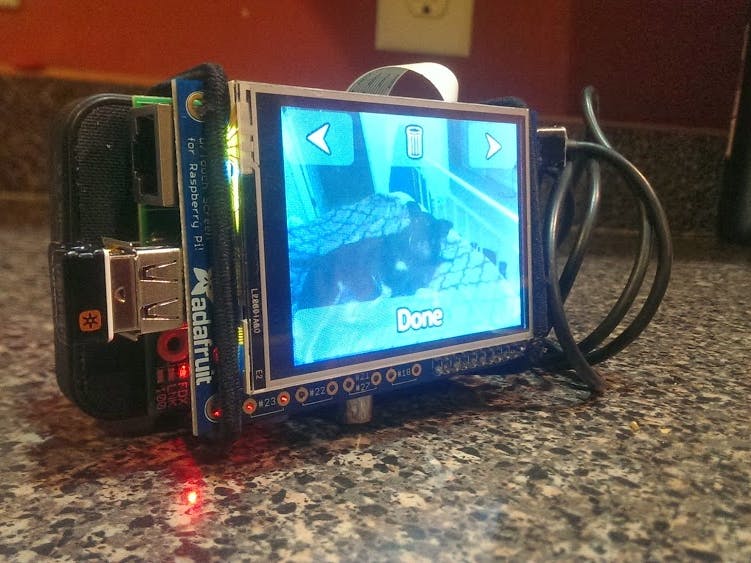
If all goes well you should now see the UI show up on the camera's touch screen.
DropBox Set Up
1. Sign in or set up a DropBox Account
2. Download and set up Dropbox Uploader on the Raspberry Pi
3. Create a DropBox API Application
4. Run the run the cam.py script and head to settings
- Here select DropBox for storage and it will save to dropbox and locally
3-D Printed Case>If you are looking to make this a bit more sexy check out the plans to print a case.
http://www.thingiverse.com/thing:244361
You should be all set up and ready to start shooting.
Thanks to Adafruit for the project tutorial


Comments