

Hardware components | ||||||
_wzec989qrF.jpg?auto=compress%2Cformat&w=48&h=48&fit=fill&bg=ffffff) |
| × | 1 | |||
| × | 1 | ||||
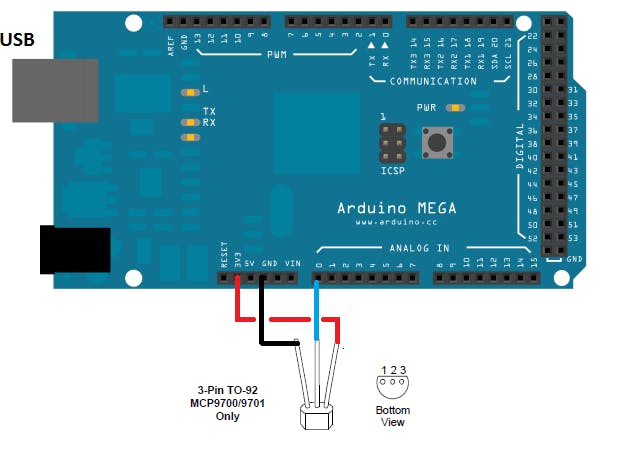
The project is based on the Microchip MCP9701 Active Temperature Sensor. This sensor is interfaced with the Arduino MEGA that supplies it and reads its output voltage. The MCP9701 sensor provides an output voltage that is proportional to the temperature. The sensor has a linear output characteristic defined by the formula:
vout = tc * ta + v0
Where v0 is the voltage at 0°C, while tc is the temperature coefficient.
The tc for the MCP 9071 / A is 19.5 mV / °C while for the MCP9700 / A the tc is 10 mV / °C.
The output voltage vout0, for the MCP9701 / A, is 400mV. The temperature ta measured by the sensor, note the voltage vout, is:
ta = (vout-vout0) / tc
The value of Vout is obtained by averaging 1024 values reading the voltage on pin A0 that is connected to the sensor output. The value of ta will be calculated by the formula and shown on the serial monitor.


Comments