OverviewSimple WiFi Controlled Robot Using ARMA IoT and Blynk!
This project uses an Arduino Uno connected to the WiFi using an ARMA IoT shield and controlled using Blynk app which is available for both iOS as well as Android. The chassis is a simple one made from pressed sheet metal with high gauge thickness.
The motors used are geared DC motors with a rated speed of 100 RPM, it works on 12 V power supply given through the motor driver module. The rear wheels are made of virgin plastic of 680 mm diameter. The castor wheel is mounted on the Chassis using nut and screws. All the boards fit on the Chassis and are attached using screws.
The video below illustrates how to develop this project and get it up and running.
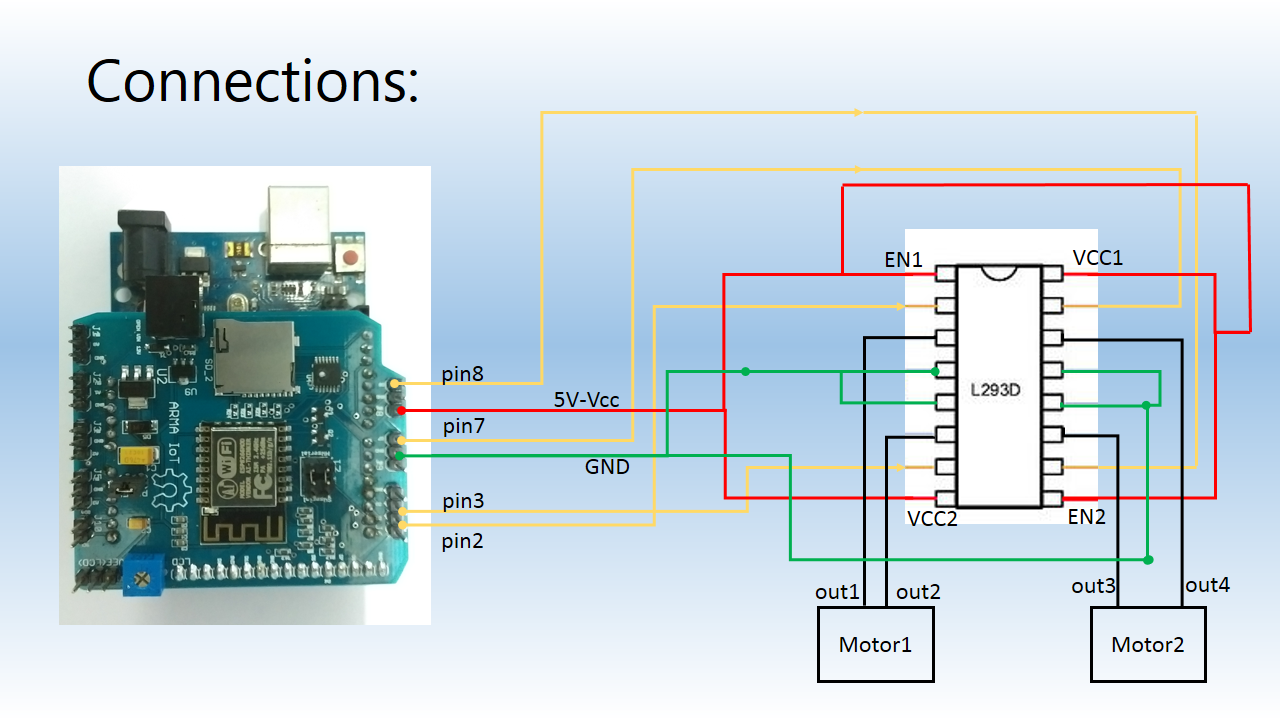
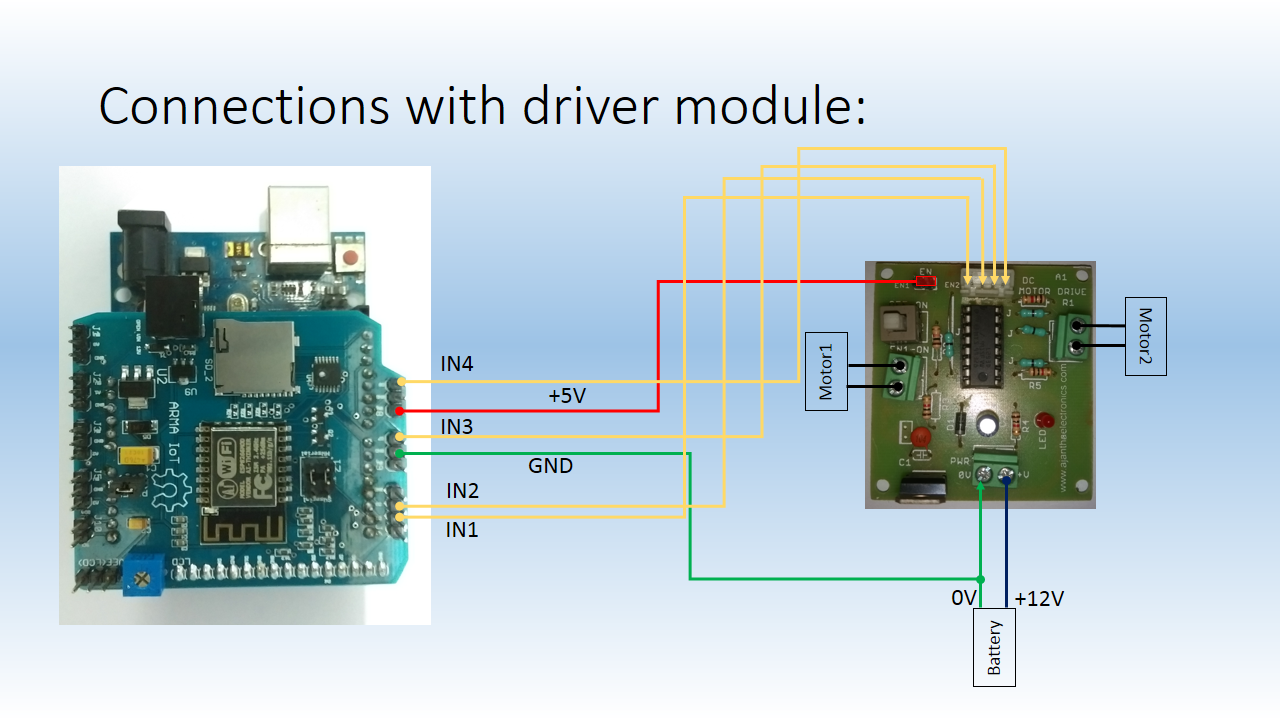
The Schematics include the connections for L293D motor driver and ARMA IoT.
Bot Assembly Instructions- Upload the code into the Arduino UNO given in our GitHub repository.
- Place the ARMA IoT shield on the Arduino UNO.
- Assemble the Chassis and fix the L293D driver module and the Arduino on it.
- Make the connections according to the the schematics given.
- Power up the ARMA IoT shield.
Now the Robot is ready to operate.
Blynk UI tutorial- Open the Blynk app and create a new project.
- Select the Button icon and place it conveniently on the screen.
- Select 3 more button icons and place it as shown.
- Set the pins associated with each button.
- The top two Buttons control the left motor and the bottom two buttons control the right motor.
- Press the play button to activate the program.
1 / 4 • Create a new project
The Project is now live and ready to go!
Control your robot using the buttons in the Blynk UI, each button controls a motor in a particular direction. With the right combination of buttons the robot can be made to forward, backward, turn left or right or rotate on the spot.
This project is meant for beginners to understand the basics of hardware interfacing with Arduino and basic guideline on how to use the ARMA IoT shield. It is also meant to show the simplicity of making projects with ARMA IoT shield and the time saved to get your project up and running. This is a simple example of what the shield is capable of when it is powered by the Blynk app.


_ztBMuBhMHo.jpg?auto=compress%2Cformat&w=48&h=48&fit=fill&bg=ffffff)


Comments