

Hardware components | ||||||
_ztBMuBhMHo.jpg?auto=compress%2Cformat&w=48&h=48&fit=fill&bg=ffffff) |
| × | 1 | |||
| × | 1 | ||||
 |
| × | 1 | |||
Software apps and online services | ||||||
 |
| |||||
| ||||||
 |
| |||||
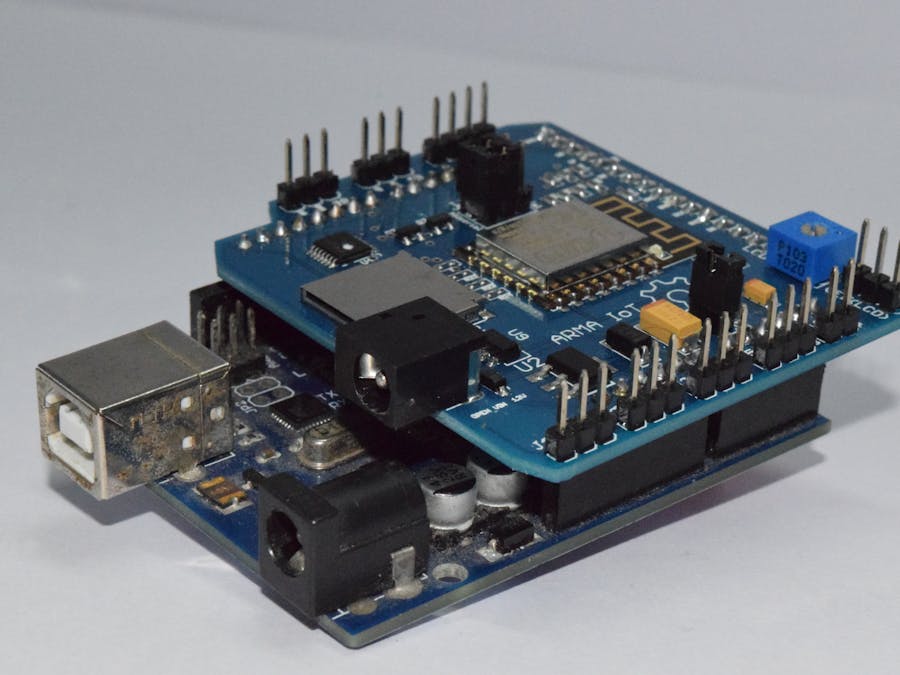
The ARMA IoT Shield is a learning platform that offers both novices and advanced Arduino users, the opportunity to bring hundreds of projects alive quickly.
ARMA IoT provides an extremely flexible environment to express ideas and bring interactivity to simple projects, as well as providing for an easy way to implement, learn and prototype advanced projects and applications.
It is the “first of its kind” shield that offers wireless communication option, SD Card, input sensors, outputs and device extendability. While offering high integration and compactness, the ARMA IoT Shield offers a large selection of latest hardware and features, accompanied by tested libraries, code and use cases. A must-have for the enthusiastic Arduino user.
Details- No more clutter
- No learning curve
- No more complex circuits
- Plug and Play WiFi
While designing ARMA IoT, we concentrated our focus on simplifying things so that you could see your first results very quickly. However, if you are into writing more serious code, you'll have full freedom in your hands (Its Open Source).
New App/Software to Buy? Nope, not this time.
ARMA IoT board doesn’t require any special software to run. Instead, it's been designed to support the apps and server which are already free for developers and its compatible with Arduino. Many app and website offer pro features for free and the rest charge a little money for their extended service. Apps are available for both Android and iOS.
Here are some examples and one along with tutorial which demonstrates the working of the product developed by our crew and this is just a tiny drop in the ocean of possibilities.
Got Milk?Make your Arduino take pictures of the fridge every time you open the fridge and store it in memory and send it to you on the app whenever required. You don’t have to worry about forgetting something at grocery store to fill you fridge anymore.
Talk to your plantsYou've seen this before, right? Some might say that it's boring, but we love plants, and think that it's cool when they can talk back.
Build instructionsStep 1
Step 1: Stack the ARMA IoT Shield on top of your Arduino Board. No need to build complex circuits.
Step 2
Step 2: Connect your Arduino to your computer, and start writing code as you normally would.


Comments