

Hardware components | ||||||
 |
| × | 1 | |||
 |
| × | 1 | |||
Software apps and online services | ||||||
 |
| |||||
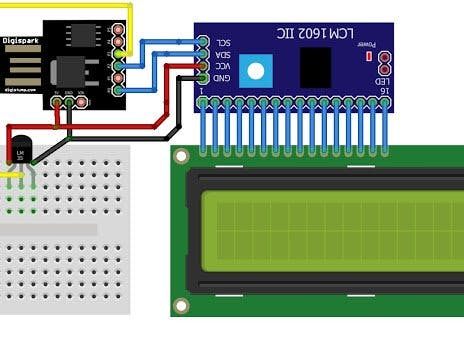
In our previous post, we look on how to interface the Digispark with LCD 16x2. Today we will look at how we can interface the temperature sensor LM35 with Digispark. For this, we will need to have the LM35 temperature sensor, Digispark and the LCD. Before going further let's look at LM35.
Basically, the LM35 looks similar to any other transistor. To differentiate either it is a transistor or temperature sensor one to check the value printed on the flat side of it. The pinout of the LM35 is as shown on the image above. By looking it from the flat side, the first pin on the left is the 1) VCC, 2) Analog Out and 3) Ground. The connection of the circuit diagram is as shown below
This code can copy and paste directly into the Arduino IDE. Once verified, try to upload to the board. Below are the image and video of my testing.
Demo video can be seen below.
Thank you!


_3u05Tpwasz.png?auto=compress%2Cformat&w=40&h=40&fit=fillmax&bg=fff&dpr=2)
Comments