

Hardware components | ||||||
 |
| × | 1 | |||
 |
| × | 1 | |||
 |
| × | 1 | |||
 |
| × | 1 | |||
 |
| × | 4 | |||
 |
| × | 1 | |||
 |
| × | 1 | |||
 |
| × | 1 | |||
| × | 1 | ||||
 |
| × | 1 | |||
| × | 1 | ||||
| × | 1 | ||||
 |
| × | 1 | |||
 |
| × | 1 | |||
| × | 1 | ||||
 |
| × | 1 | |||
Software apps and online services | ||||||
 |
| |||||
| ||||||
| ||||||
| ||||||
Hand tools and fabrication machines | ||||||
 |
| |||||
 |
| |||||
 |
| |||||
 |
| |||||
 |
| |||||
 |
| |||||
| ||||||
I am a tenth grader, wanted to make my own gaming console. One fine day I was browsing through the hackster io website and saw the arduboy completion and realised that it is a great opportunity and registered as a participant and submitted my idea for free hardware and I won the free hardware.
Then I ordered parts needed for my project.
As soon as I received my parts I started working on them.
Firstly
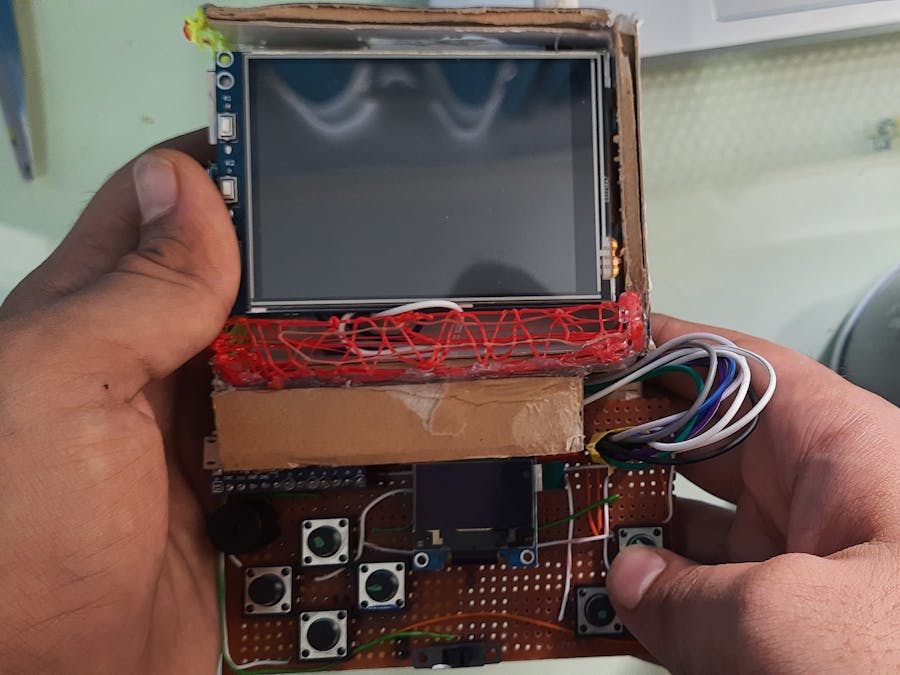
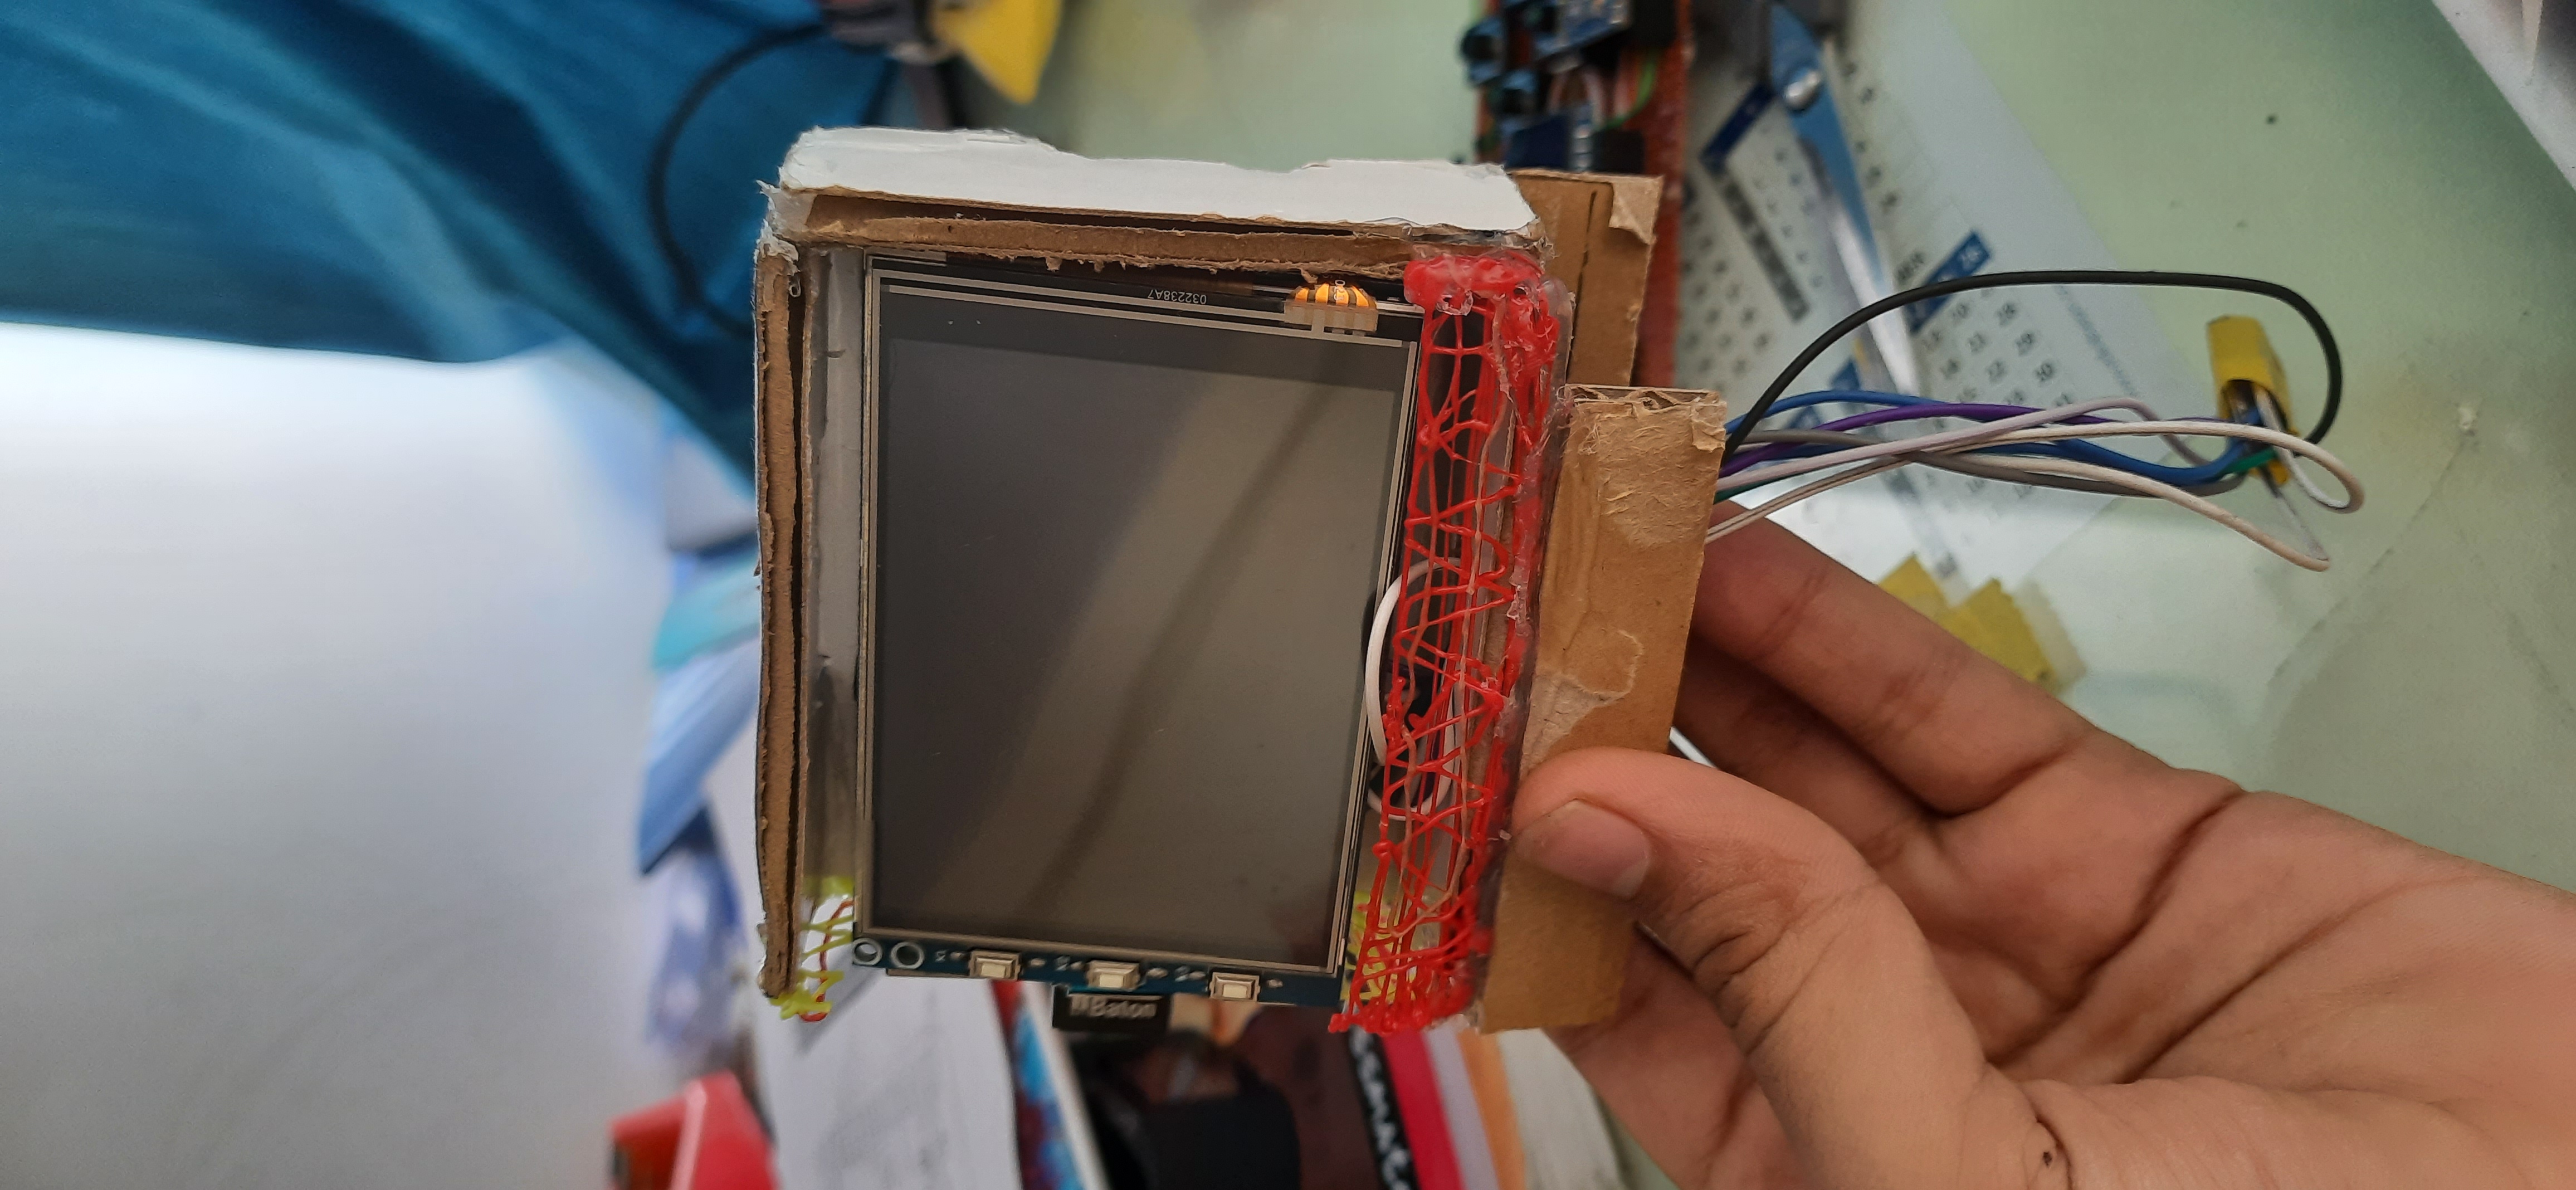
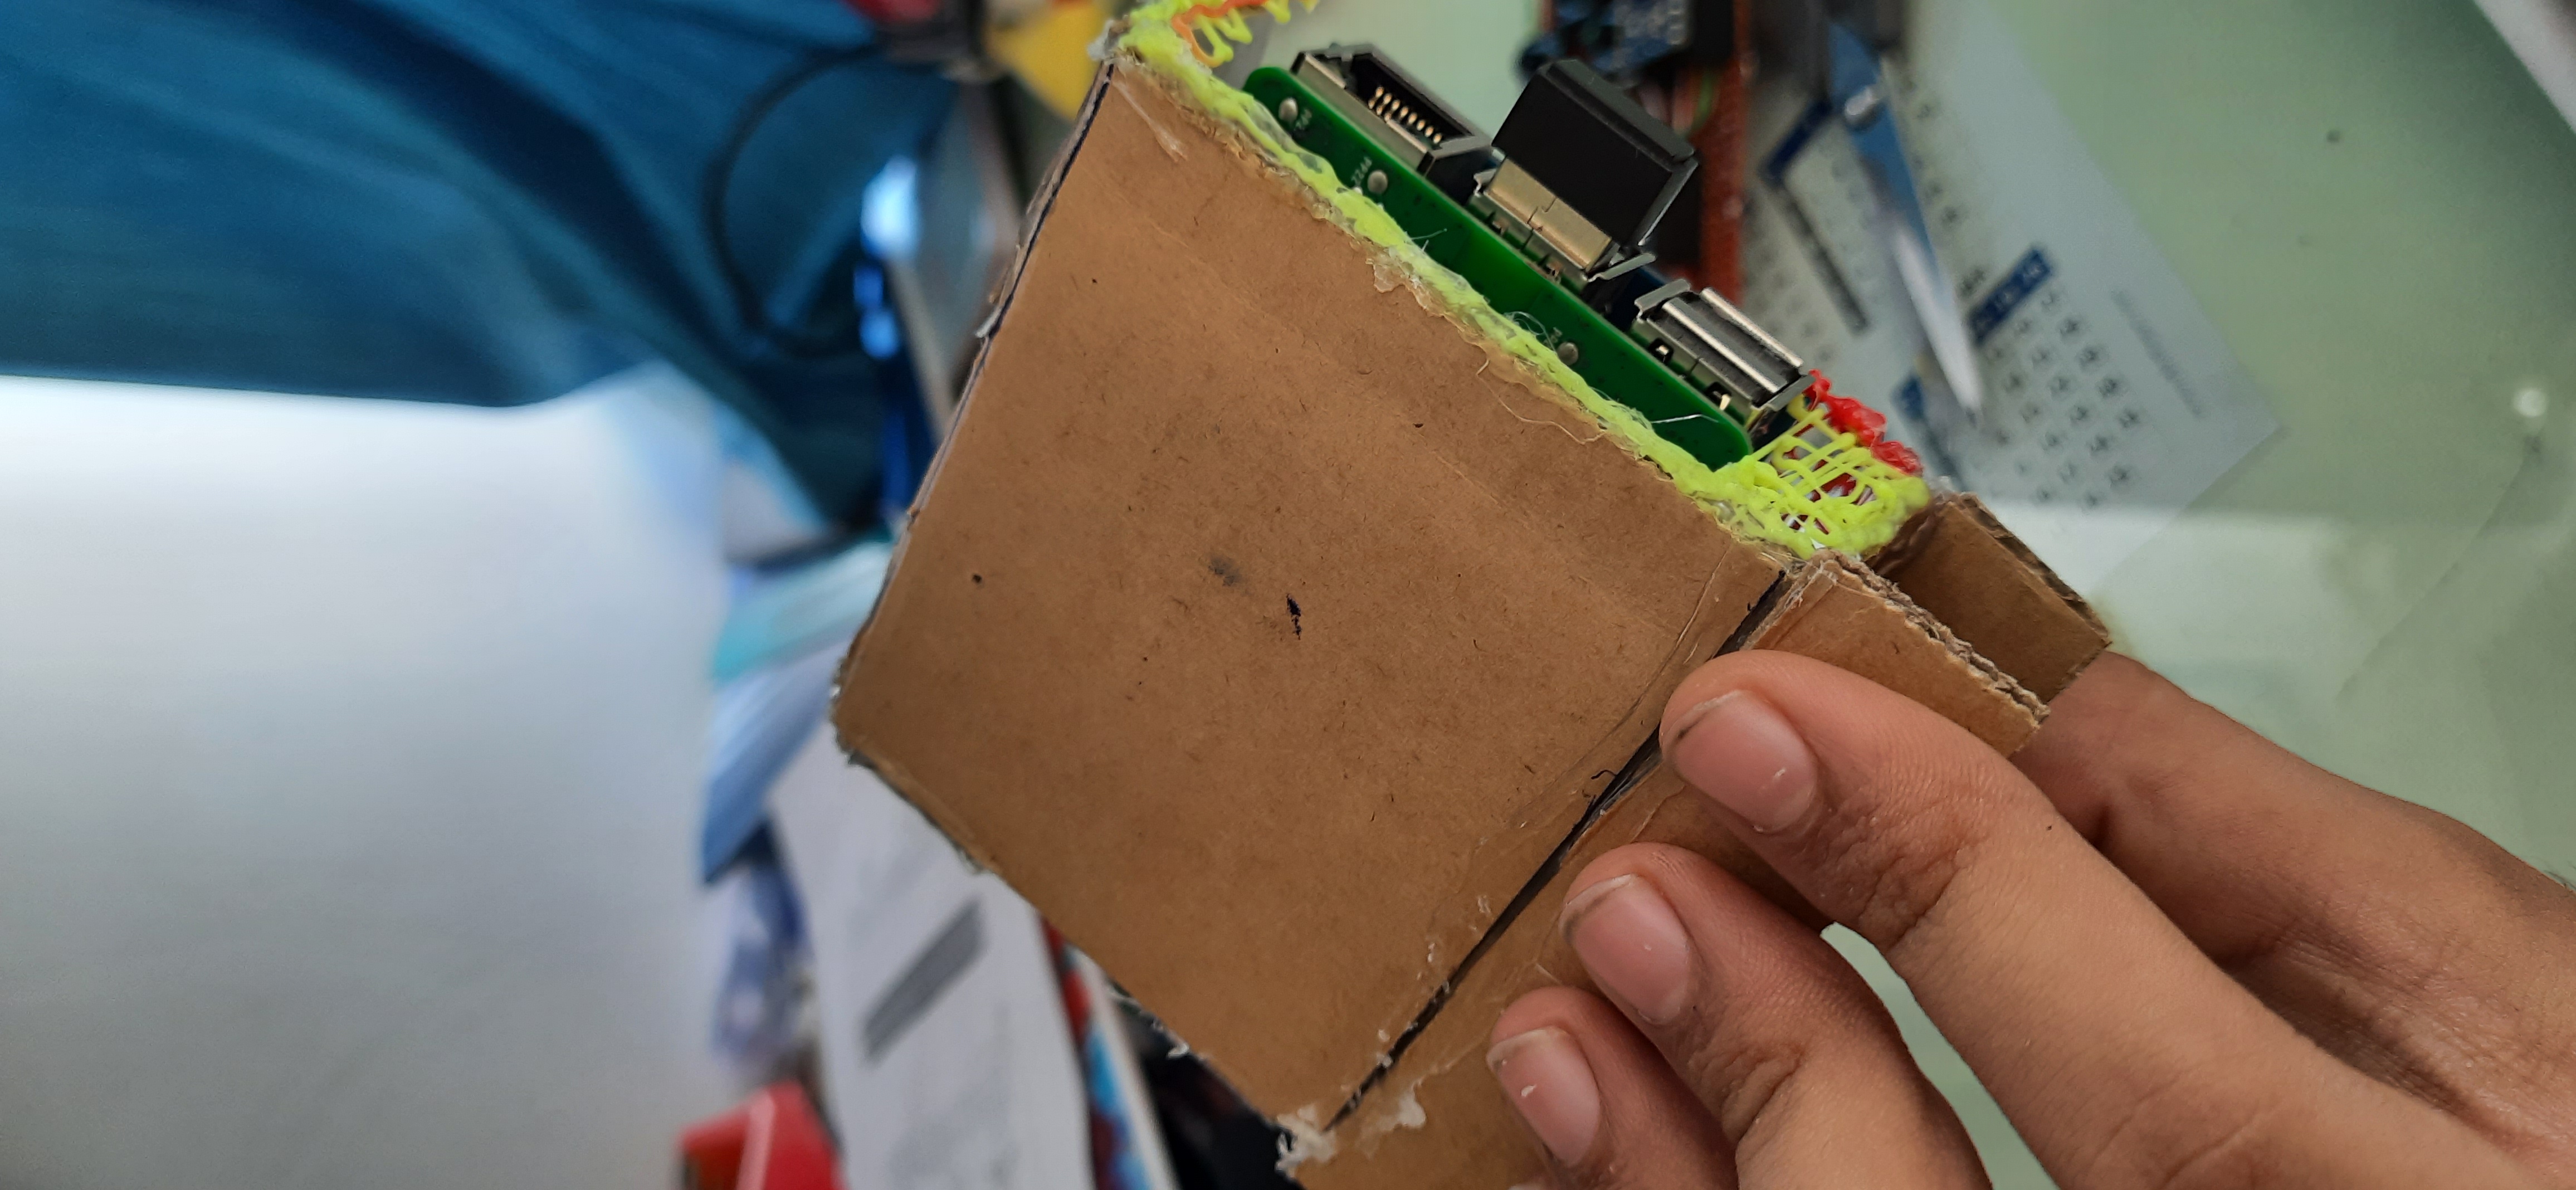
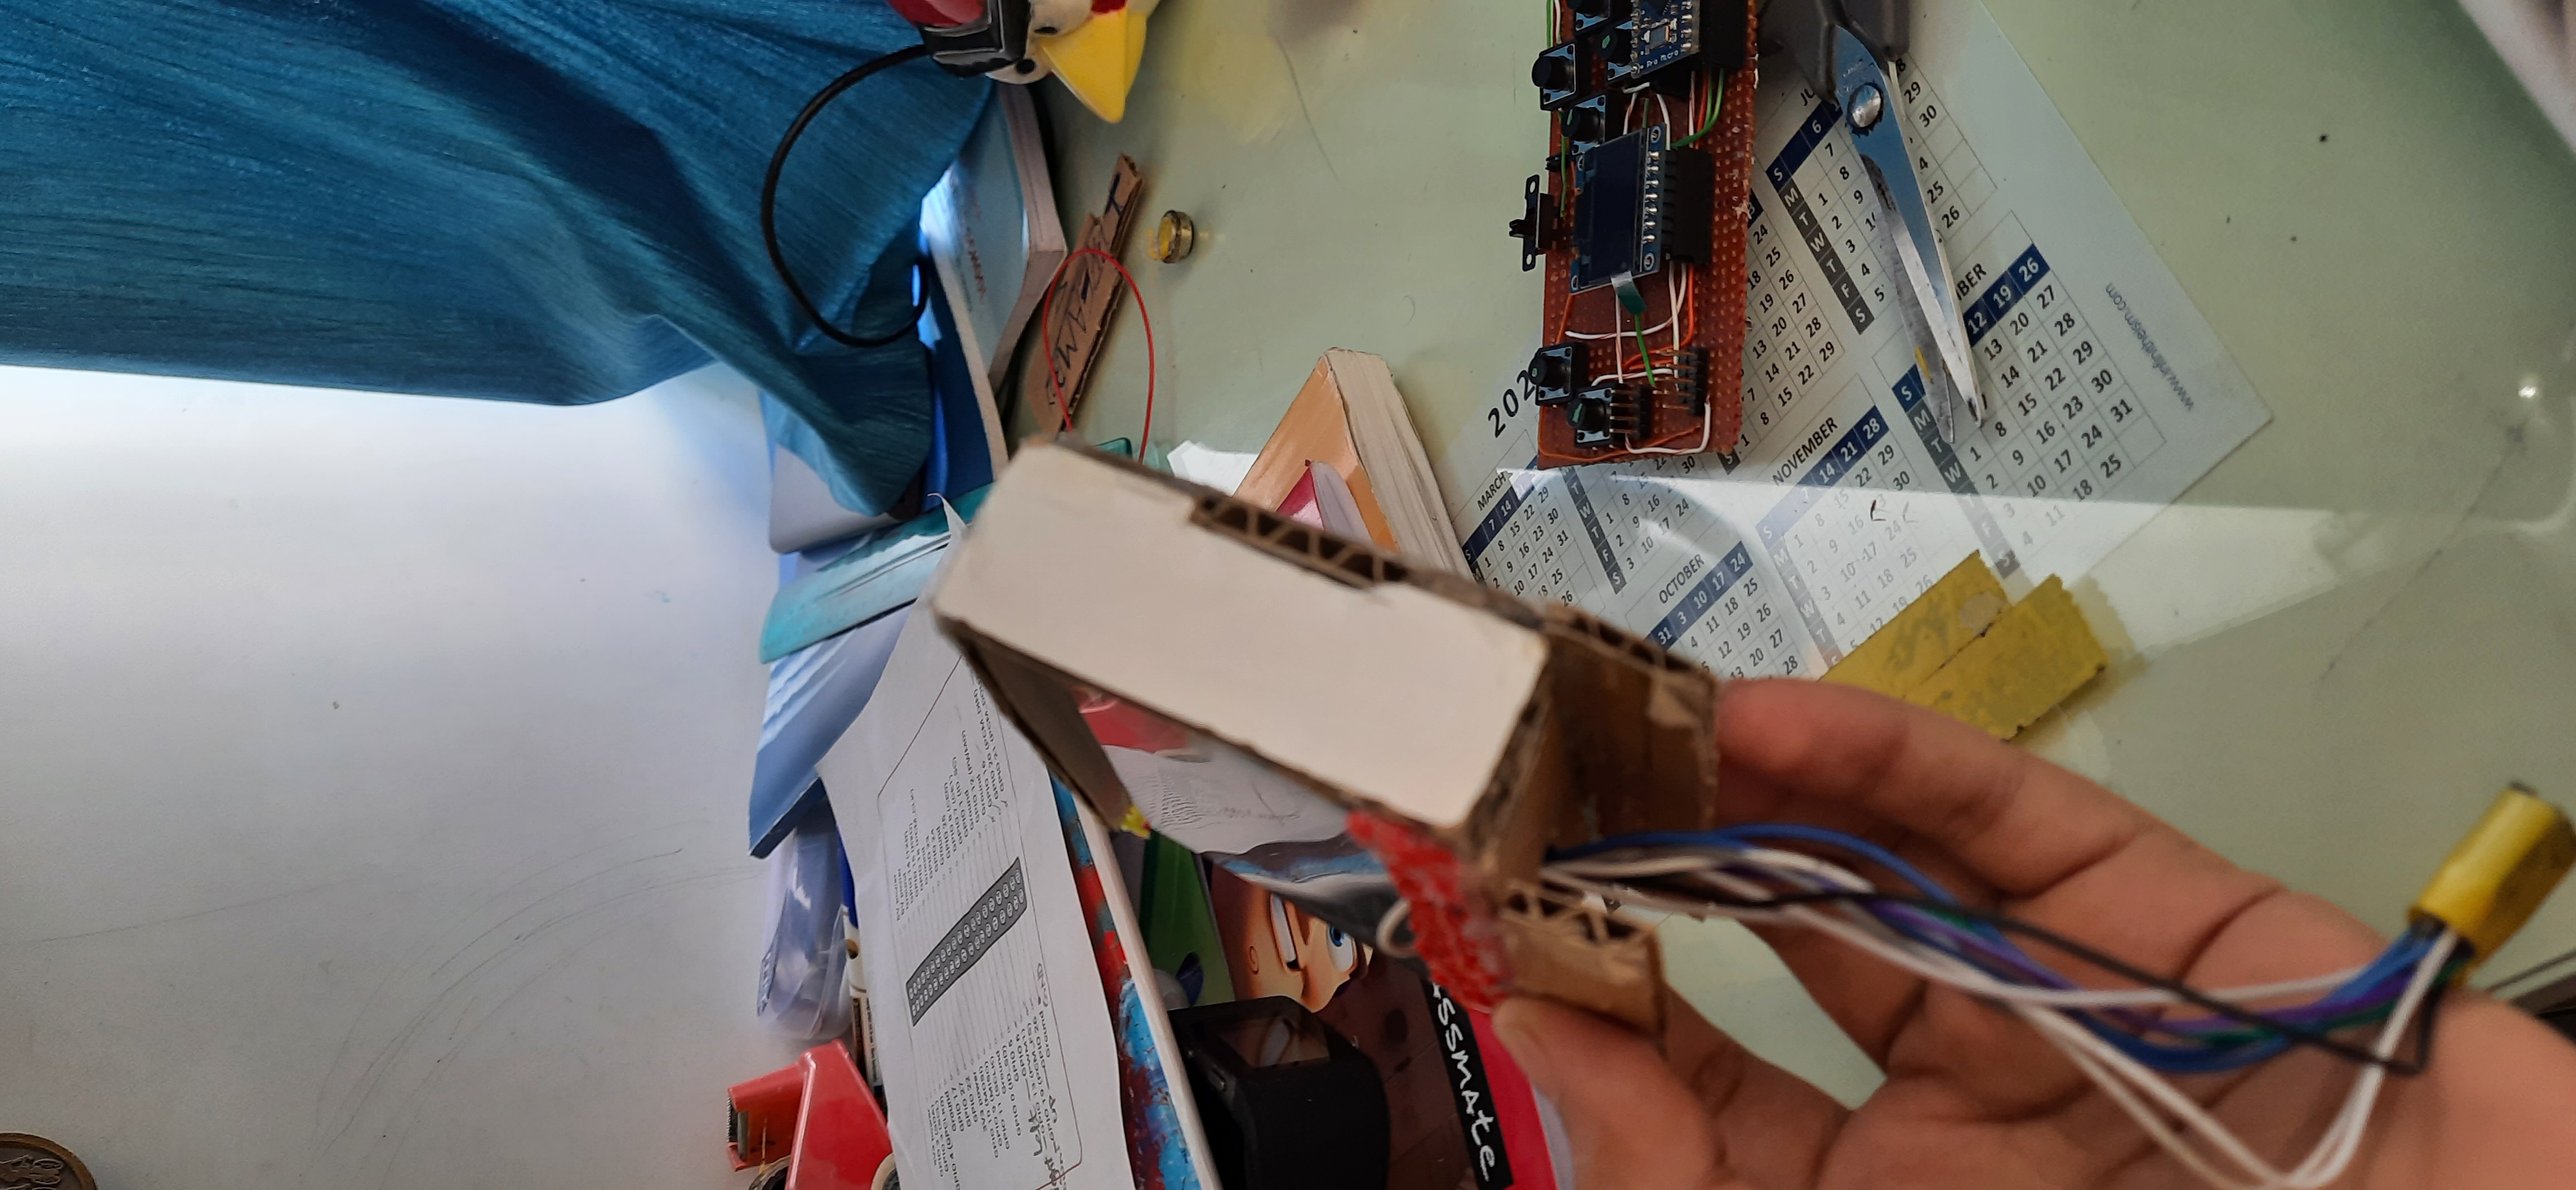
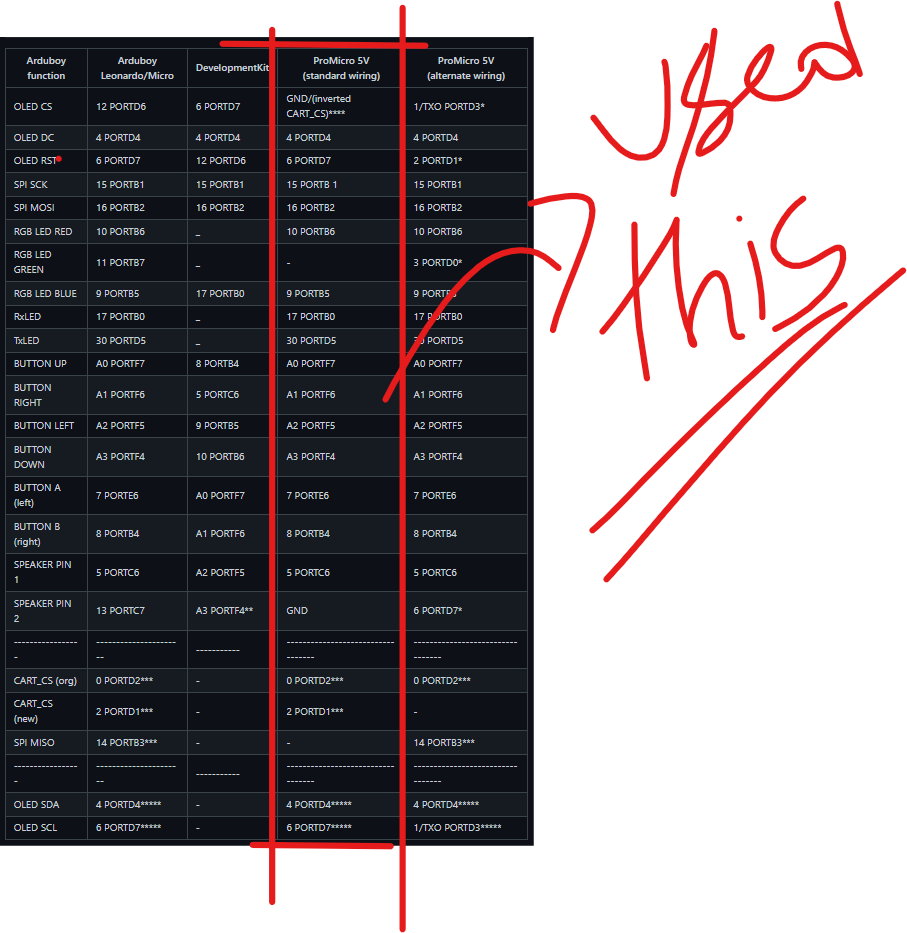
I followed mr.blinkys Arduboy homemade package standard wiring and wired an arduboy following these instructions and for each switch, I made a secondary connection that goes to the header pins, which in turn gets connected to RPI gpios when we want to use it as a controller to play games on RPI. also made a custom PCB out of protoboard.
Then downloaded a game from the arduboy game website. then uploaded to it using USB wire.
1 wired wires parallel to the switches to 9 male header pins.(pinout of headers shown in connections below)
Retropie on raspberry pi
Then I installed retropie on raspberry pi connected it to the wifi then install waveshare display overlays and edited the boot config file to use retropie on a 3.2inch display.
Here's how
After connecting to RPI with putty enter waveshare display overlays
git clone  https://github.com/swkim01/waveshare-dtoverlays.git
sudo cp waveshare-dtoverlays/waveshare32b.dtbo /boot/overlays/
Press enter and then reboot.
Now we have to edit the boot config file. After reboot goes back to the terminal type
sudo nano /boot/config.txtdelete everything in that file and copy-paste the code given in the code section.
Then reboot, after reboot
Open up the terminal again
Now we need to edit one last file. open
sudo nano /etc/rc.localNavigate down to the line above “exit 0” and enter the following:
/usr/local/bin/fbcp &Save the file by hitting CTRL+X, Y, then Enter.
Now reboot using:
sudo rebootThen I placed the display on top of the RPI and tested it. Now we can play it in handheld mode or if the screen is too small for you we can connect it to the HDMI to play on the big screen. It basically works like a Nintendo switch. We can also connect a USB controller to RPI to play multiplayer games on it.
The basic idea is to build a handheld retro gaming console with RPI to power its emulation and a detachable controller which has arduboy in it. I would be wiring up ardudoy input switch wires with RPI gpios as input when the arduboy controller is connected to RPI. For this, I will be using retrogame utility. Retrogame utility is the software glue that links our GPIO-connected controls to “virtual” keyboard input. It is similar to sega dream cast VMU.
To install retrogame utility
cd
curl https://raw.githubusercontent.com/adafruit/Raspberry-Pi-Installer-Scripts/master/retrogame.sh >retrogame.sh
sudo bash retrogame.sh
When run, you’ll be asked to pick one of several control configurations.
pick 3 and press “y”
you will be asked for reboot press y
then open up the terminal again
and type
sudo nano /boot/retrogame.cfgnow delete everything in the file
paste the following code given in the retro game section in the code section and press ctrl+x then y to save.
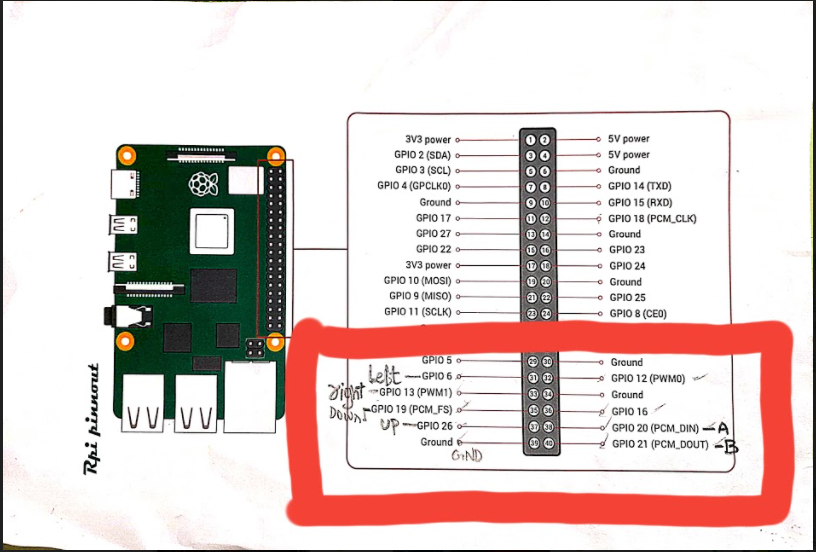
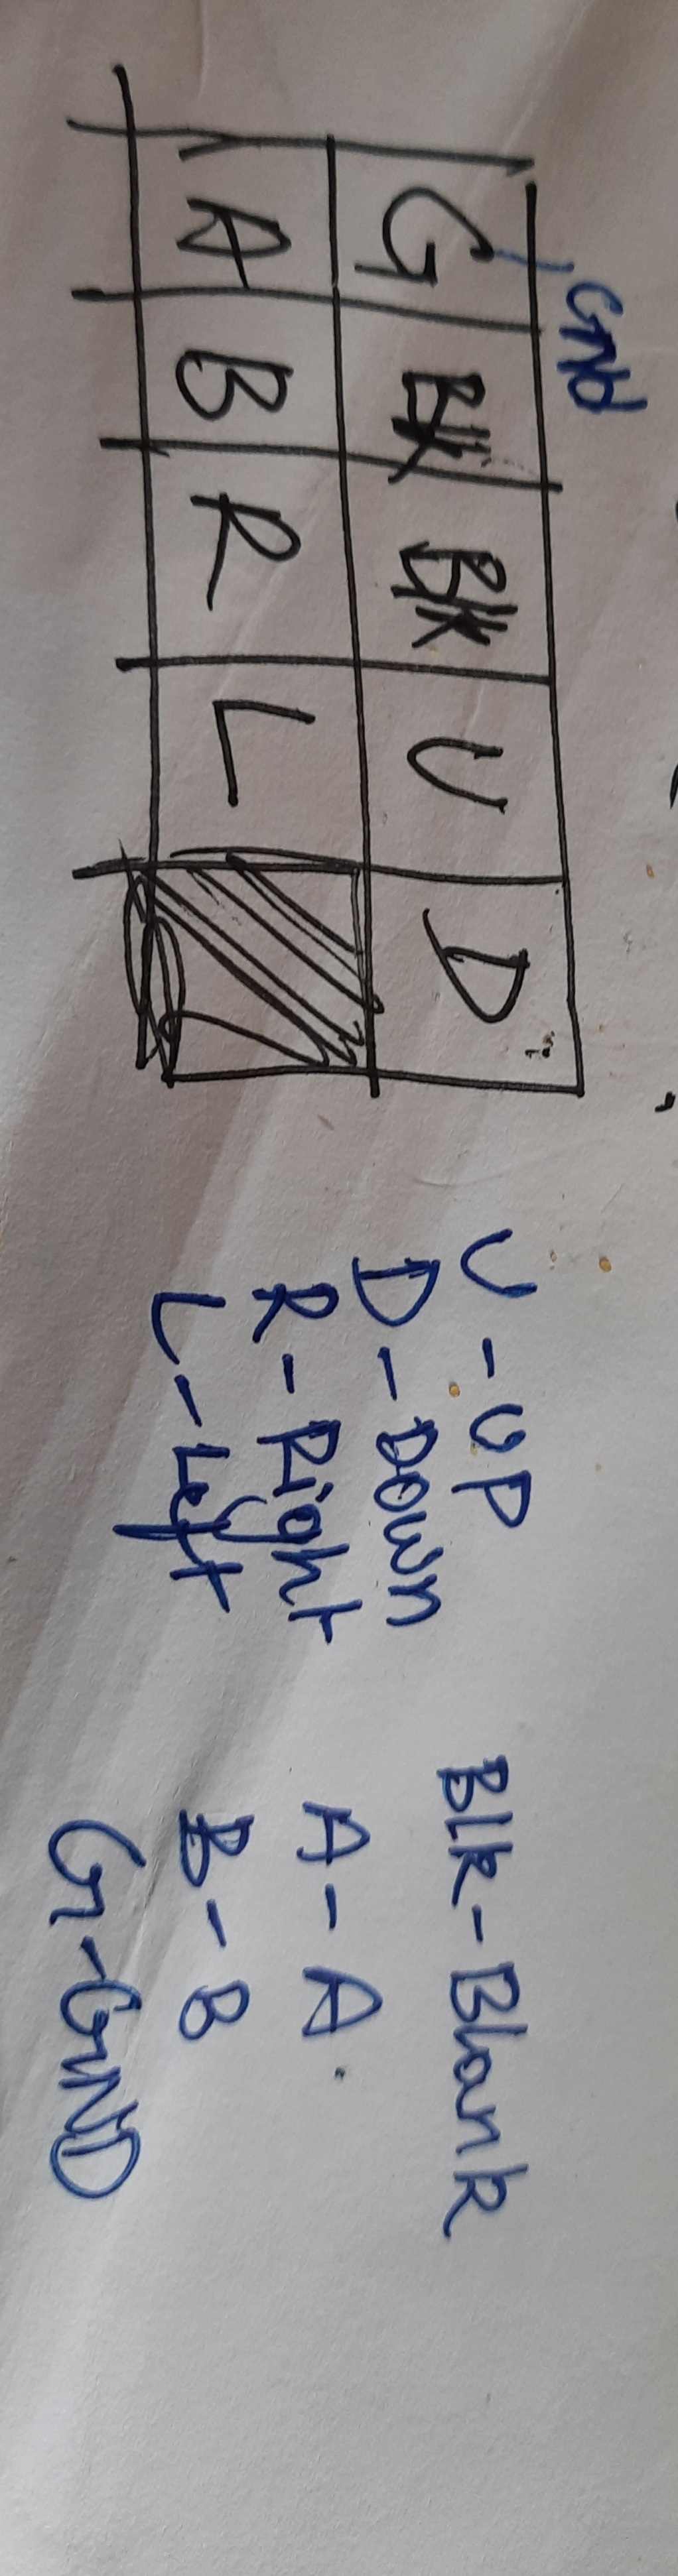
As the display uses only gpio pins and does not use HDMI it covers up 26 pins out of 40 RPI gpio pins, then I installed retrogame utility using terminal. Then I configured retrogame input using /boot/retrogame.cfg. The button mapping is given below in the picture.
To connect arduboy gamepad with RPI I used 9 female to female jumpers connected to gpios and arduboy PCB has 9 male to male jumpers
Then I doodled some attachments with 3d pen on the RPI
this currently powered by a power bank cuz I didn't have a proper battery and BMS to power RPI and arduboy runs on a 350mah lipo battery.
Here's what the final product looks like
We can connect up to 4 wired controllers via the USB and 5th one via Bluetooth.
Here's a video of the dreamboy:


_3u05Tpwasz.png?auto=compress%2Cformat&w=40&h=40&fit=fillmax&bg=fff&dpr=2)
Comments